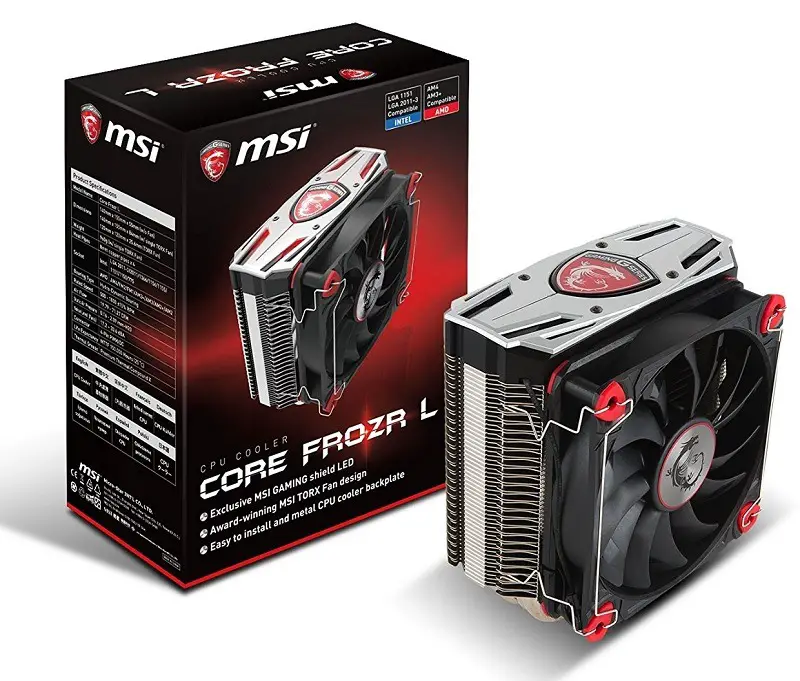
MSI was not into making CPU coolers up until 2017 when it started preparing some of the best-looking air coolers.
It launched a CPU cooler for all Intel and AMD platforms including AM4 namely the Core Frozr L. The cooler is a mid-end budget CPU cooler that costs $50 featuring good aesthetics and a differently designed heatsink than its rivals from Cooler Master.
Let’s see if this uniquely designed heatsink can deliver some good performance or not.
- Nickel-Plated copper base. Air flow - 71. 27 CFM....
- Premium thermal compound x
- Airflow control technology
- 120Mm fan featuring the award-winning MSI TORX...
SPECS:-
| WEIGHT | 960 g (w/ single TORX Fan) |
|---|---|
| DIMENSIONS | 140mm x 155mm x 55mm (w/o Fan) 140mm x 155mm x 84mm (w/ single TORX Fan) 120mm x 120mm x 25.6mm (TORX Fan) |
| SOCKET INTEL | LGA 2066/LGA 2011-3/2011/1366/1156/1155/1151/1150/775 |
| SOCKET AMD | AM4/ FM2/ FM1/ AM3+/ AM3/ AM2+/ AM2 |
| BEARING TYPE | Hydro-Dynamic Bearing |
| RATED SPEED | 500 – 1800 ±15% RPM |
| AIRFLOW | 19.79 – 71.27 CFM |
| STATIC AIR PRESSURE | 0.16 – 2.09 mm-H20 |
| NOISE LEVEL (FANS) | 17.2 ~ 33.6 dBA |
| CONNECTOR | 4-Pin PWM/DC |
| LIFE EXPECTANCY | MTTF 150,000 Hours (25℃) |
| THERMAL GREASE | Premium thermal compound X |
Seeing its specs it appears to be a fine CPU Cooler with a wide range of fan speed and a normal range of noise levels. The cooler is compatible with every type of socket from Intel and AMD.
Packaging and Unboxing

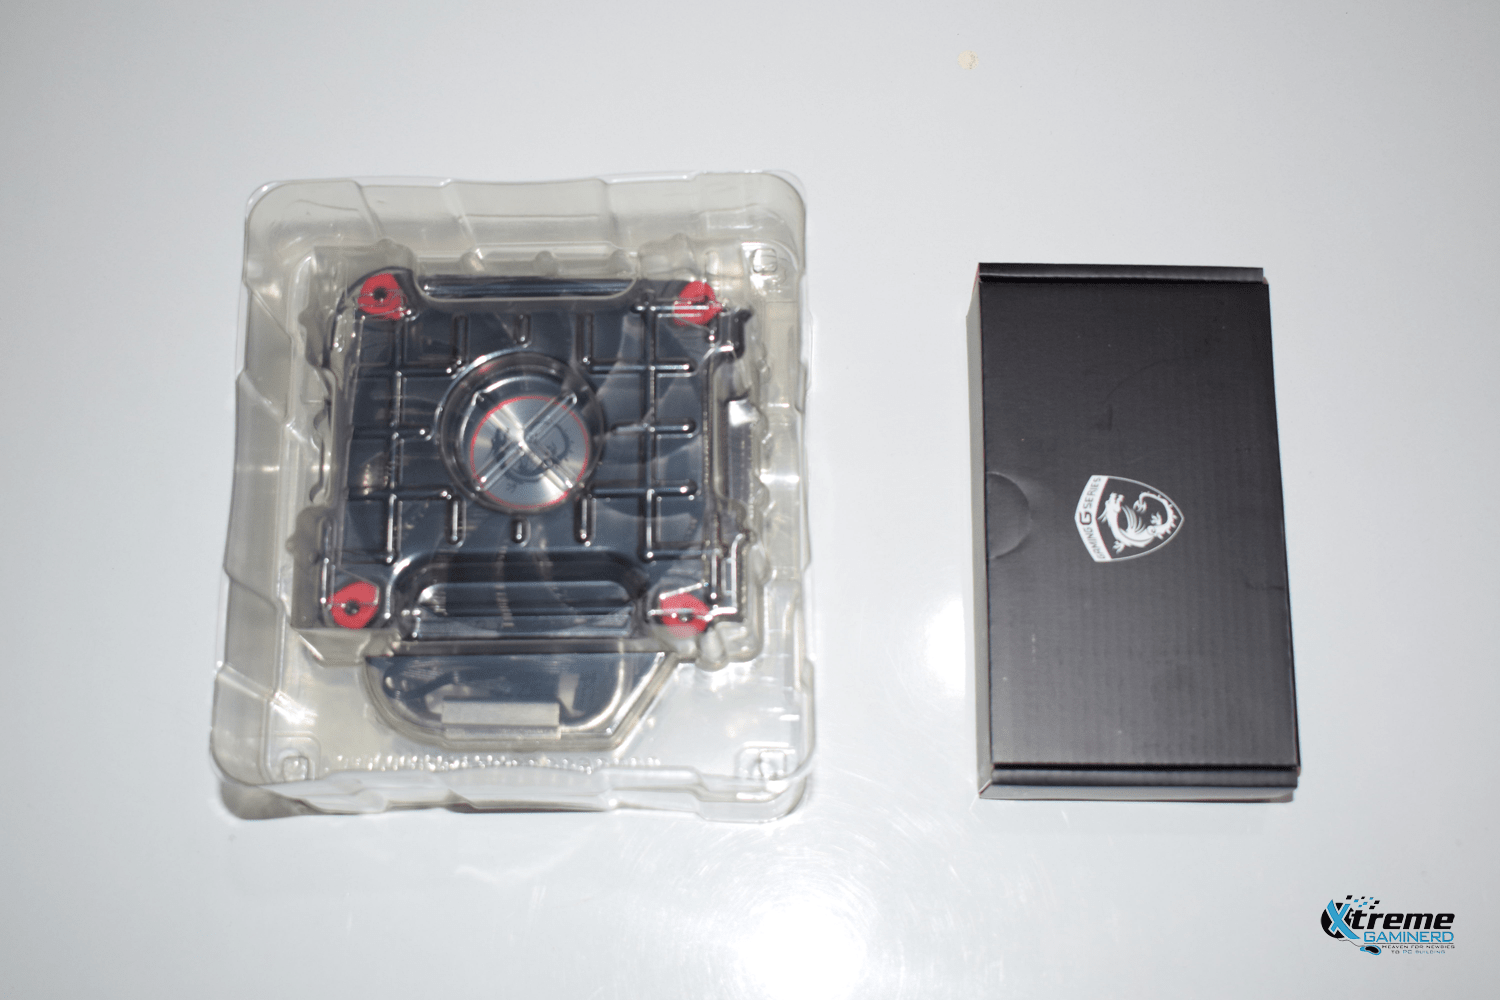
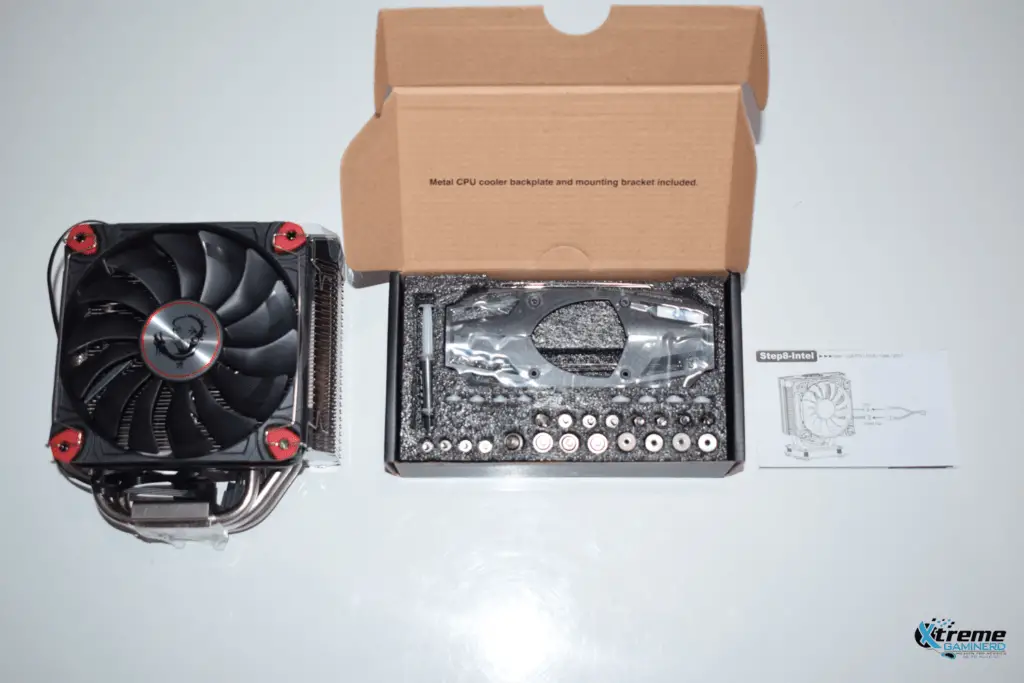
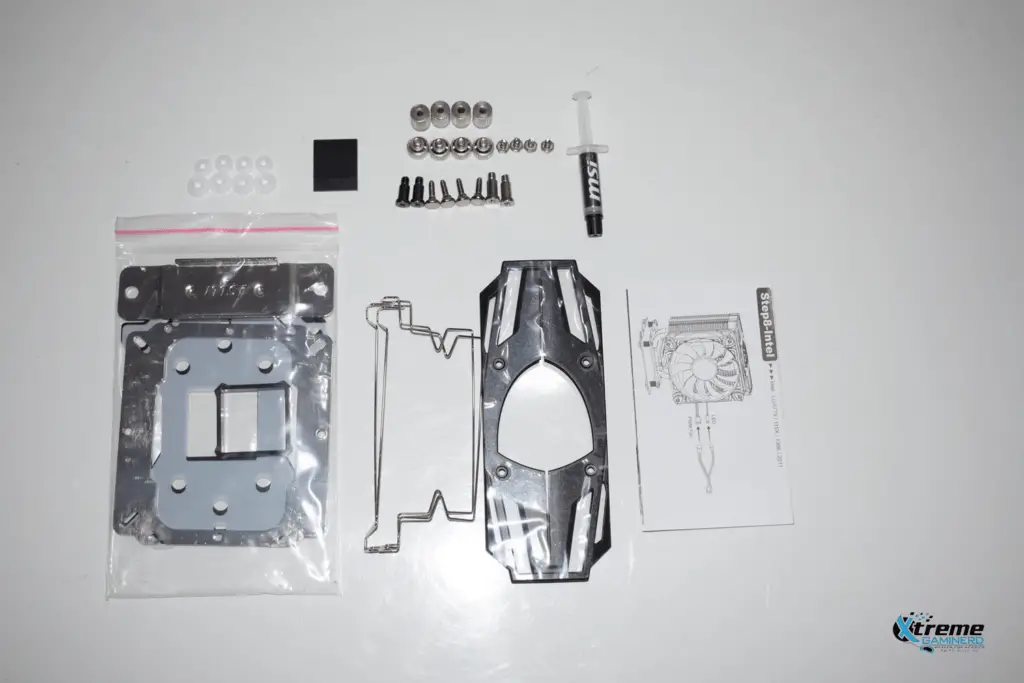
The packaging was the best I have ever seen of an Air cooler and it was well organized. One plastic packet contained the CPU heatsink with a pre-installed fan and came with a separate box for accessories that contained the brackets, screws, thermal paste, manual, etc. The accessories box contained a foam container with dedicated sections for each material. Even the screws had their proper places. The packet contained:-
- 1x Mounting kit for AMD/Intel socket
- 1x Mylar film sheet for the mounting kit
- 1x Metal backplate
- 1x Mounting plate
- 1x Black cover for the top
- 12cm Fan clips
- 1x Black plate cap
- 8x Rubber
- 1x MSI chill factor thermal paste
- 1x CPU fan
- All the necessary screws and washers.
In short, the accessories provided were up to the mark and there is no need for any improvement. Additional things like a separate top black cover for the heatsink is a great pro and two extra fan clips are required things to easily add a second fan.
Taking a close look

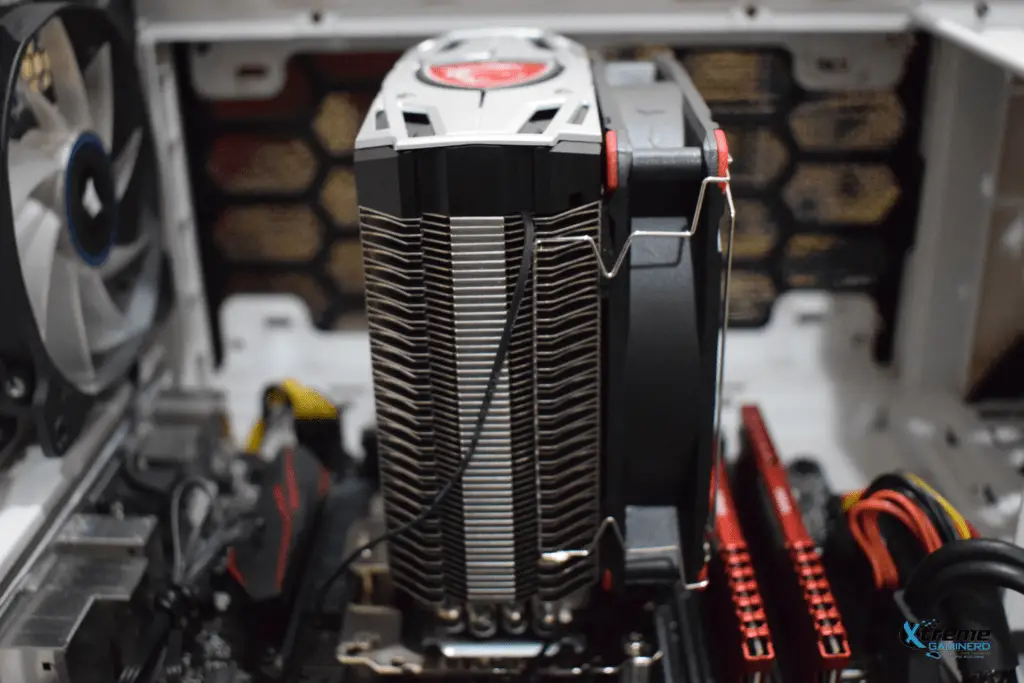
I have already mentioned the dimensions of the heatsink in the specs table and here is a close look at how the CPU cooler combined with the CPU fan looks from all sides. The cooler is slightly wider from one side and the heatsink is somewhere between a budget heatsink and a full tower. It definitely looks like a mid-tower because of its size.
The fan is secured at its place with two metal clips which can be adjusted to a little up or a little down. It’s flexible for adjusting according to the memory on your motherboard. However, the height from the ground is not enough to install a tall memory stick in the 1st slot if you let the fan secure at its original place. However, we will see this issue when the installation process is done.
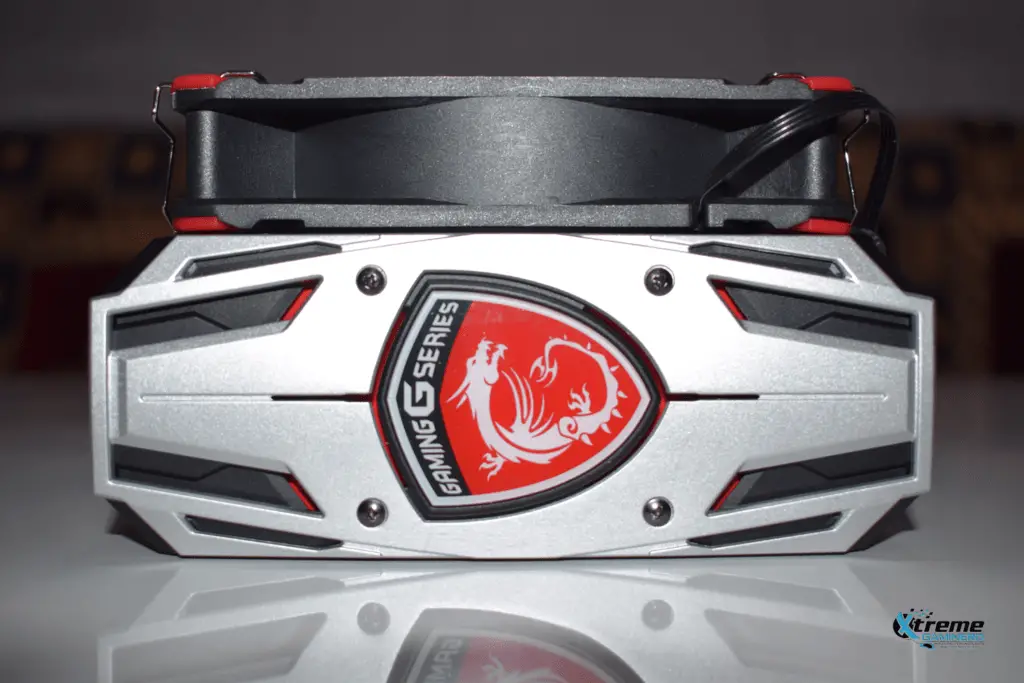
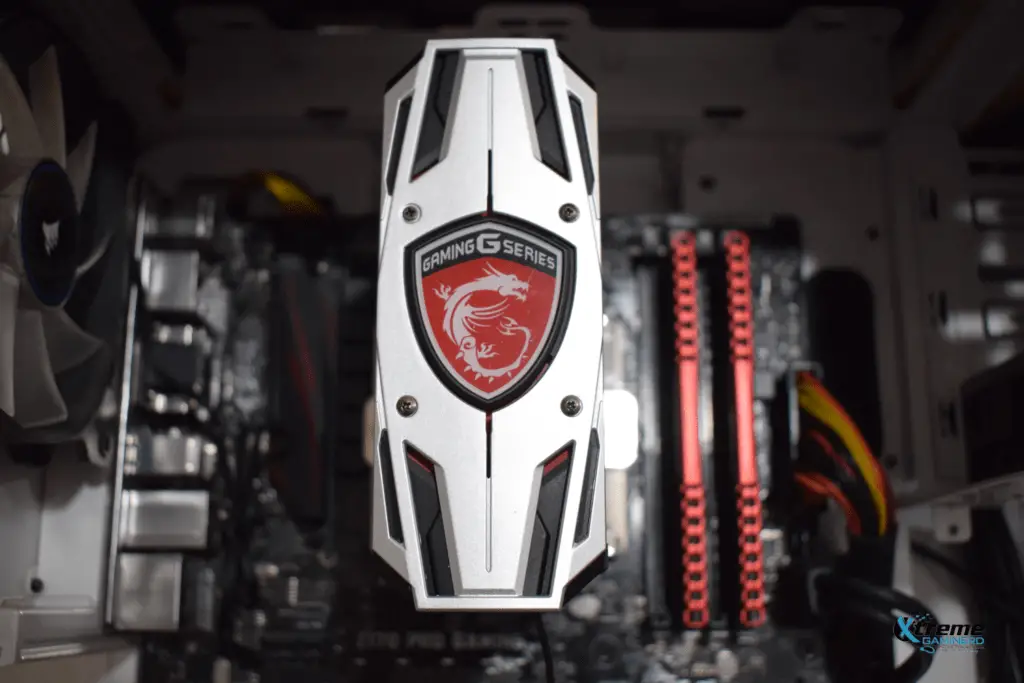
The top has an MSI GAMING G Series LOGO in a shape of a shield that is at the center of the plastic cover finished in silver color secured with 4 screws. The aesthetics look great and I will let you take a look at how the bare heatsink looks soon. But let’s take a look at its connection first.
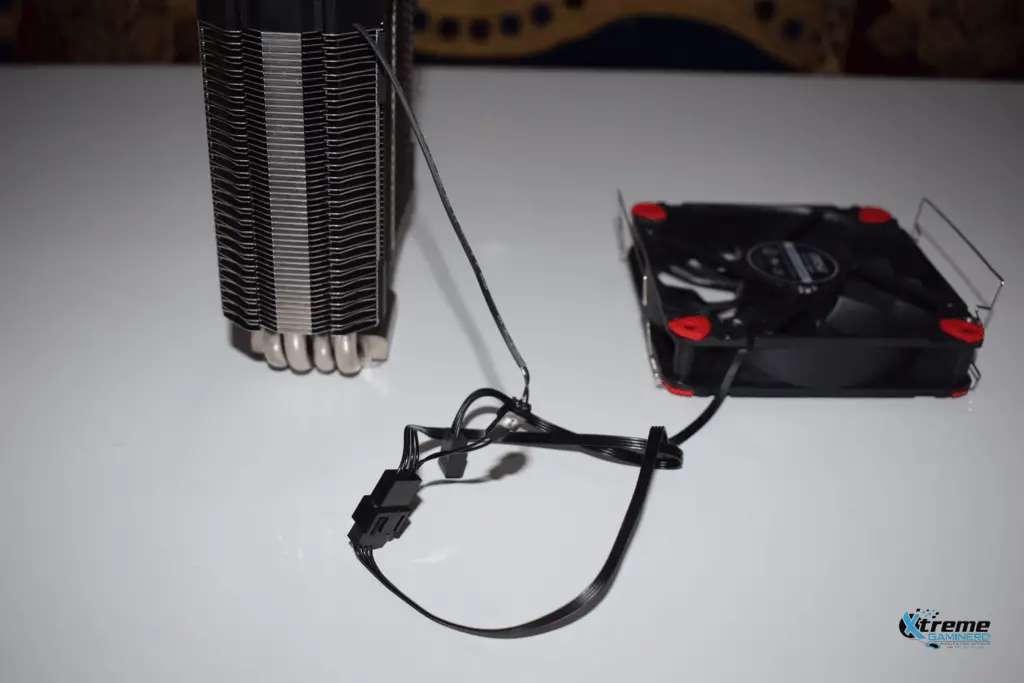
When I saw the fan, it seemed to be connected to a separate cable splitter that came from the top of the heatsink and the 4 pin power connector of the fan was connected to it. The main connector was left over to be connected to the motherboard. First I thought what is the use of this until I disassembled everything.
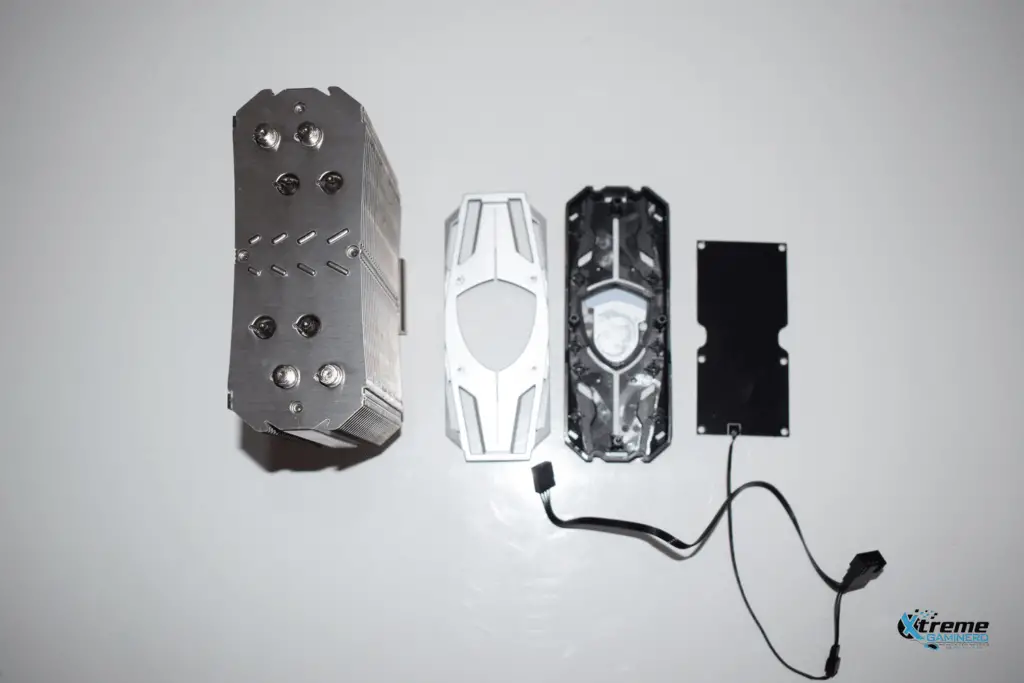
So, there were 4 pieces. One was the heatsink and the other three were the covers at the top for aesthetics. The top cover is made up of plastic which you can misunderstand as aluminium or some metal because of its looks. This cover can be interchanged with the black cover provided in the accessories box to match your theme.
But I didn’t replace it to match my white RIG. Under it was a cover with an MSI LOGO which can be seen from the outside and it was secured with 4 tall screws to the heatsink and a plexiglass embedded with LED with 8 small screws to this cover. The plexiglass is Black on one side and completely Red on the other side to give Red illumination. A cable is connected to it to power the LED and that’s why there is a cable splitter: to power both the LED and Fan by one port.
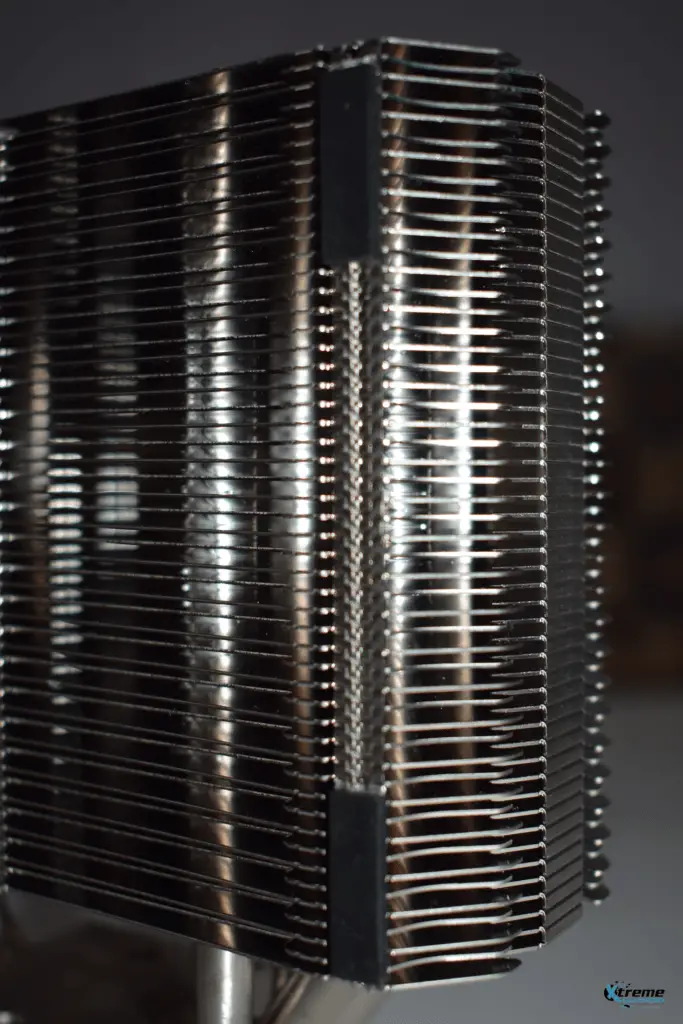
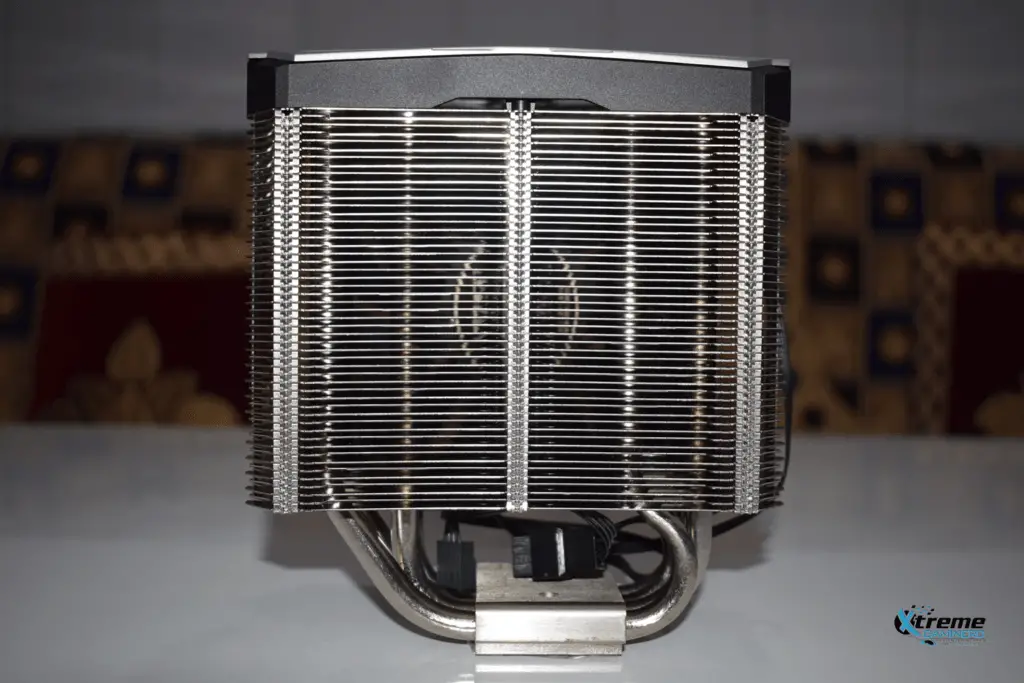
The heatsink is definitely a thing that one can admire. You cannot find a better heatsink than this. It’s very strong and the fins can’t be bent easily unlike the other budget air coolers. Fins are straight and are made to provide maximum airflow to the heat pipes as MSI stated and there are a total of 4 heat pipes 8mm thick each which are nickel plated to match the color of the heatsink passing through the heatsink to different areas to dissipate maximum heat to the heatsink.
There are also rubber pads at the sides of the heatsink. I think they serve some purpose like controlling the Fan vibration or something similar to it.
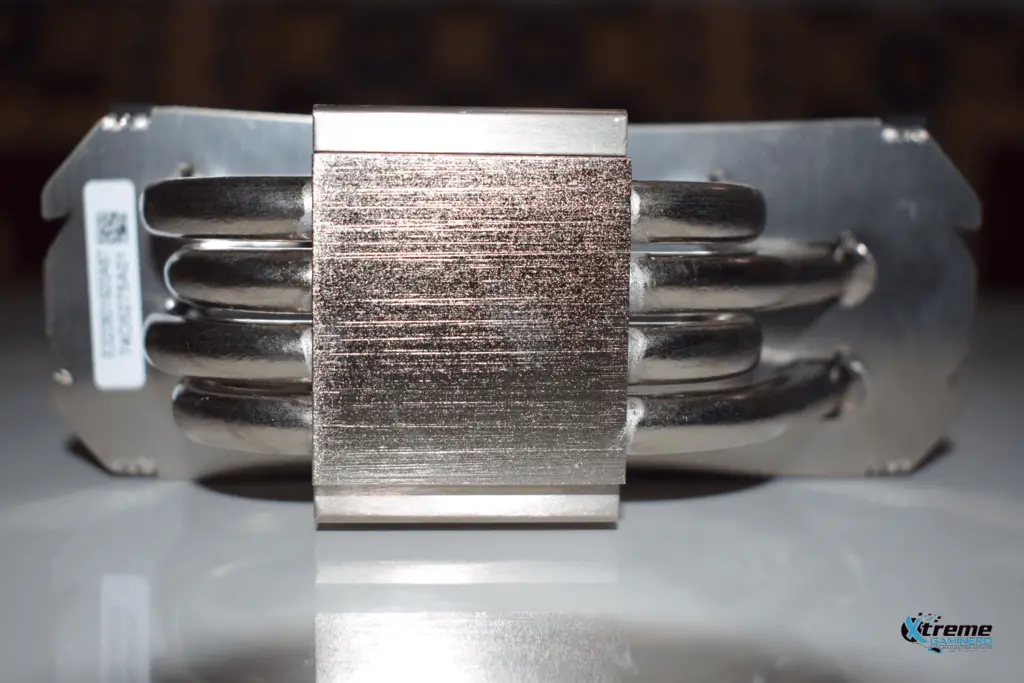
The base is also nickel-plated Copper base which is common in most of the good heatsinks. Most of the budget heatsinks feature aluminium heatsinks with copper pipes exposed at the base just like the
Cooler Master Hyper 212 Turbo. The cooling of a copper base with copper pipes embedded inside is better than the latter one as copper has better conductivity and also provides a smooth base.
Although the base is not completely smooth, there are some little imperfections but it’s where the thermal paste will come into action. Overall, the heatsink is something which I couldn’t complain about.
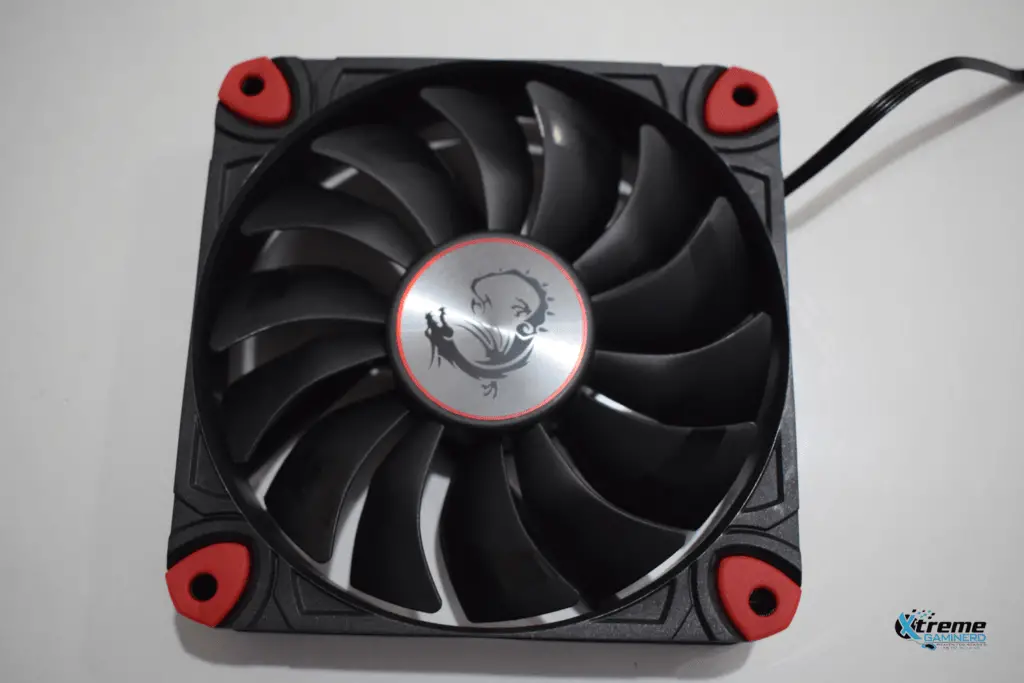
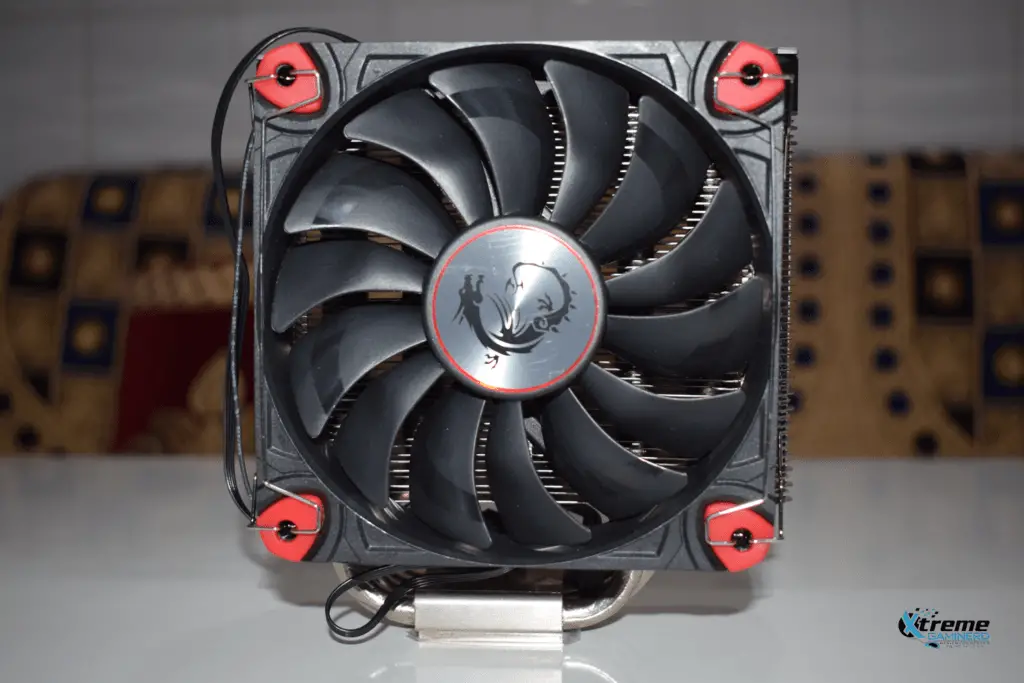
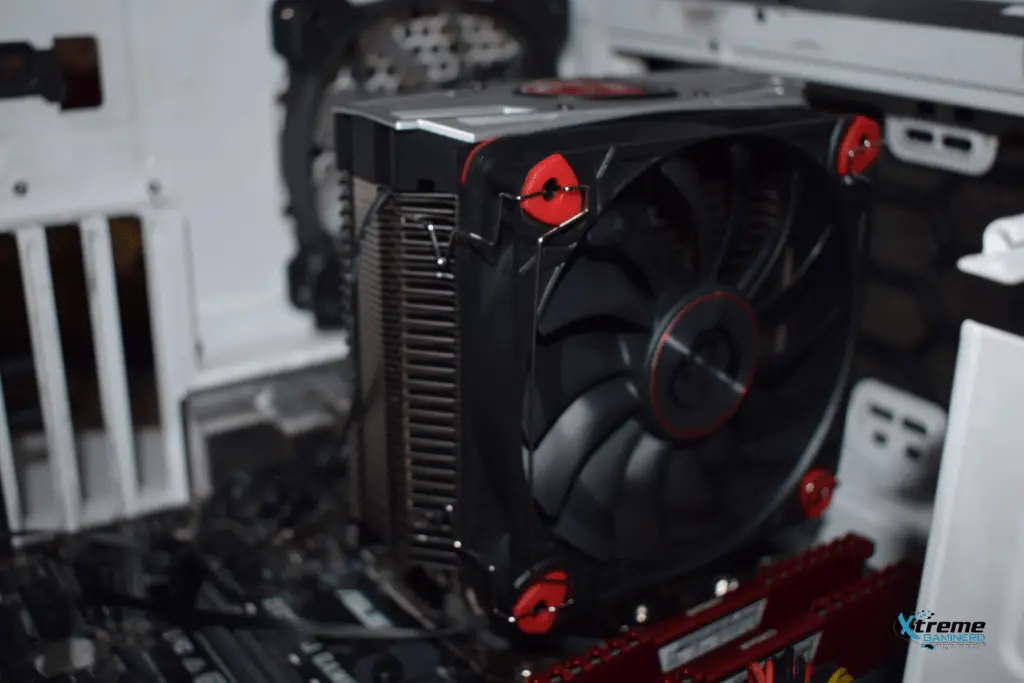
The fan is 120mm which is made for high air pressure as you can easily tell by looking at its blades. They are traditional and there is nothing special designed for advanced airflow but a total of 14 fan blades is more than enough to generate some good air pressure. The fan blades are slightly curved just like any other static pressure fan and the mounting frame comes with rubber pads to control vibrations.
The Dragon LOGO of MSI at the center with Silver and red accents along with the red rubber pads give it a complete MSI look. This fan as told by MSI should operate between a speed range of 500-1800 (+ or _ 15%)RPM which we will see in testing. The fan is supposed to provide up to 71 CFM of Airflow and up to 2.09mm-H20 of Air pressure. That’s a good spec for a static-pressure fan.
Installation is a little different for this cooler. There are a lot of screws and washers which I got confused about before reading the manual and I had to refer to the manual multiple times to install it properly. The installation is not simple as that of other budget CPU coolers and you need a manual to guide yourself.
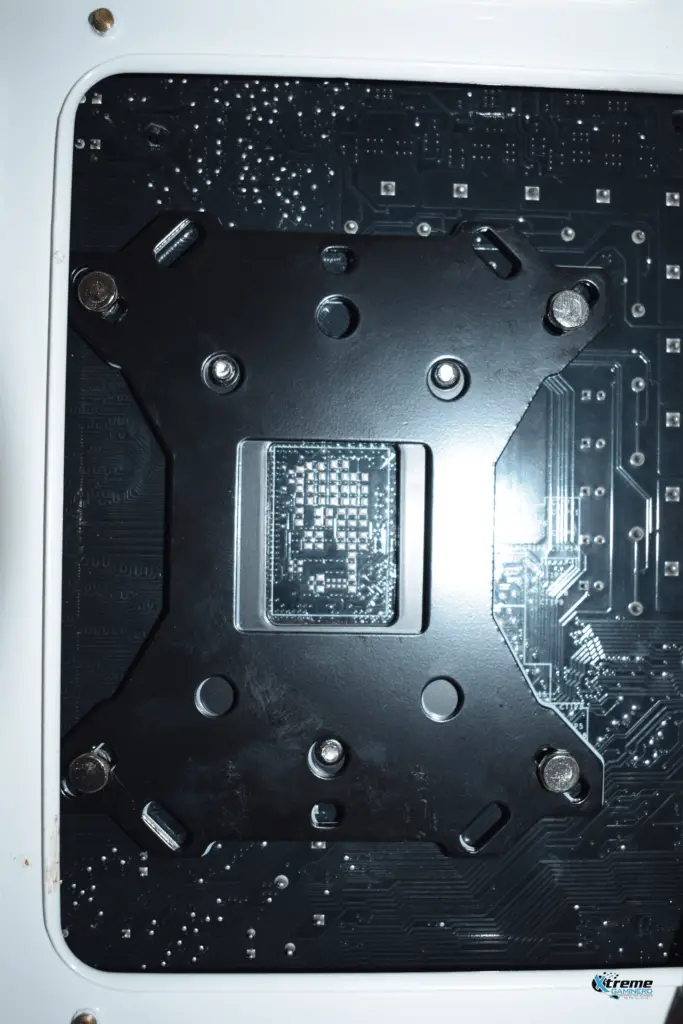
The back plate needs to be accompanied by the Mylar film sheet which I think is for eliminating any possibility of any sorting. I am not sure about this but this is what the manual tells us to do.
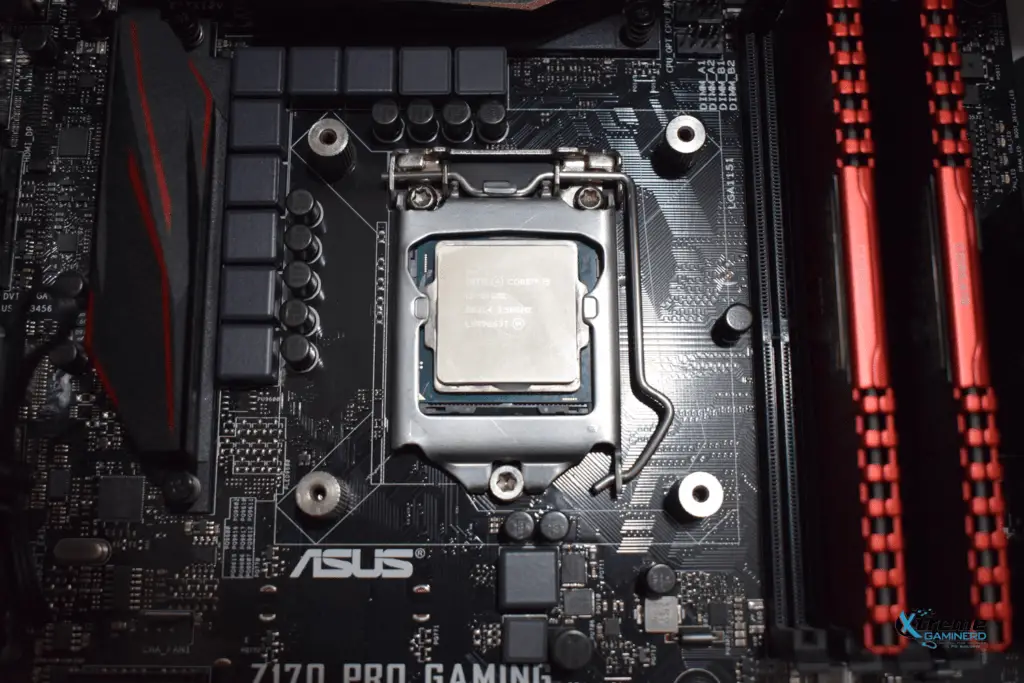
After screwing from the other side, now it’s time for the bracket installation. The screw holes for Intel are wider to facilitate the installation at the proper place but the screws will be placed somewhat on one side and not in the middle or at the edge of each screw hole. It’s weird for me because it’s not the norm and is not the perfect solution.
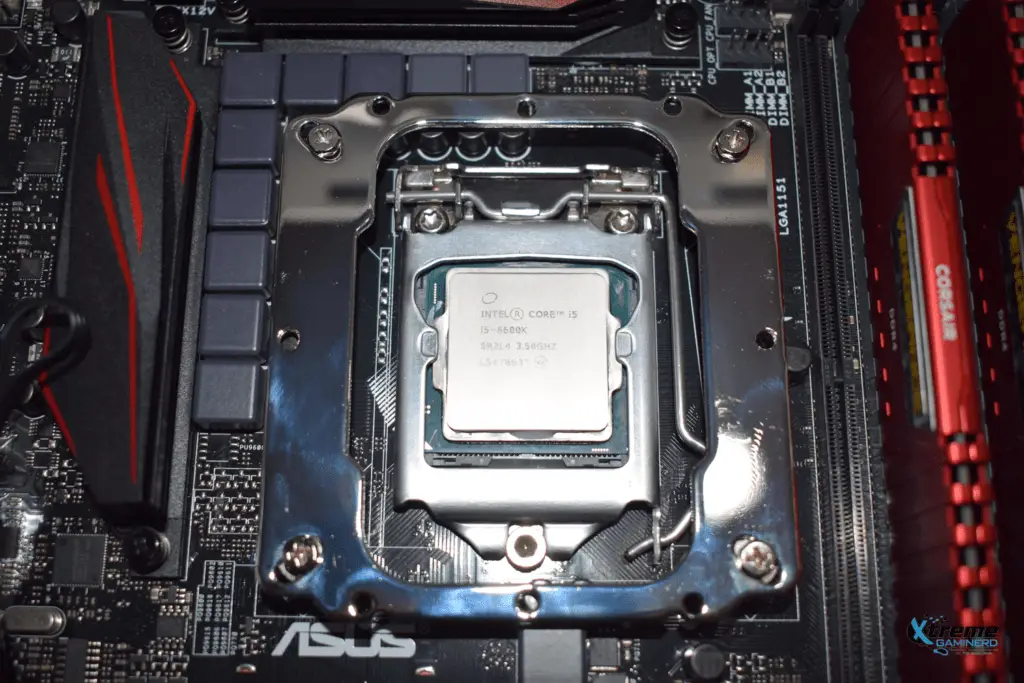
Anyways after installing the bracket, a small clip is to be used for securing the heatsink to the bracket which is to be screwed into the screw holes present at the left and right side of the bracket. It was also a difficult process because that clip cannot be secured to the heatsink with screws. It had two extended metal circular pieces on one side to be attached to the heatsink temporarily. So, it needs some skill to place it properly.
So, as usual, I already cleaned the CPU and the heatsink base with isopropyl alcohol and applied the thermal paste that came with this CPU cooler. So here is the finished installation.
There is a fine clearance for installing a short heatsink memory at 1st slot but don’t expect to install something bigger because there isn’t enough space. But the cooler doesn’t acquire space more than One DIMM slot, so you don’t have to worry about memory compatibility on the three slots but you still have to use a shorter memory stick on the 1st slot.
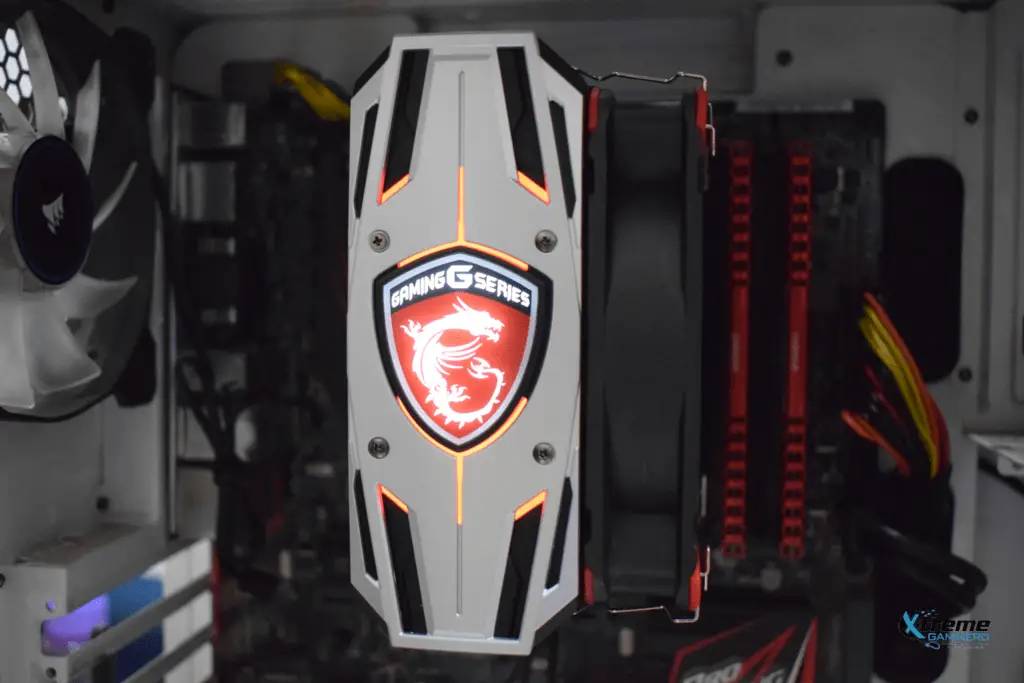

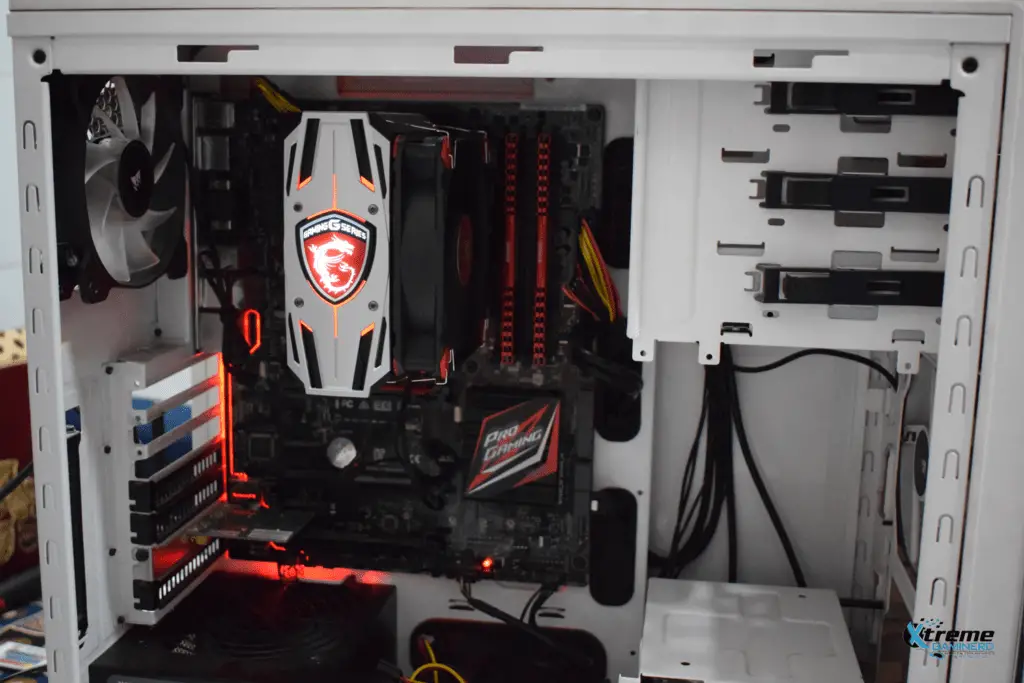
I used the CPU_FAN header for powering the heatsink as most of us will do. The result was good. The MSI LOGO lit up very well with fans spinning at its standard speed.
Here is the RIG I used for testing the cooler(I use this same rig for every other cooler to keep the results fair):-
- Intel Core i5 6600K: Check on Amazon
- Asus Z170 Pro Gaming: Check on Amazon
- 2x 4GB DDR4 2400Mhz Corsair Vengeance LPX: Check on Amazon
- 320GB WD HDD: Check on Amazon
- TP-Link N300 Wifi PCI Card: Check on Amazon
- Cooler Master MasterWatt Lite 500W: Check on Amazon
- Cooler Master 690 III: Check on Amazon
- 1x 120mm Corsair AF fan: Check on Amazon at the rear, 1x 120mm DeepCool TF120 fan(Used from Radiator): Check on Amazon
Testing was done at 31 Degree C room temperature and as different coolers are tested in different seasons, I will also include the Delta T benchmarks to keep the comparison fair. Delta T will be obtained by subtracting the room temperature from the temperature of the CPU after benchmarking.
So for example, if the room temperature is 25C and the CPU temperature after benchmarking is 60C, then Delta T will be equal to 60C- 25C= 45C. This will be done to make the comparison of different CPU coolers tested in different seasons fair.
Noise testing was done by an LCD noise tester in a silent room after switching off every fan in the case except that of the PSU. The tester was kept around 1 inch far away from the CPU cooler Fan.
I liked it how the Cooler was able to keep the CPU temperature equal to the room temperature just like the Hyper 212 Turbo at idle. Although results are a little different than what you would expect. The software used was Heavyload for stress testing the CPU, which was used for 15 minutes for each benchmark and then 5 minutes were given to the CPU cooler to cool down at its full speed until the temperature went to its initial idle temperature.
For measuring the temperature of the CPU and fan speed I use CPUID HWMonitor. For fan speed control, I used the AI Suite 3 software from ASUS to automatically set a fan profile but the fan speed was still measured by the HWMonitor because of its accuracy.

Result and Conclusion
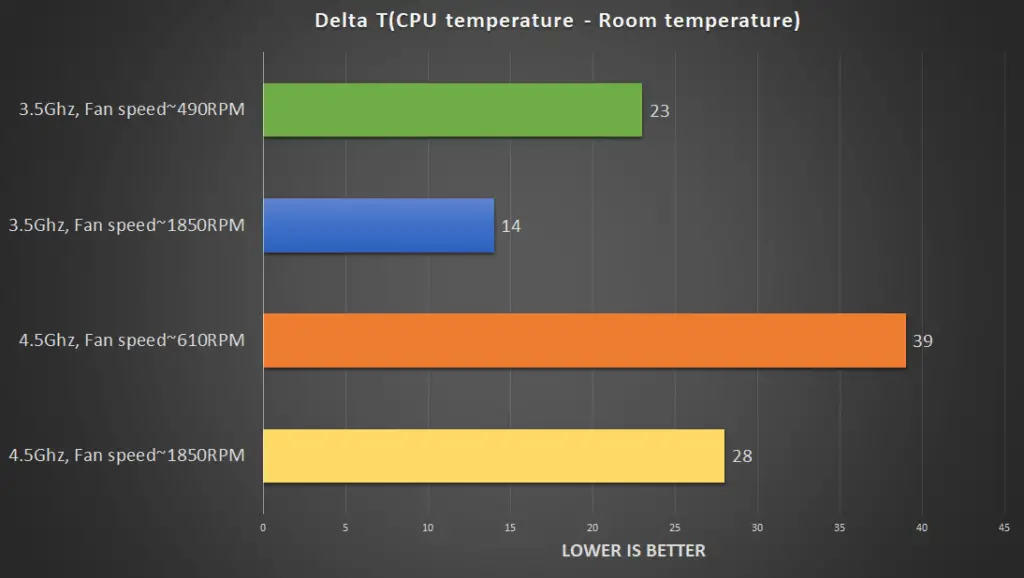
As far as the heatsink goes, it’s great but the cooling is not that great. At silent profile, the fan ran at around 610RPM which increased from 490RPM automatically as a result of high heat. I didn’t want to fix the silent profile fan speed at a particular speed but rather I wanted to see the automatic working of the fan at different temperatures.
With i5 6600K overclocked to 4.5Ghz and fans at 610RPM, the temperature went to 70C in 15 minutes but increasing the fan speed to full 1850RPM, the temperature came down to 59C which is far better. This means that the low fan speed is not enough to drive heat out of the heatsink and you should never go below 1000 RPM if you overclock. Although the temperature went too high at low fan speed, still this is a good CPU cooler for overclocking as a single fan is able to control the temps at full speed.
As the heatsink is capable of adding one more fan, two fans in a push-pull configuration will give much better results even when fans are running at low speed and I didn’t have one additional to test with. But the heatsink is definitely capable of pulling heat from the CPU effectively giving similar results as the Hyper 212 Turbo gave with 2 fans.
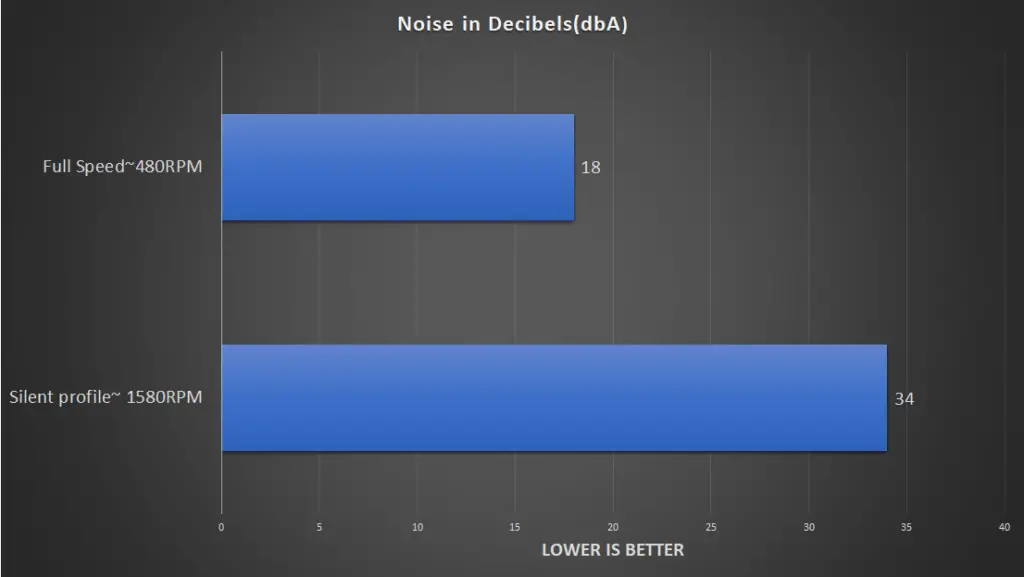
Noise-wise, it was fine. At silent profile, no noise whatsoever but at full speed, you can hear the noise clearly because of the speed of the fan. It created more noise than the Hyper 212 Turbo and installing a second fan will add a little more.