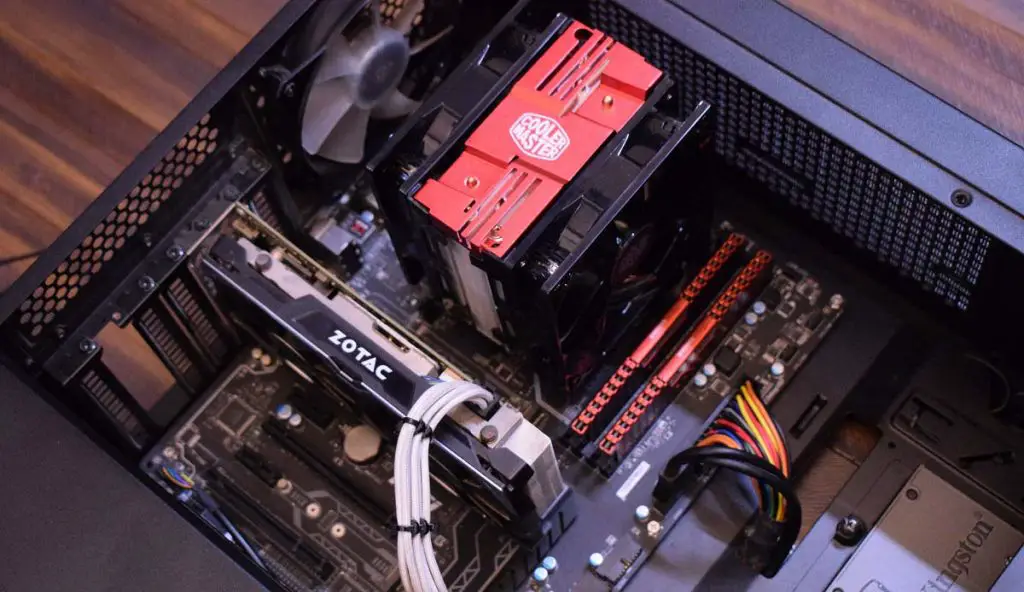
Build Your Gaming PC: A To Z Guide
STARTER
The STARTER Gaming PC is for casual gaming and can provide a playable gaming experience at lower resolutions. This PC is for those who can't spend hundreds of dollars on components and can't afford a discrete GPU.
ENTRY LEVEL
The ENTRY-LEVEL Gaming PC is designed to uplift the gaming performance through overclocking. It already uses one of the most powerful APUs and features adequate storage and reliable PSU for your build.
ADMIRABLE
The Admirable Gaming PC is capable of gaming at 1080p with High settings as it features an ideal CPU-GPU combo in a low budget. While it can play most titles with 60 fps, it is an ideal choice for esports games.
COMPETENT
The COMPTENT Gaming PC looks better and does better. With a faster and better GPU, it is capable of playing modern intensive titles on Ultra settings at 1080p. The case is top-notch and the RAM-storage combo is also adequate for running and storing big games.
BRILLIANT
The Brilliant Gaming PC is designed to max out the visual quality at 1080p resolution and can possibly play at 1440p. It uses one of the best Core i5 processor with the the latest RDNA 3-based Radeon GPU that enables superb graphics. It is perfectly fit for any modern title and supports Ray Tracing.

SWEET SPOT
The Sweet Spot Gaming PC is ready for intensive gaming and applications with powerful 6-core Ryzen CPU. It is noticeably faster in gaming and multitasking and is a viable option for streaming on a budget.
EXCELLENT
The Excellent Gaming PC provides no-compromise gameplay on both 1080p and 1440p resolutions. Its perfect CPU-GPU combo will help you achieve 60+ fps on the max settings and will be ready for enabling Ray Tracing for realistic reflections and shadows.
FIRST CLASS
The First Class is ready to improve the visuals with enhanced Ray-Tracing performance and maxed out graphics at 1440p resolution. It uses faster and better components to achieve higher performance in both gaming and non-gaming tasks.
NO-COMPROMISE
The No-Compromise gaming PC is a 1440p game killer. It is superior to First-Class in many aspects like Overclocking, GPU Power, and of course, Aesthetics. With this one, you can increase the performance by overclocking to make it ready for 4K gaming.
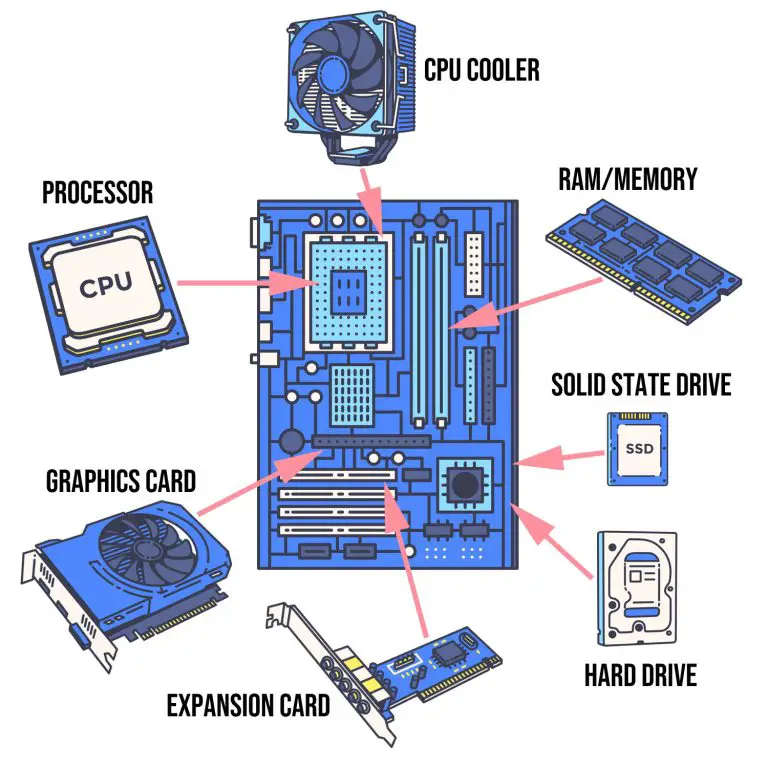
Components  | Brief Introduction |
|---|---|
Processor  | Processor is the brain of your computer and is responsible for performing logical and arithmetic operations. Modern CPUs come with multiple cores and their speed is measured in MHz or GHz. |
Graphics Card  | Graphics card is responsible for rendering the images and graphics parameters in games and non-gaming applications. |
RAM/Memory  | RAM or Memory stores small data containing the information of the applications for quick access. The data is stored temporarily and vanishes when the PC is switched off. |
Motherboard  | Motherboard is the hub which connects every PC component for a flow of data between each other. |
Storage Drive  | Storage drives are of many types. Their main purpose is to permanently store your data unlike RAM which erases the data as soon as the power is turned off. |
Power Supply 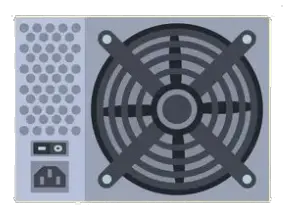 | Your PC components need reduced DC voltage that is achieved through the Power Supply Unit. PSUs come in various wattages and power efficiency ratings for better operation. |
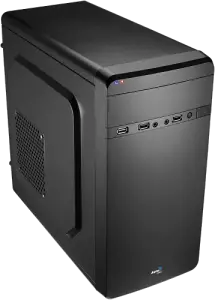
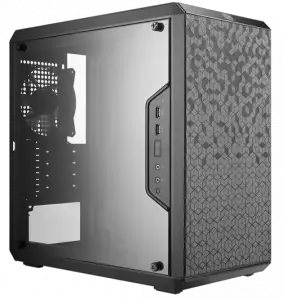
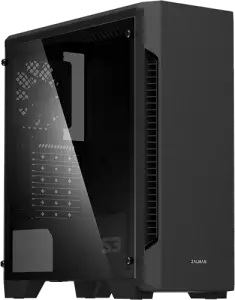
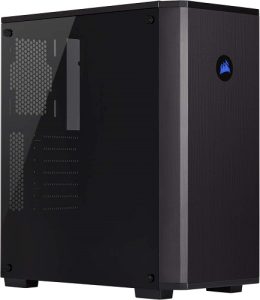
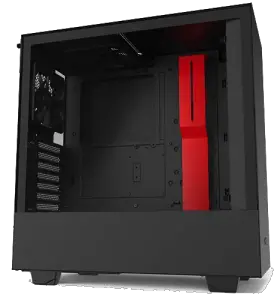
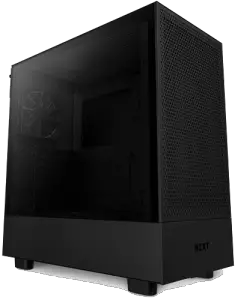
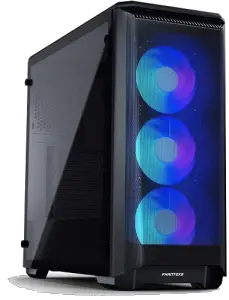
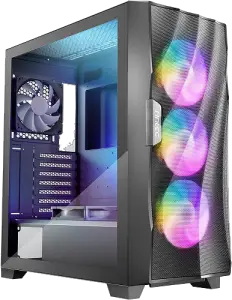
PC Case  | All the components are installed inside a box known as PC Case or Chassis. It comes in variety of form factors to accommodate different-sized components. |
CPU Cooler 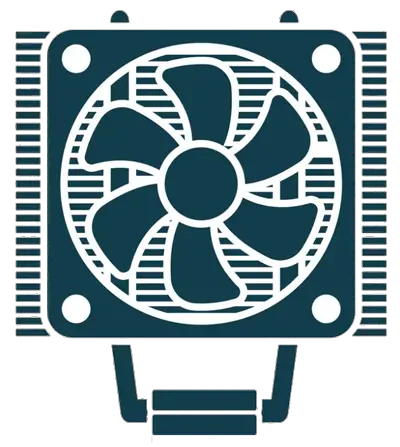 | Every electronic part starts to heat due to the voltage supplied. To cool the Processor, a CPU Cooler is installed on top to dissipate the heat rapidly. |
PC Tools  | Compulsory and Recommended Tools |
|---|---|
Magnetic Screwdriver  | A screwdriver is a compulsory tool for building your PC. You will need a magnetic Philips screwdriver #2 for installing various PC components and a screwdriver #0 for M.2 SSD. |
Zip Ties  | Zip ties help you manage and secure your cables for cable management. You will need a few of these after finishing your build. |
Cutter Pliers  | Cutter pliers will cut off the extra part of zip tie to make the build cleaner. |
Anti-Static Wrist Wrap  | To protect your PC components, it is recommended to use Anti-static wrist wrap that will prevent building up of static electricity. |

Click to enlarge
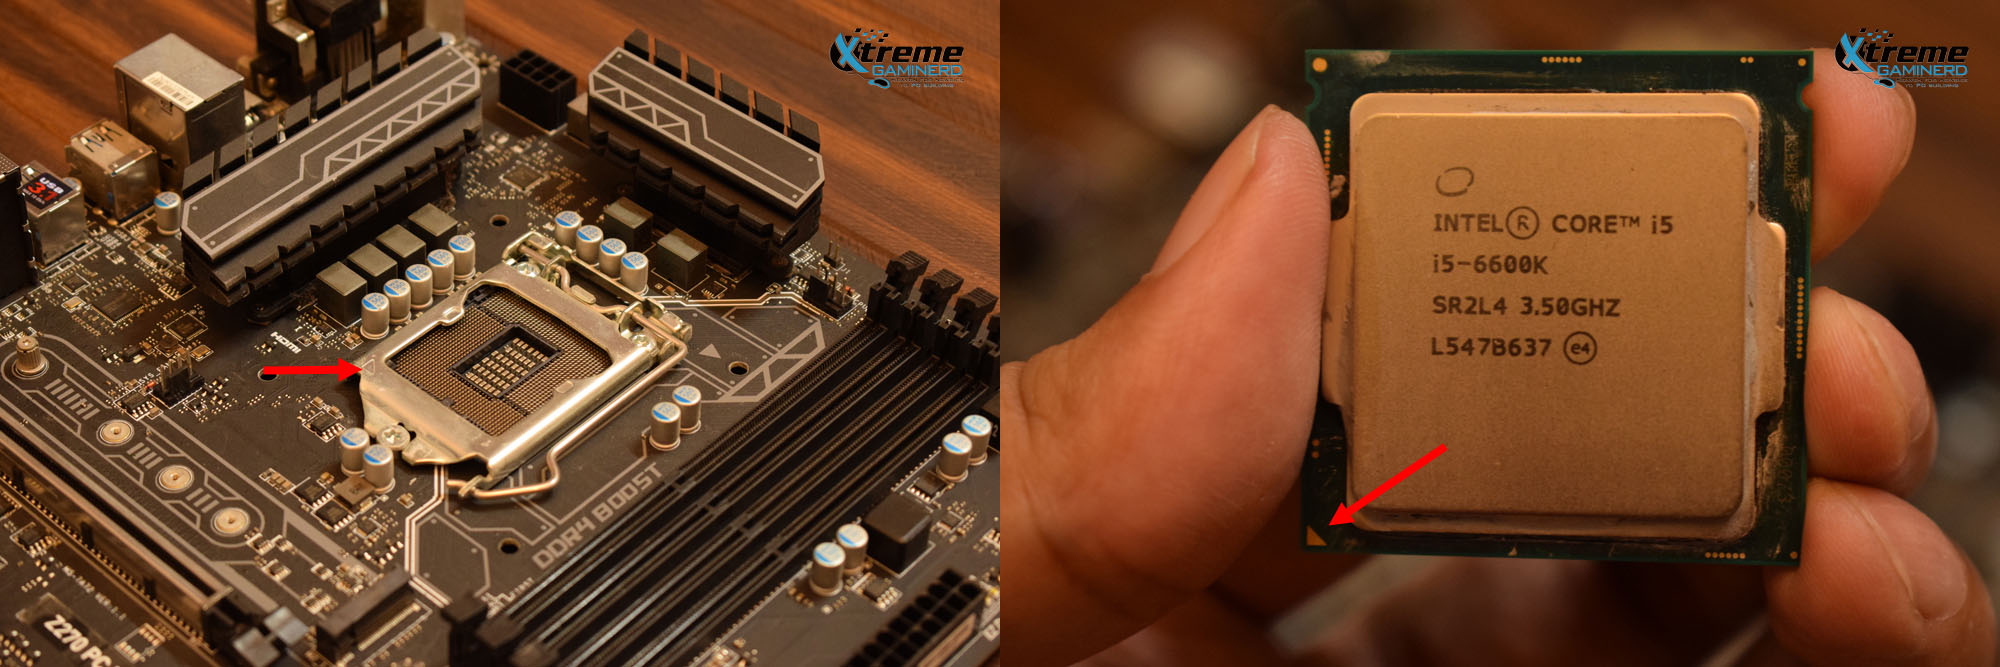
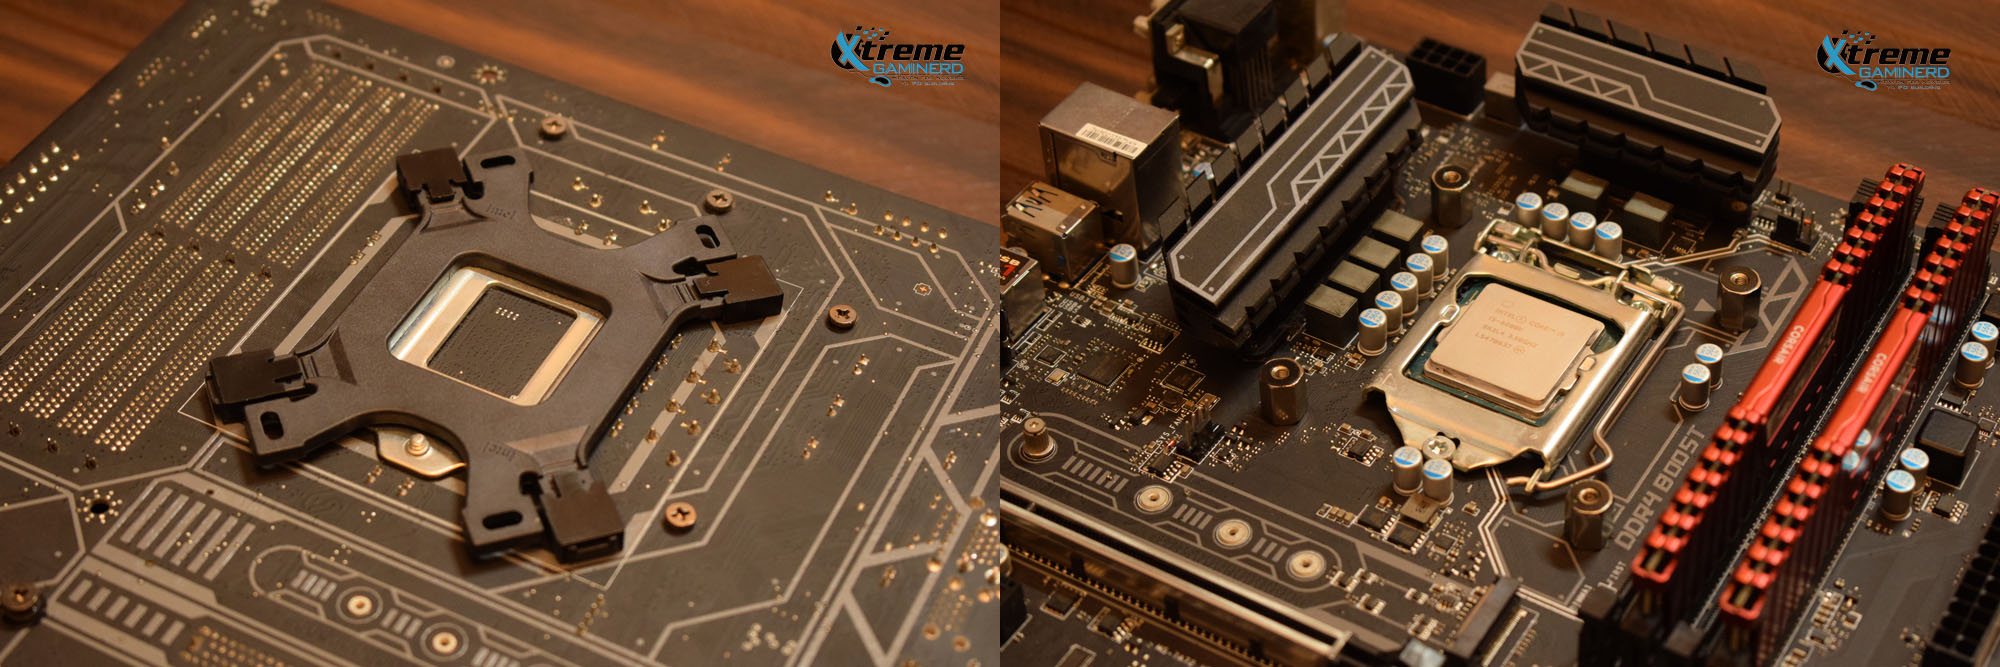
To install your processor you need to align it with the socket on your motherboard. The easiest way to do this is to identify the Arrow mark as shown in the images above. Both the socket and the processor have this arrow symbol in one corner.
Note– The image shown above is of an Intel processor and motherboard but AMD too has a similar method.
Click to enlarge
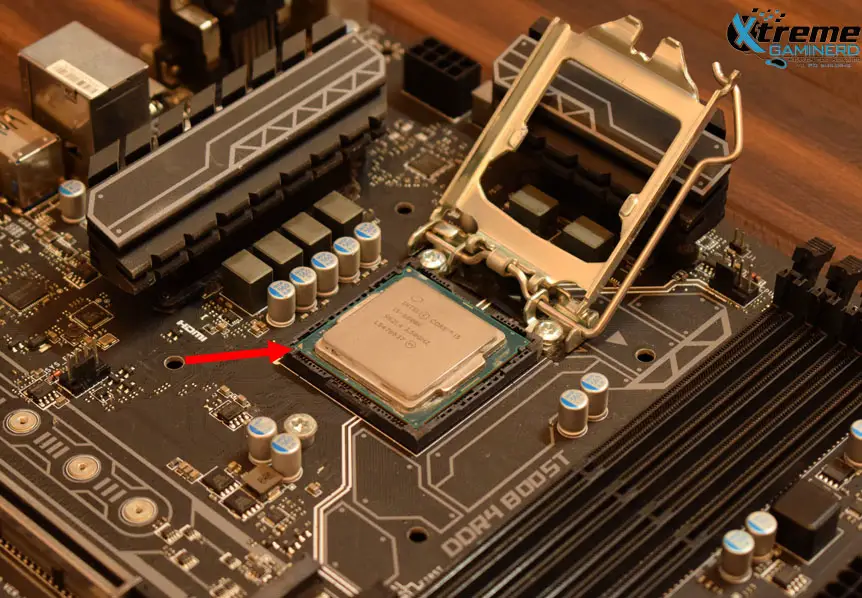
Push the socket lever to the right to remove it from the socket cover and pull it to the back to expose the socket pins. Now gently put the CPU on the socket by aligning its arrow mark to the arrow mark on the socket.
Click to enlarge
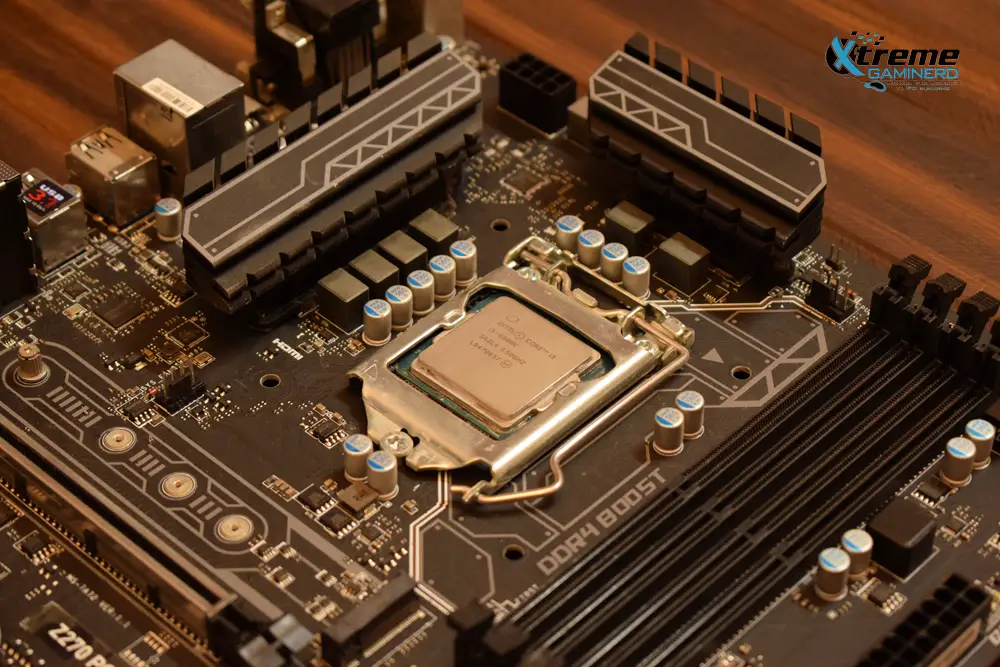
Secure the processor by putting the lever back in its place. Make sure that the lower middle part of your socket cover gets under the screw present at the bottom of the socket.
Click to enlarge
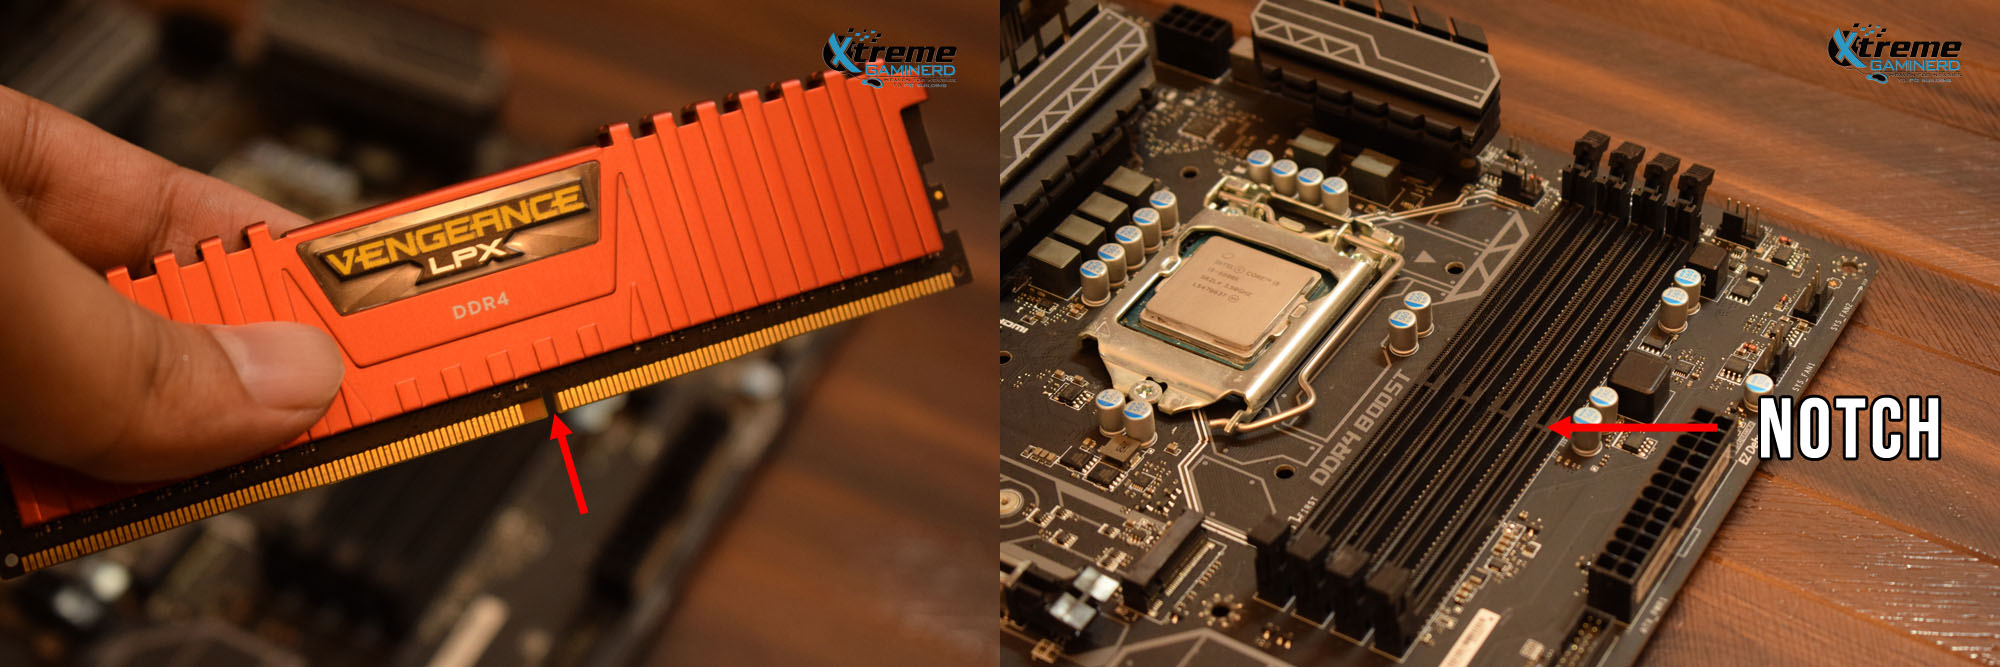
The RAM stick or module has a small cutout between its pins somewhere around the middle but not exactly at the middle. Motherboard’s DIMM slots also have a plastic notch at the exact position. Before aligning the RAM module, open the plastic latches on the DIMMs from both sides to allow the RAM insertion.
Click to enlarge
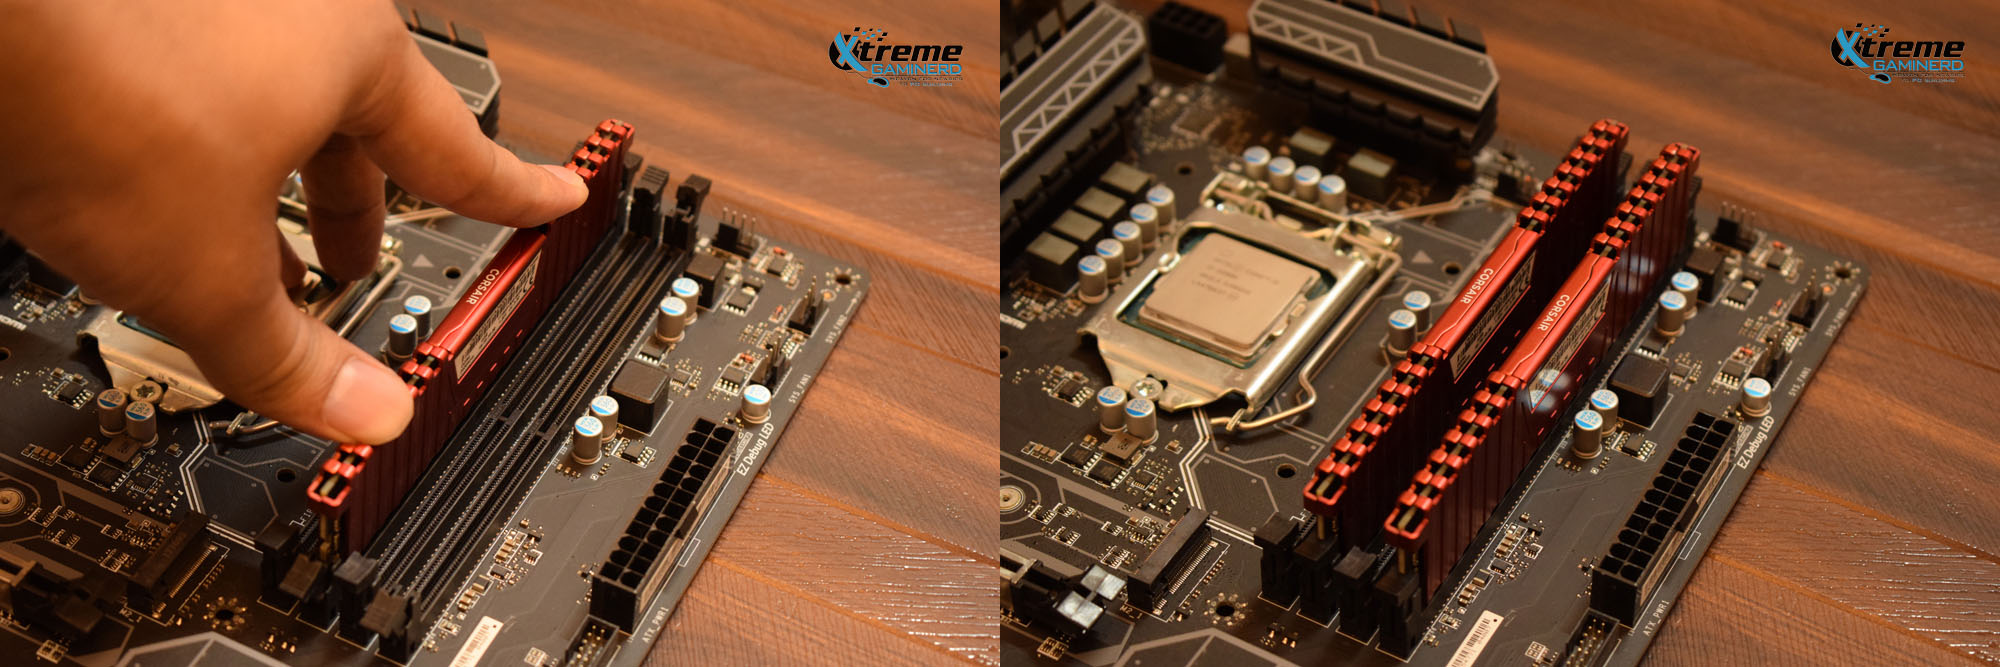
Align the RAM and use two fingers to push down the module into the DIMM slot. Keep pushing until you hear a click sound of the DIMM latches from both sides confirming the proper installation of the module into the slot. If you have more than one RAM module, you can follow the same procedure to popular your DIMM slots.
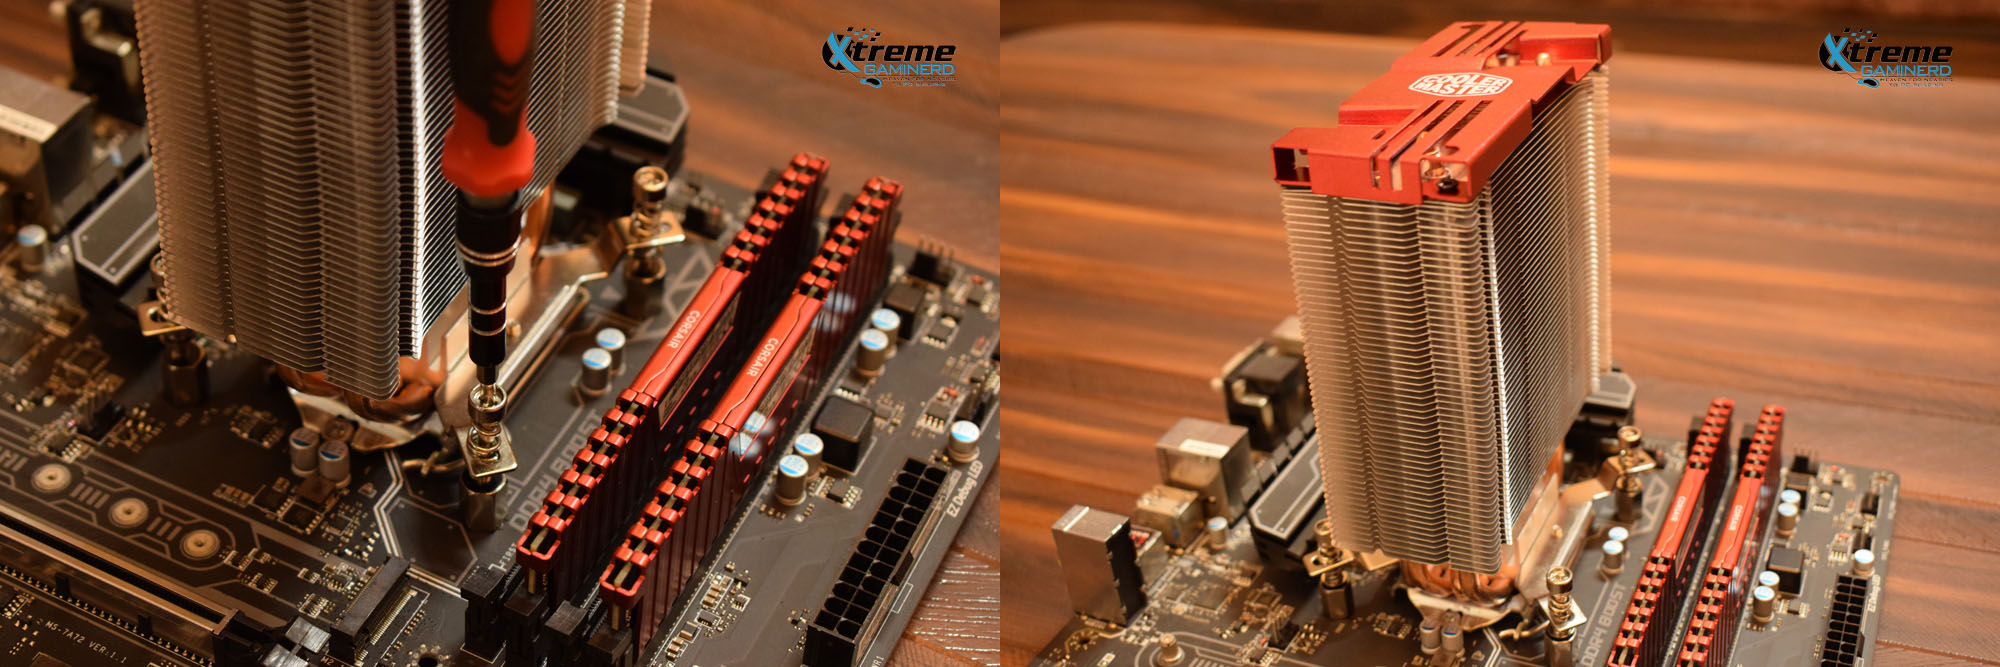
Click to enlarge
Every CPU cooler has a different way of installation and you should always refer to your CPU cooler manual. The first step is to install the cooler bracket that will hold your CPU cooler on spot. CPU coolers come with different parts including brackets, metal parts, screws, etc. Use each component as shown in your manual as shown above.
Click to enlarge
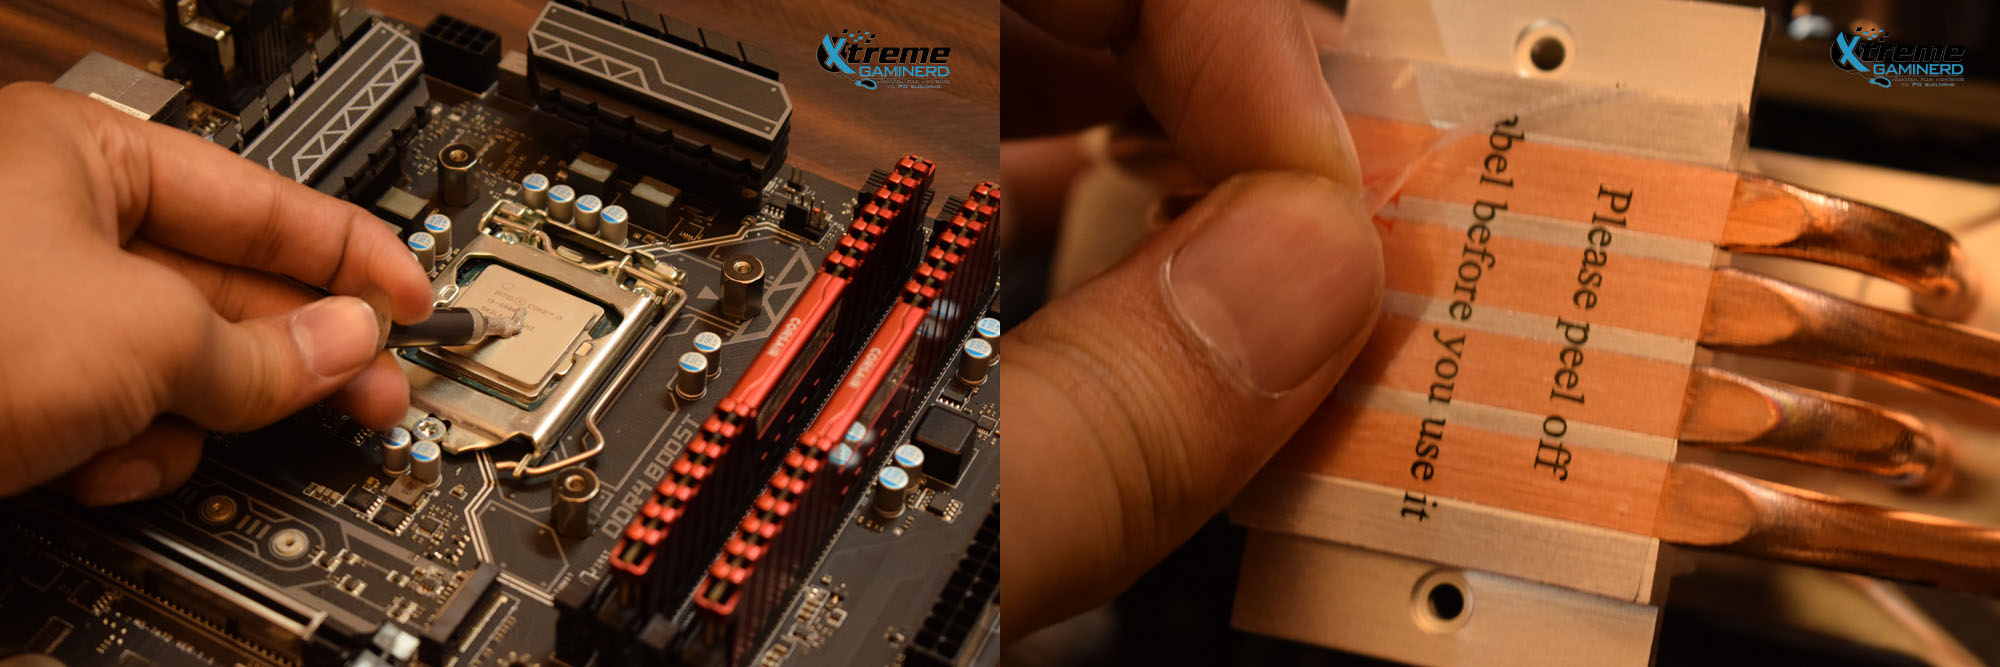
Before installing the CPU cooler, you may need to apply some thermal paste to your processor. Some CPU coolers come with pre-applied thermal paste but if your cooler doesn’t, then use the thermal paste tube or sachet that came with your cooler.
Before putting the cooler on top of the CPU, make sure you remove the plastic sheet off the CPU cooler base.
Click to enlarge
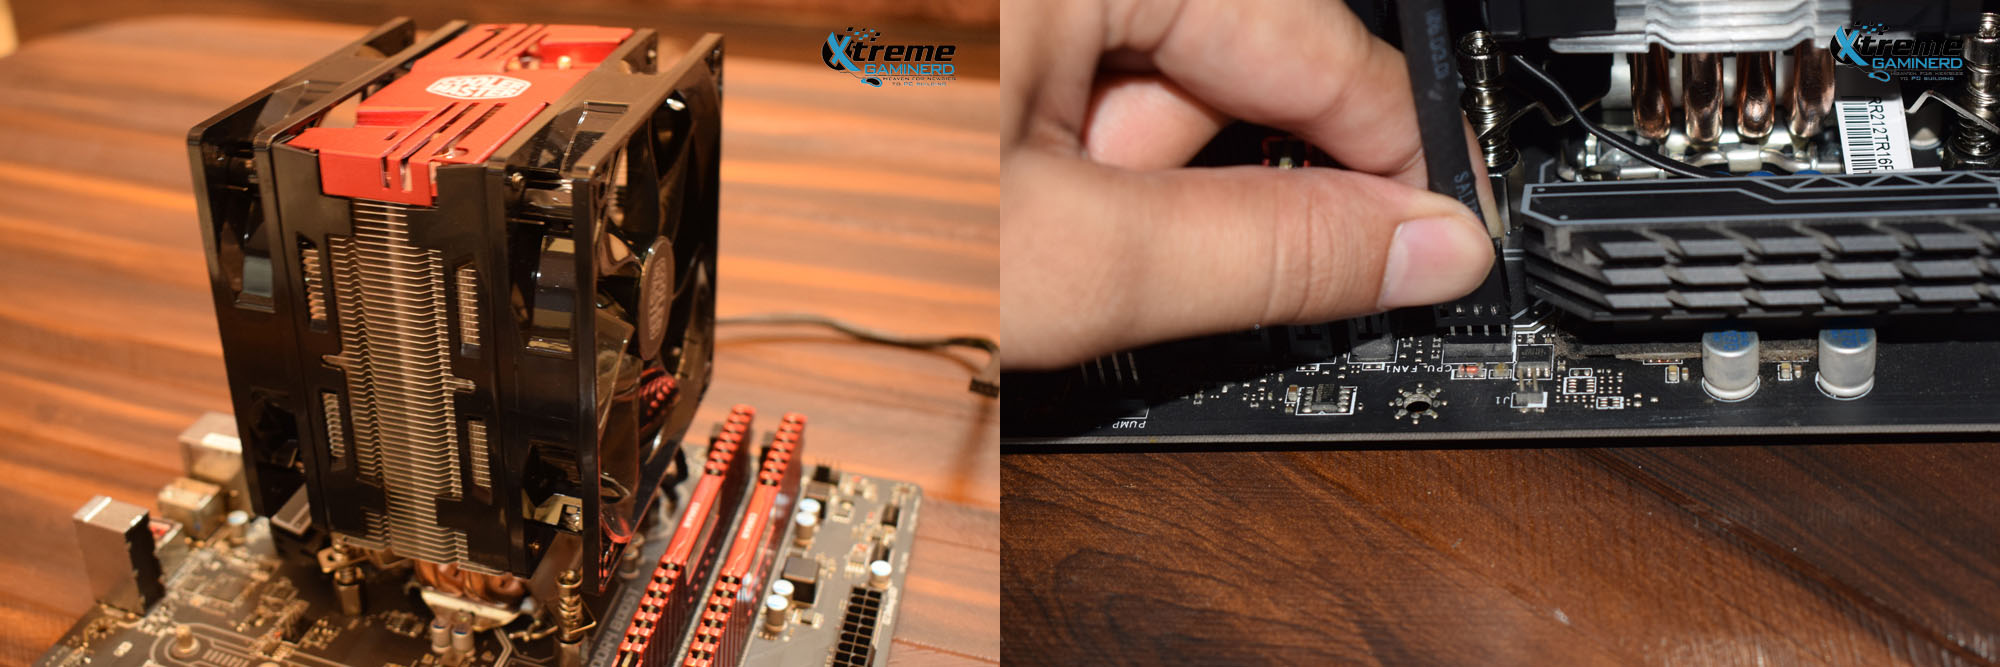
Remove the fans from the cooler before securing the heatsink on top of the processor. This will make the task easier. Some CPU coolers won’t allow you to install the heatsink without removing the fans and that is exactly because of the reasons we stated.
Now tighten the screws in all four sides one by one until you get all of them tight enough to stop your CPU cooler from moving or wobbling in its place.
Click to enlarge
Attach the fan or fans on the heatsink using the plastic/metal clips provided with them. Now you will be left with the CPU cooler cable which goes into the 4-pin CPU_fan header present at the top of the motherboard. The fan connector can go in only one direction which you can easily figure out by looking at the connector and the header.
Click to enlarge
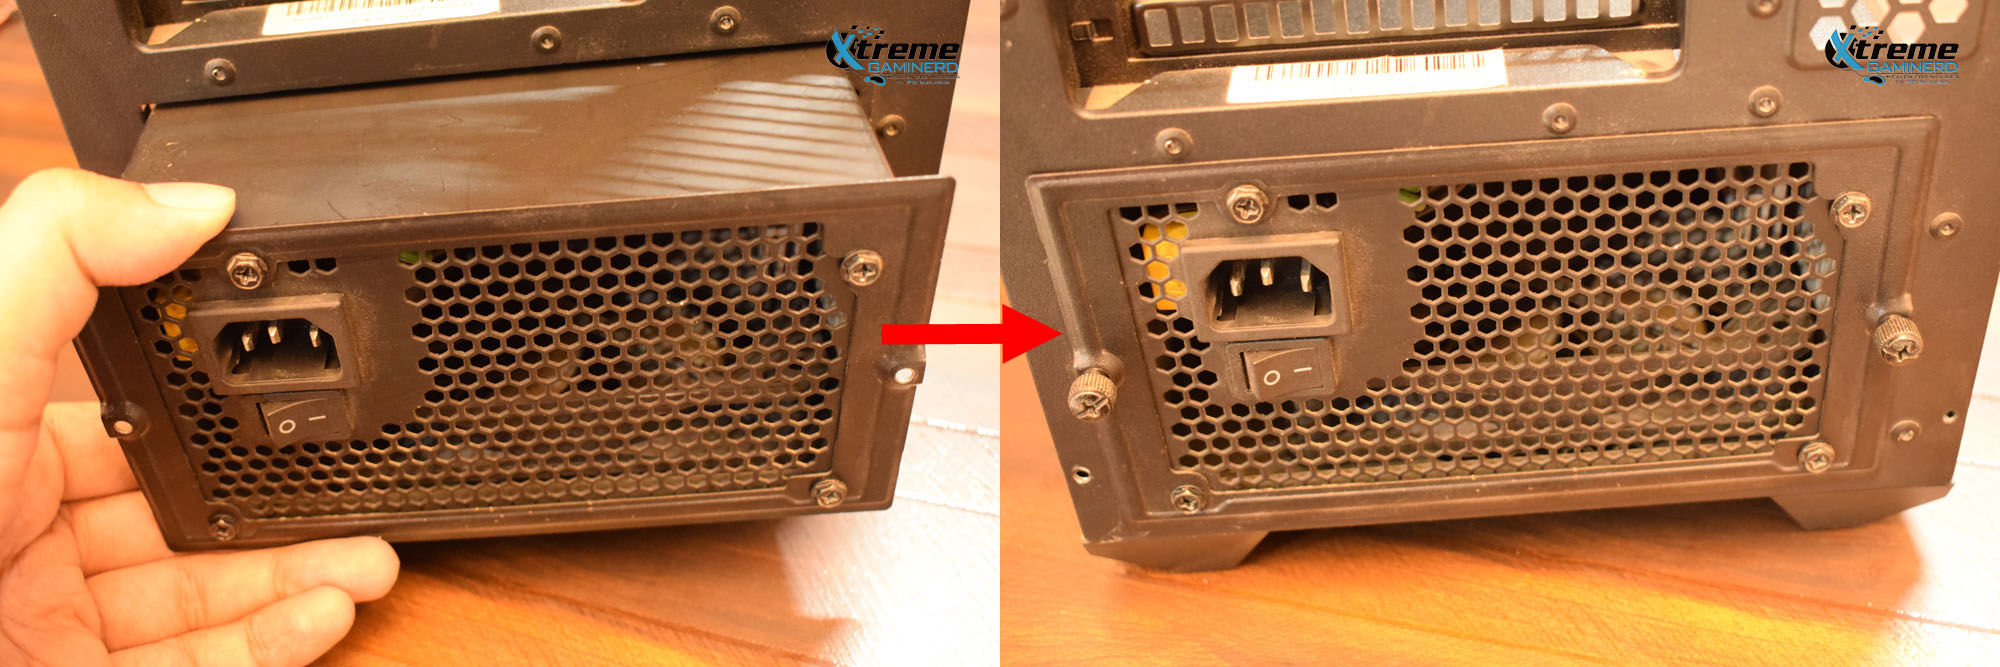
As we recommend two sequences for building a PC, here we are installing a power supply before the motherboard for easy wiring. To install the PSU, you will need four #6-32 UNC screws that you will get with the PSU or the motherboard. Different cases can have different ways of installing a PSU but they will be mostly similar to each other.
Secure the screws into the four screw holes situated at the corners of the PSU like shown above and attach the PSU cover from the case firmly.
Click to enlarge
Now slide the PSU into the bottom of the case. Some cases have a PSU shroud and some don’t. Those which don’t have a PSU shroud will require you to place the power supply from the front rather than sliding.
After its placement into the case, secure the PSU cover with the screws to the case so the PSU won’t move.
Click to enlarge
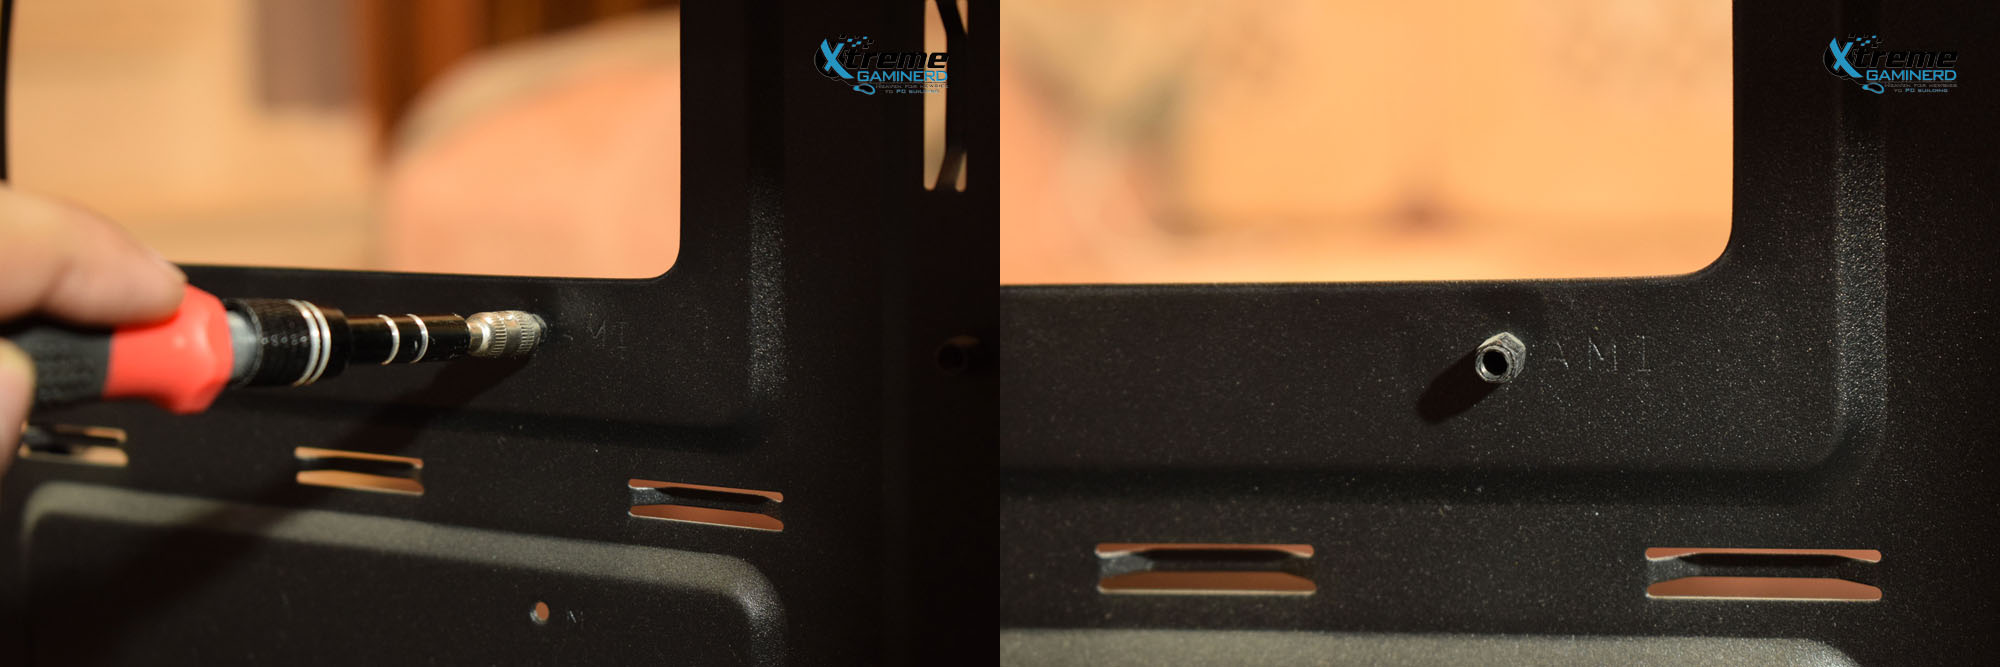
The first step is preparation. Before you put the motherboard inside the case, you need to install the motherboard standoffs. The number of standoff screws you need to install depends on the form factor of your motherboard. A standard ATX-sized motherboard will need 9 standoffs(Standoffs come with the case).
Check the location of screw holes on your motherboard and screw the standoffs onto the motherboard tray of the case accordingly. You will need a plier or a standoff screwdriver bit M5.0.
Click to enlarge
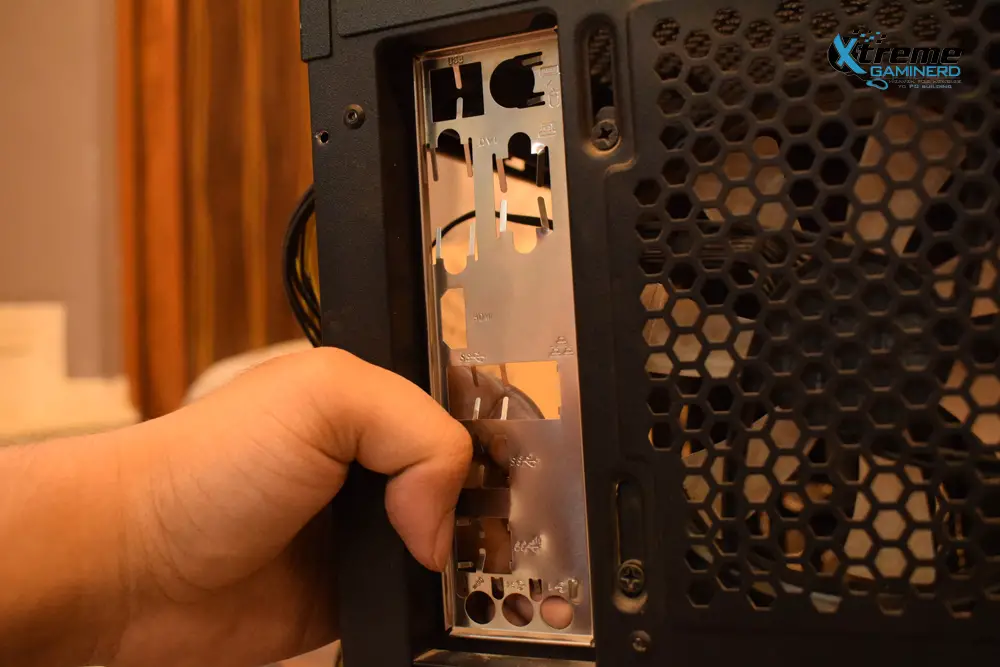
The next step is to install the I/O shield which is essential. This metal plate has several holes for the motherboard I/O ports. Make sure you put enough pressure on both sides to firmly secure the shield in its place. You will hear a click sound when it gets installed properly and shouldn’t come out easily.
Click to enlarge
Place the motherboard inside the case aligning its screw holes perfectly to the standoffs inside the case while gently sliding its I/O ports inside the I/O shield. Now use the #6-32 UNC screws and mount them one by one to populate all the standoffs to firmly attach the motherboard to the case.
Never use other screws except for the mentioned ones or you will face some serious difficulties in installing and taking out the motherboard. Also, it’s super important to use a magnetic screwdriver at this time to recollect the screws if they accidentally fall in the corners.
Click to enlarge
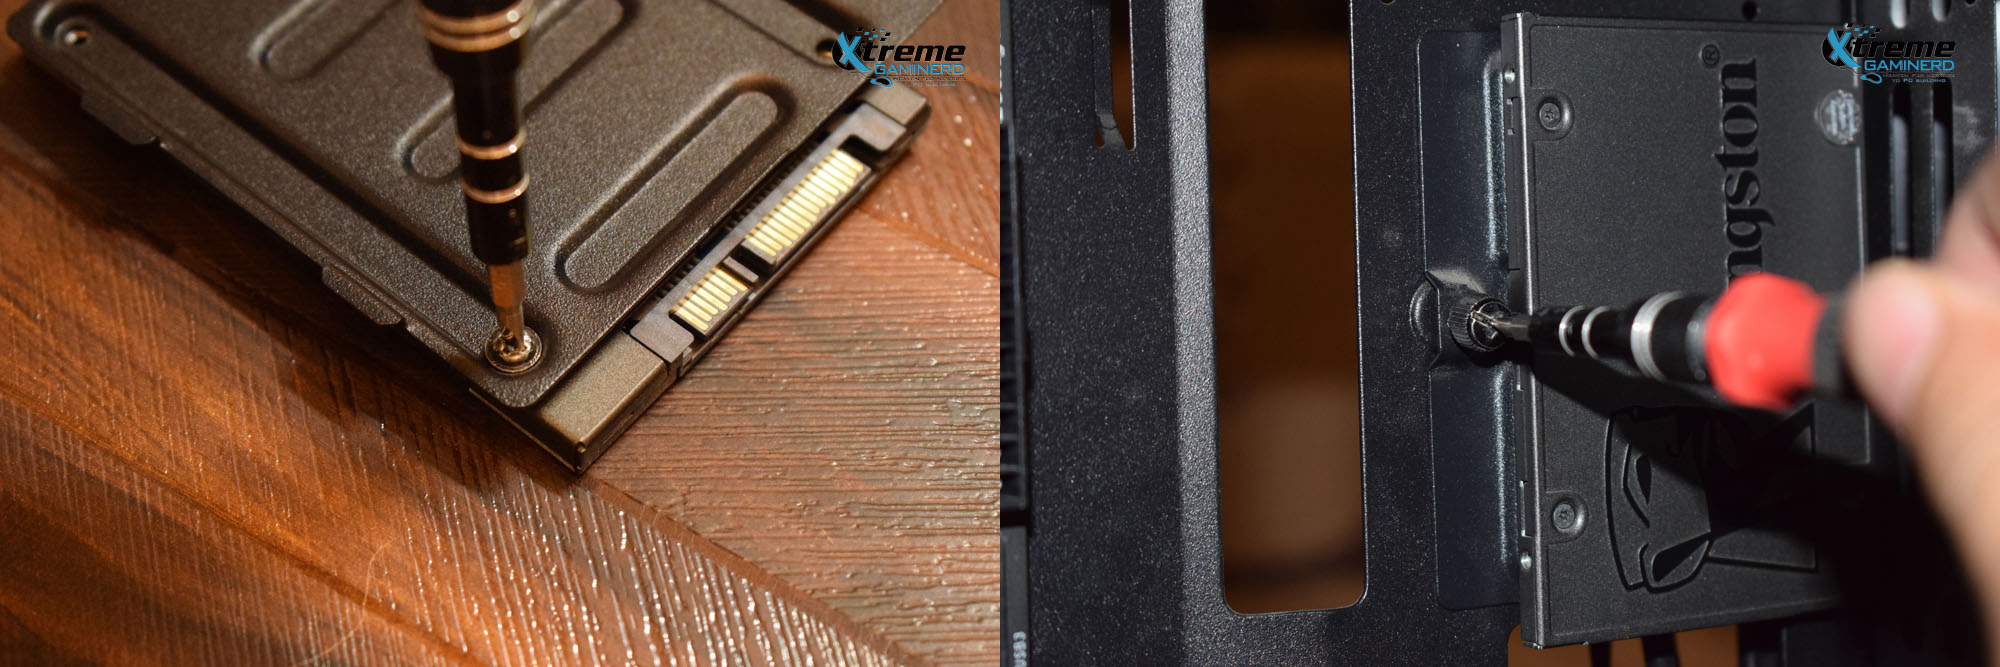
To install your SSD, remove the SSD bay from your case and put the M3 screws in all four screw holes as shown above. Now put the bay back into the case where it was attached before and tighten the thumb screw to firmly attach the SSD.
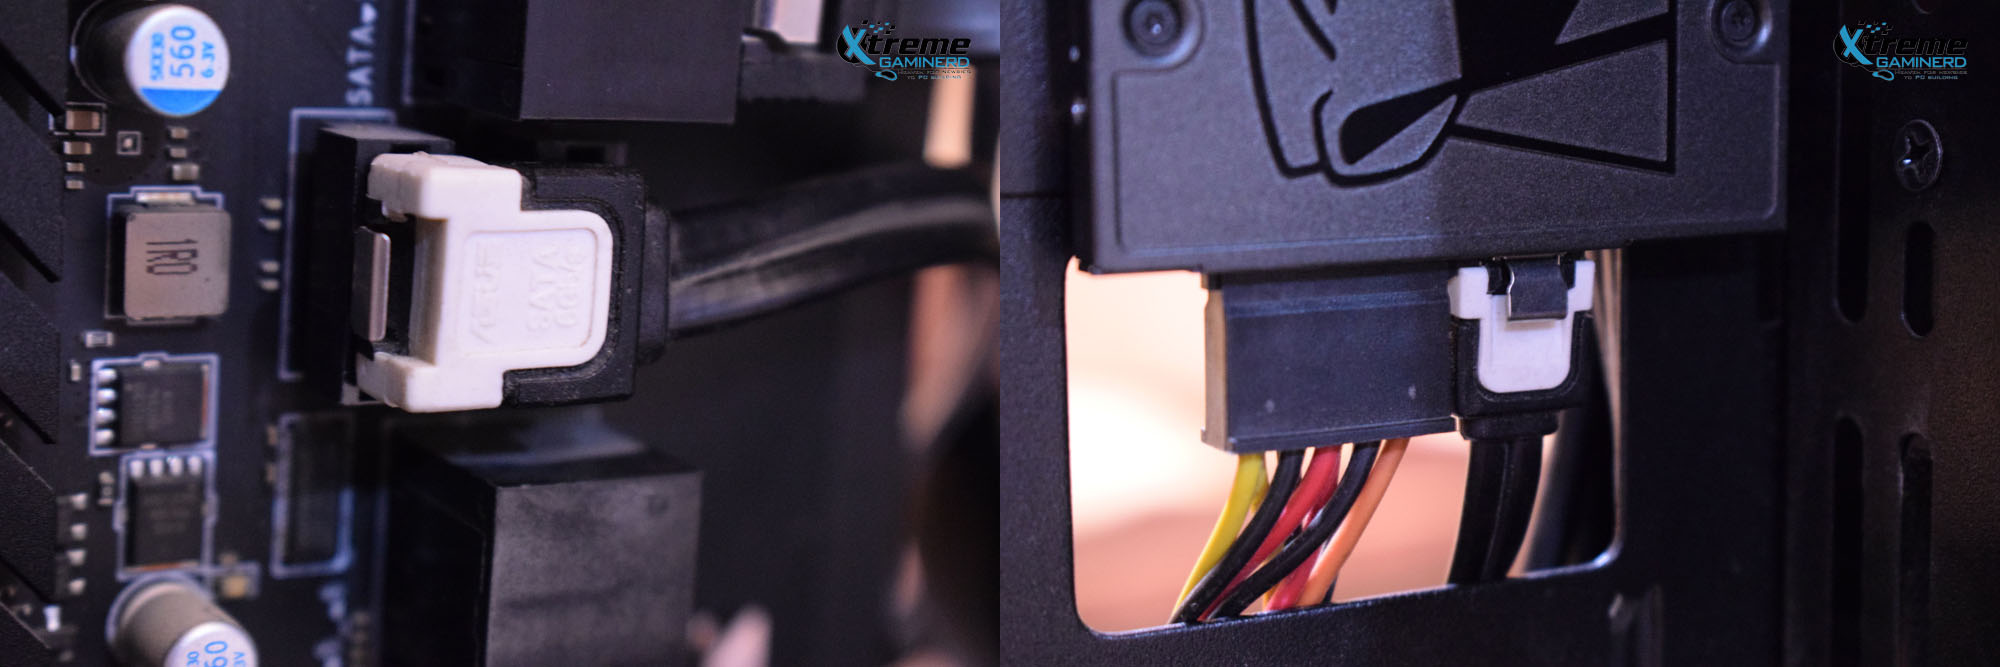
Click to enlarge
Connect one side of the SATA cable to one of the motherboard’s SATA ports and the other side to the SSD. Take the 15-pin SATA power connector cable from your power supply and connect it to the power port on your SSD.
It’s recommended that you connect the SATA cable from your primary SSD to the motherboard on the very first port if you are using multiple storage drives. This detects the first SATA drive as your main boot drive by default for a faster boot.
Click to enlarge
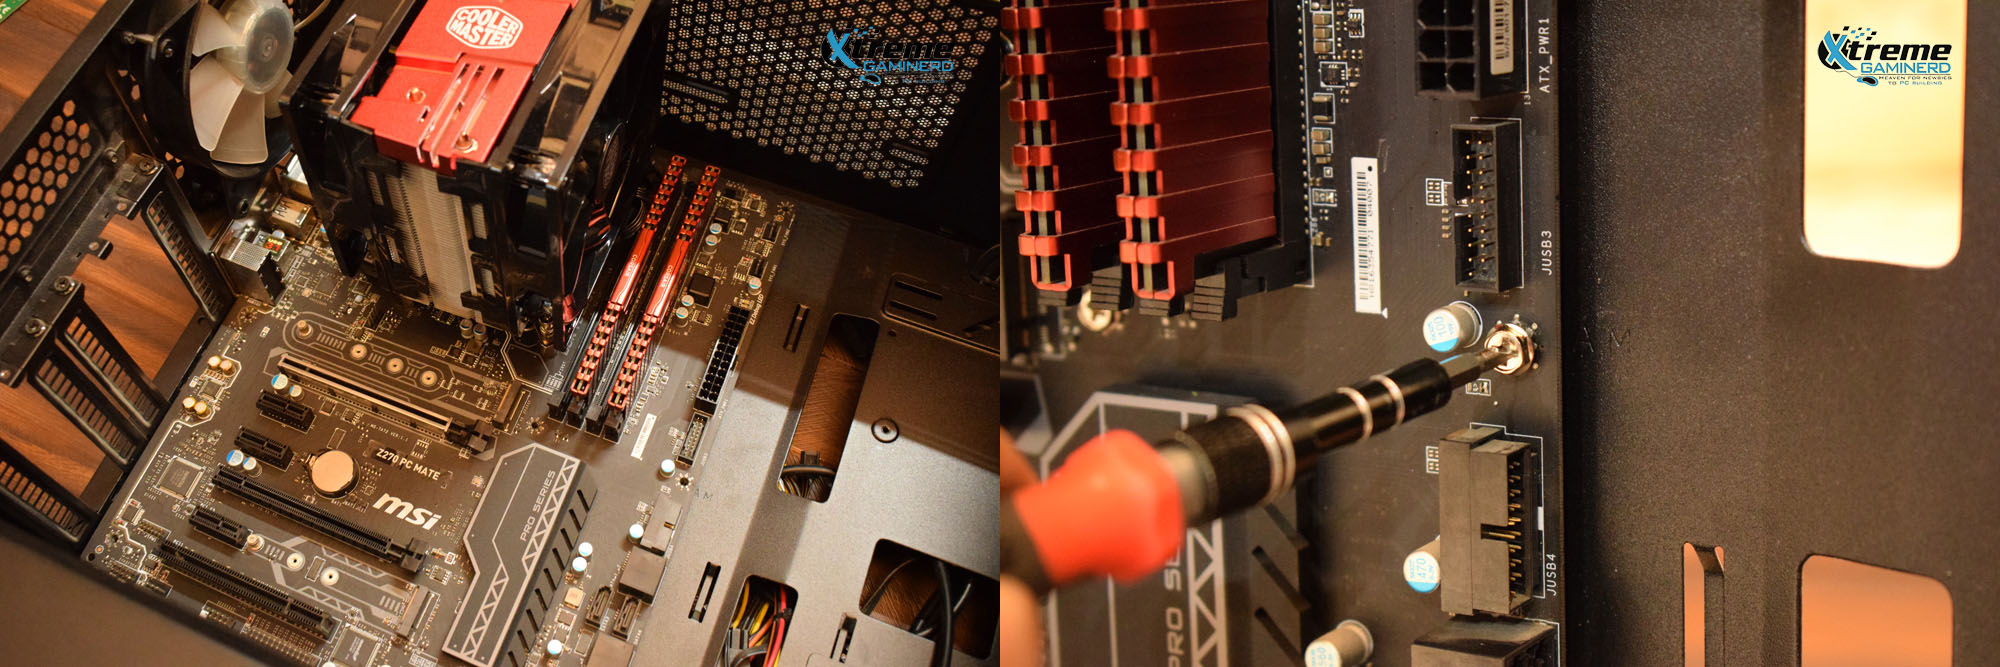
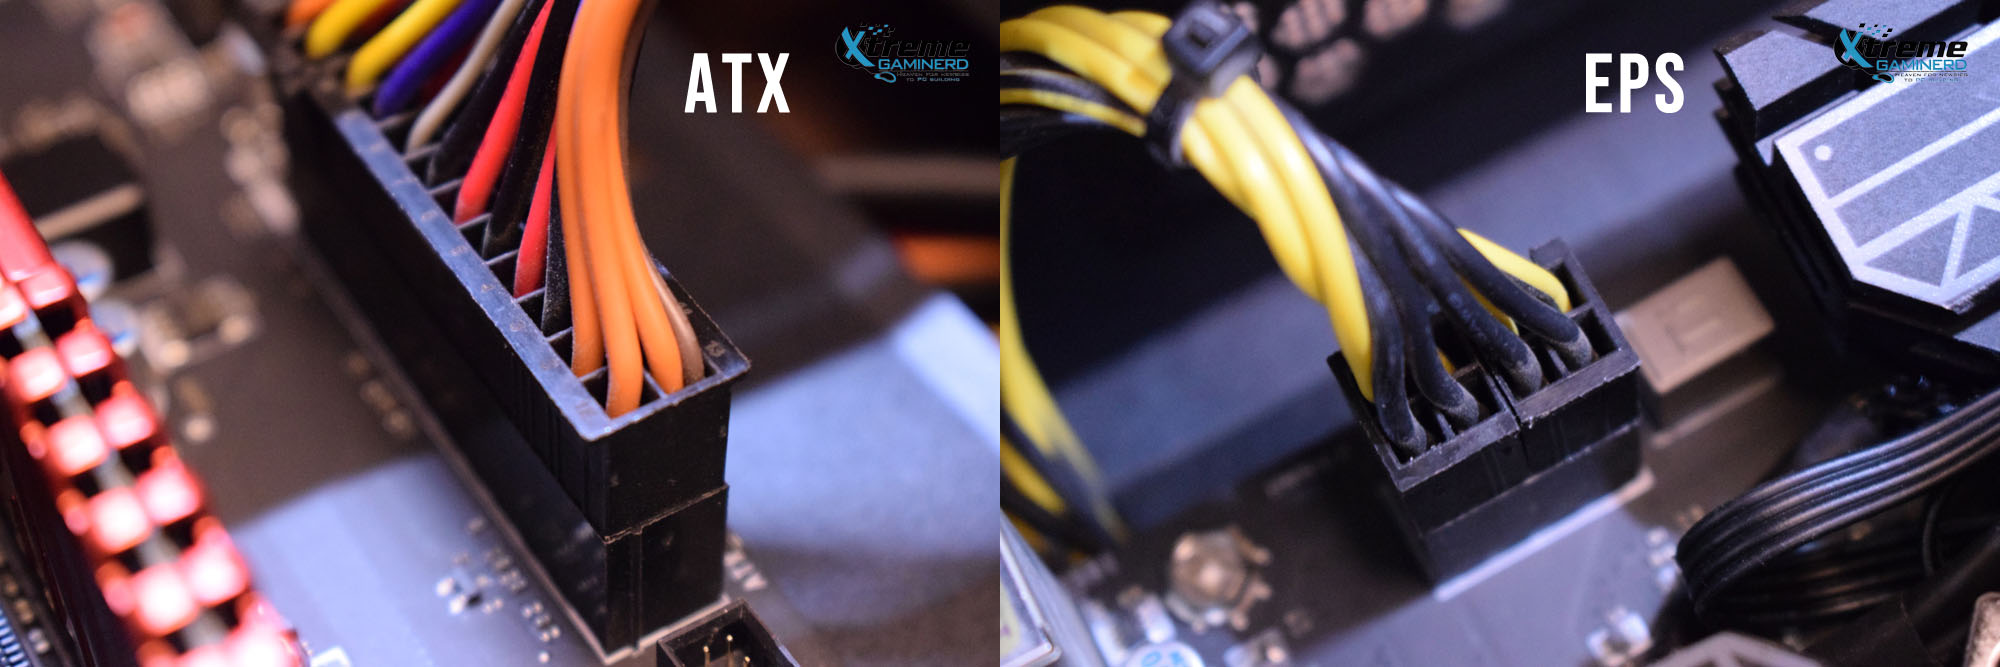
It’s time to connect all the important cables. Start with the bigger ones. Your power supply will have a single 24-pin ATX power cable and a 4/4+4-pin EPS power cable. While the 24-pin power connector will supply the power to your motherboard, the EPS power connector will feed the power to your CPU through the VRM.
Each of these connectors will have a plastic clip on one side that lets you know the correct orientation for the cable connection and the connectors can only connect one way.
Insert the 24-pin connector into the 24-pin port situated on the right of the motherboard. It will take a good amount of pressure to fully secure the connector. Make sure it is all the way in and the clip should be holding on to the port properly.
The EPS connector has a similar process. Some motherboards come with 4 or 8-pin EPS ports and are situated on the top left corner of the motherboard PCB. Simply connect the connectors aligning their plastic clips to the plastic latch of the motherboard EPS ports.
Click to enlarge
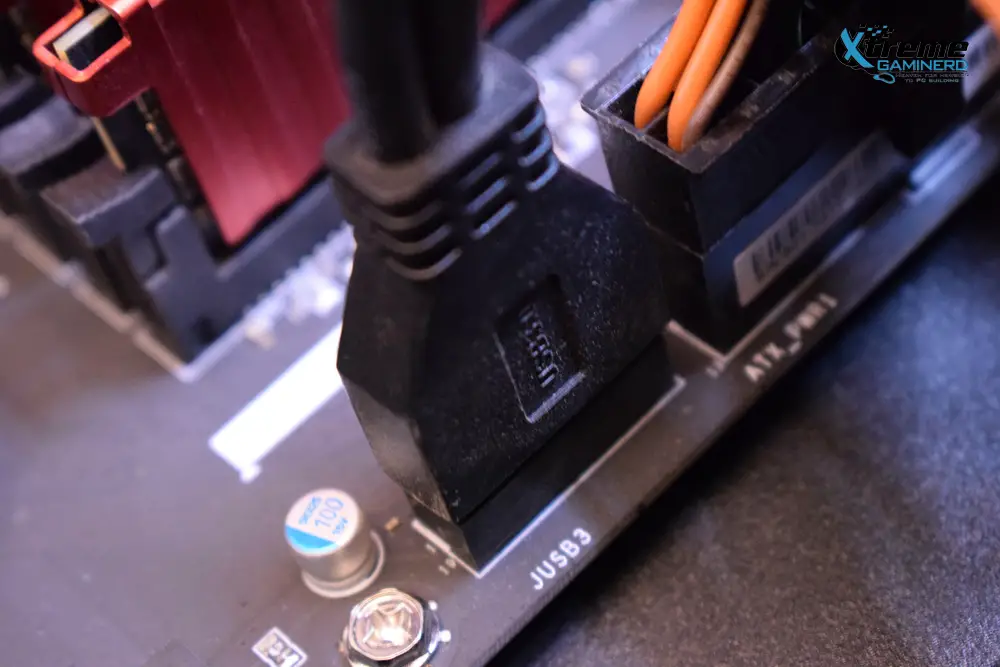
Most cases today come with a USB 3.0 front panel connector. Some may come with both USB 2.0 and 3.0 connector cables. USB 3.0 front panel header may be present either on the right or bottom of the motherboard and contains 19 pins with a notch on one side.
Gently align the front panel connector to the USB 3.0 port on the motherboard and insert the connector into the port till it’s fully inside. There won’t be any clicking sound and the connector can be easily taken off just by pulling backwards.
Click to enlarge
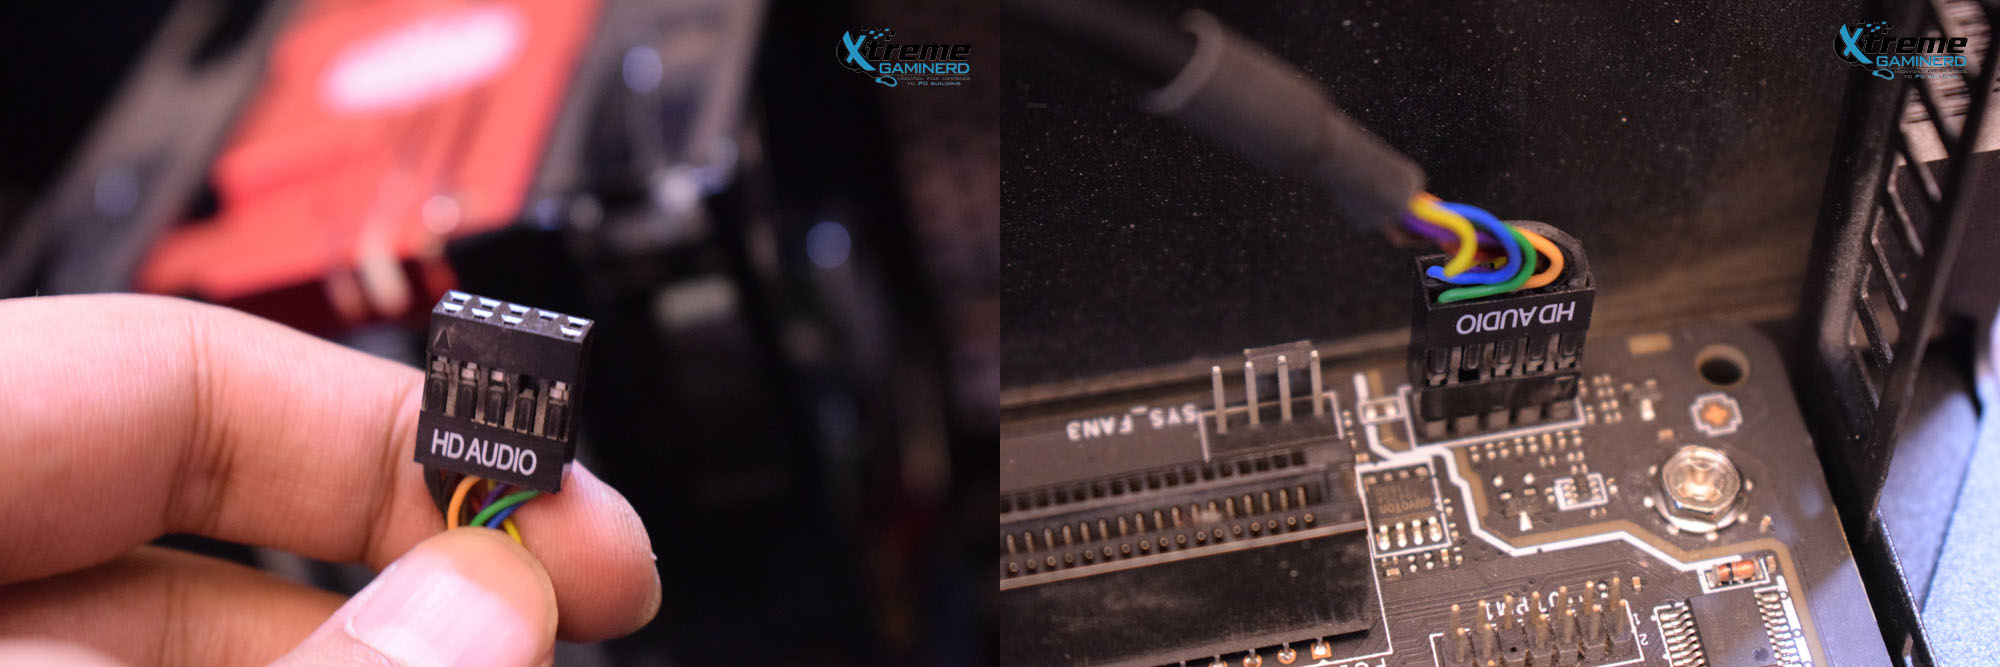
Your case will also have an HD Audio connector cable that allows you to connect a headset to the front panel 3.5mm jack. The connector has 9 pin holes and one pinhole is missing in one row.
Simply align the connector with the HD Audio header on the motherboard that has the same pin sequence and insert the connector till the pins are fully inside. Most motherboards will have an “HD Audio” label under the port that makes it easier to identify the header and it will be generally present on the bottom left corner of the motherboard.
Click to enlarge
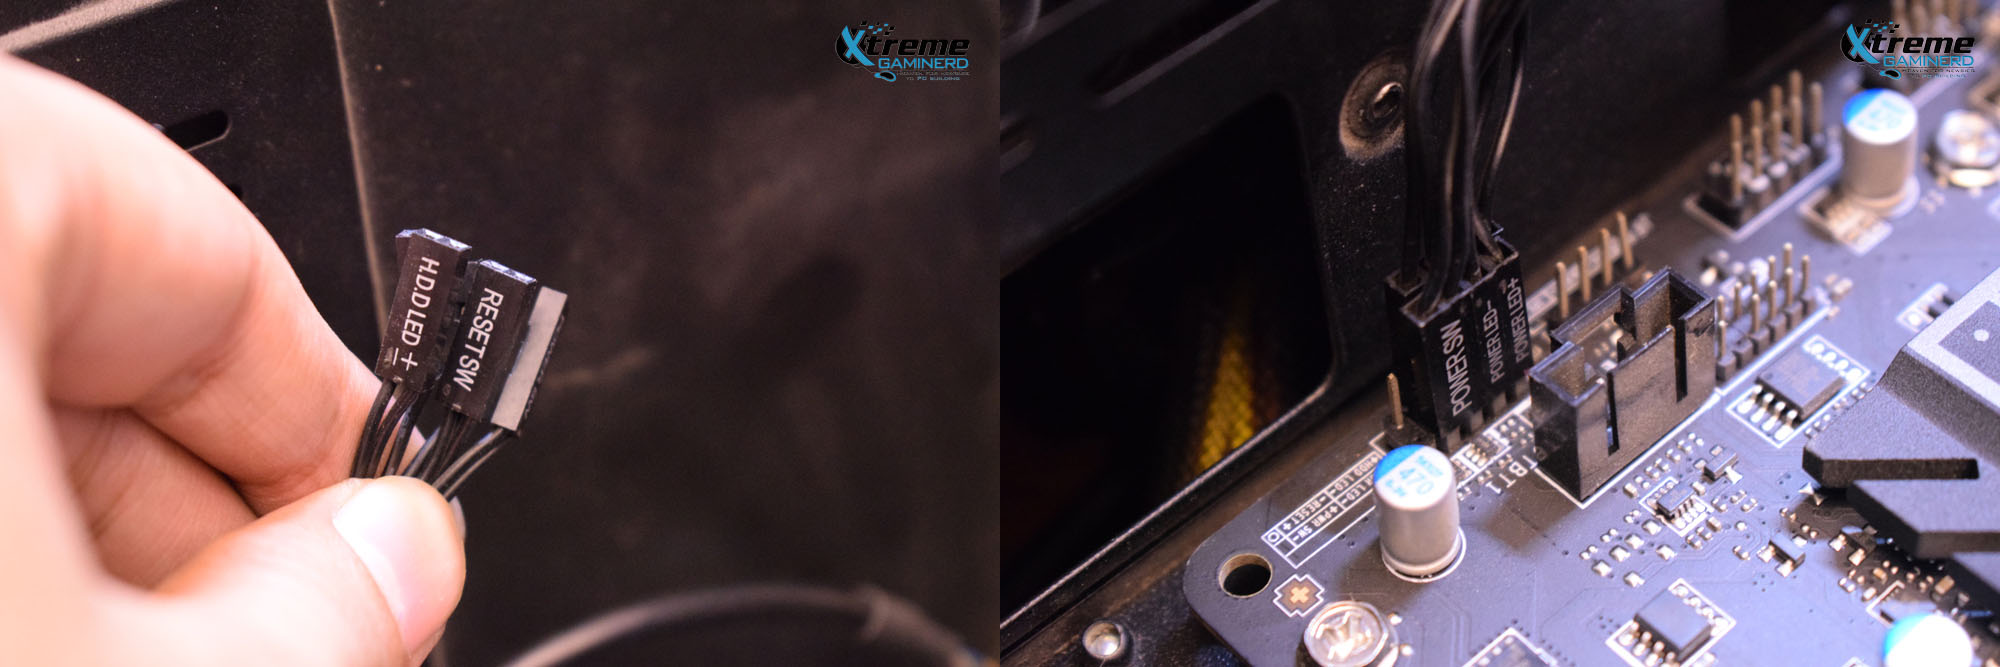
Click to enlarge
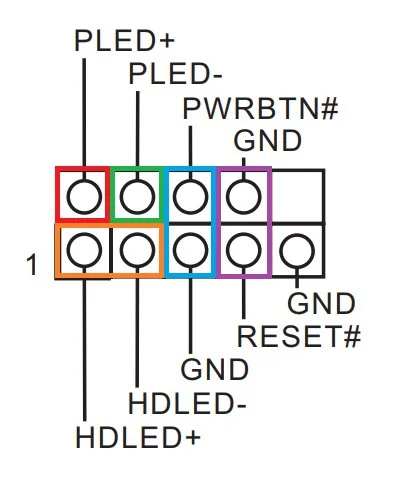
The front panel connectors include Reset, Power, HDD LED, and Power LED connectors. There is a universal way to connect these cables as shown in the diagram above. You can start with any connector but it is better to continue from only one side.
Remember that the 9th pin in second row will be left not-connected and only the 8-pins will be populated.
Use this diagram to connect all the connectors and be careful about the “+” and “-” symbols on the connectors. While connecting them in any direction won’t hurt your motherboard, the connections may not work if you don’t use the right orientation.
Click to enlarge
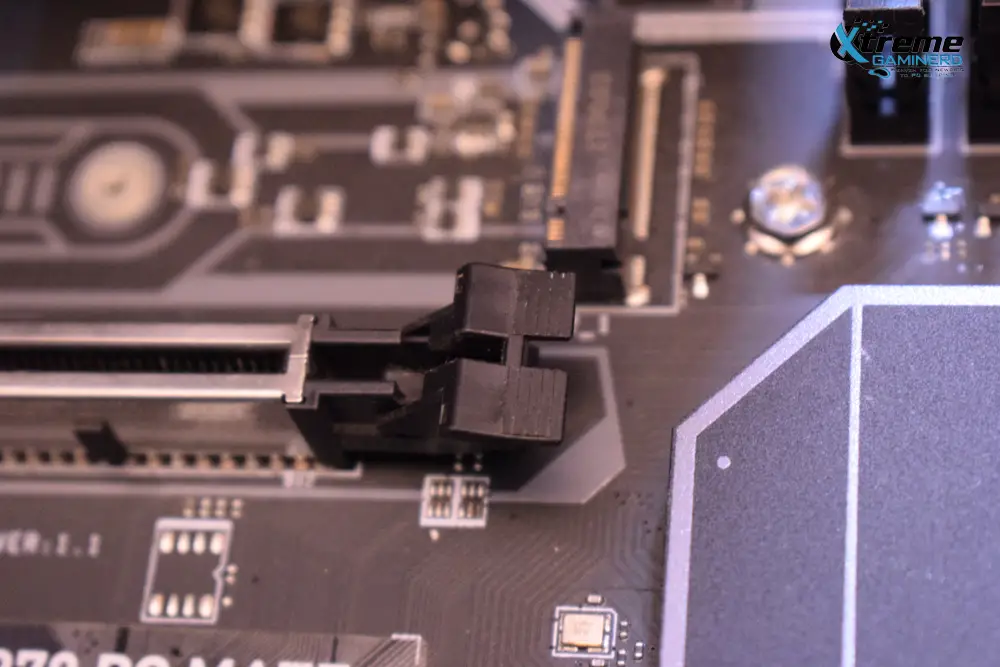
Every modern motherboard comes with at least 1x PCI-E x16 slot and to install your graphics card, you will need to press the plastic latch present at the right end of the PCI-E x16 slot to unlock the slot. This will enable the insertion of GPU pins into the slot.
Note- It is always recommended to install the GPU after the wiring process because connecting the front panel connectors becomes super difficult after you install a GPU.
Click to enlarge
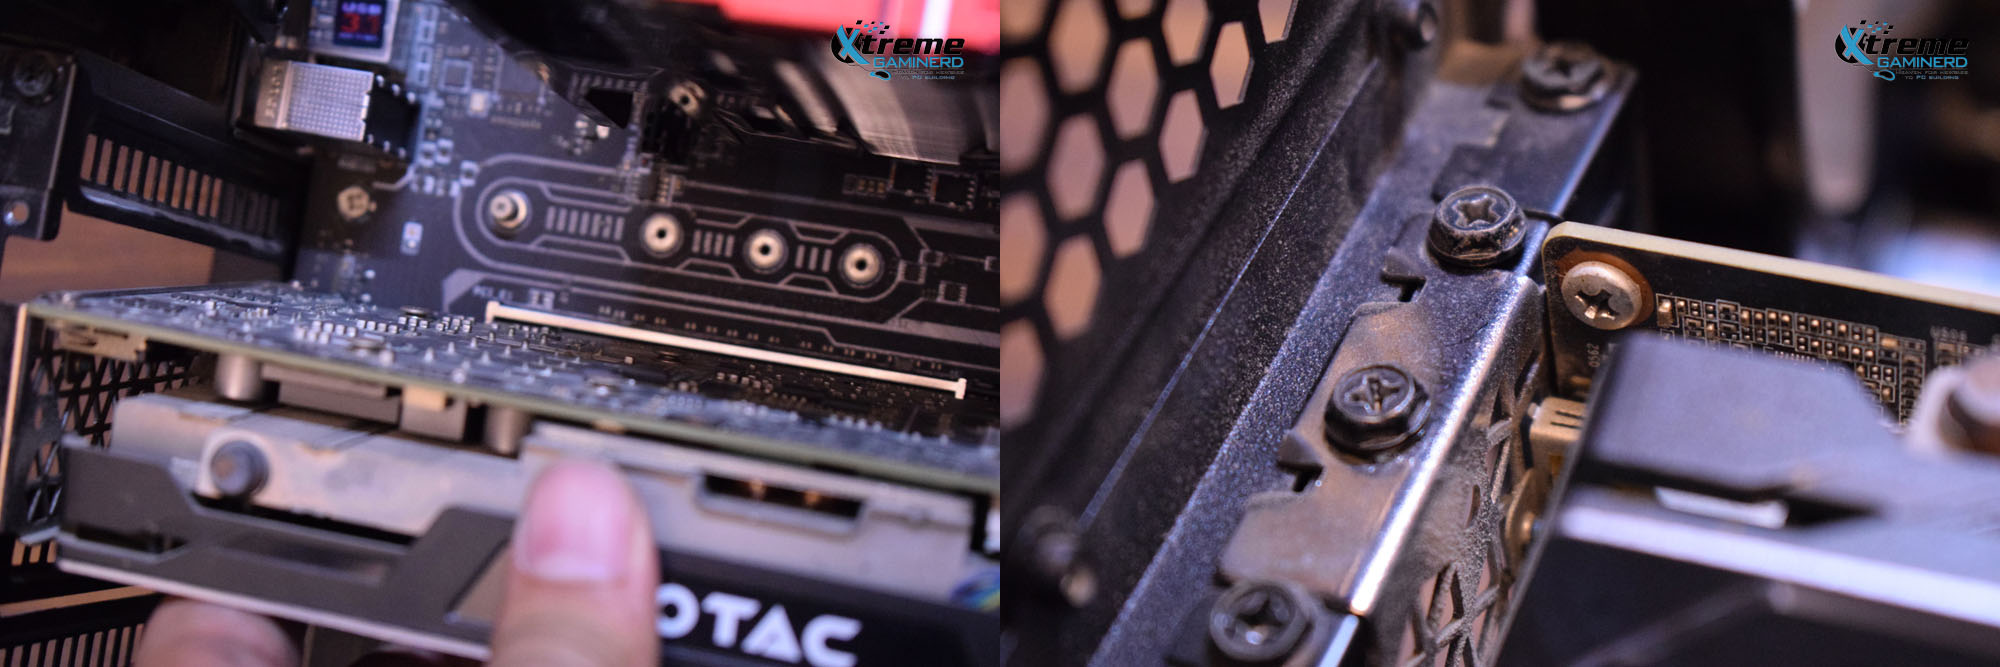
Before you put the GPU into the slot, remove the expansion slot covers from the case to allow the exposure of GPU I/O. Depending upon the width of your GPU I/O area, you will need to remove 1-2 expansion slot covers.
Now align the GPU to the PCI-E x16 slot which is easier to do once you find out a small plastic divider on the slot that aligns with the GPU pins cutout. Apply some pressure till you hear the click sound of the plastic clip on the PCI-E x16 slot confirming the installation of the GPU.
Now use the #6-32 UNC screws to secure the GPU in one place and to avoid any wobble.
Click to enlarge
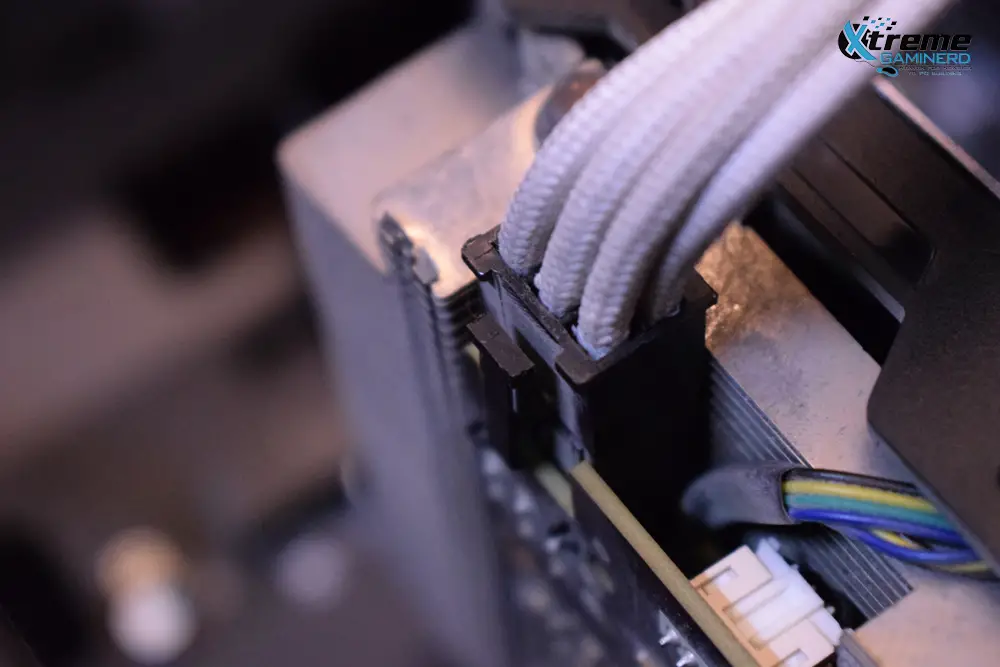
Now, grab the PCI-E connector cable from your PSU and check how the number of PCI-E ports on your GPU. Typically, it will range from 6-pin to 3x 8-pins depending on how powerful your GPU is.
The connectors from your PSU will have a plastic clip on one side to secure the connection to the GPU ports. Simply insert the PSU cable connectors to your GPU ports till fully inside.
Note- PSUs may come with several PCI-E connectors in a different combination of 6, 6+2, and 8-pin connectors. You can use 6+2 in place of 8-pin connectors and vice versa.
Click to enlarge
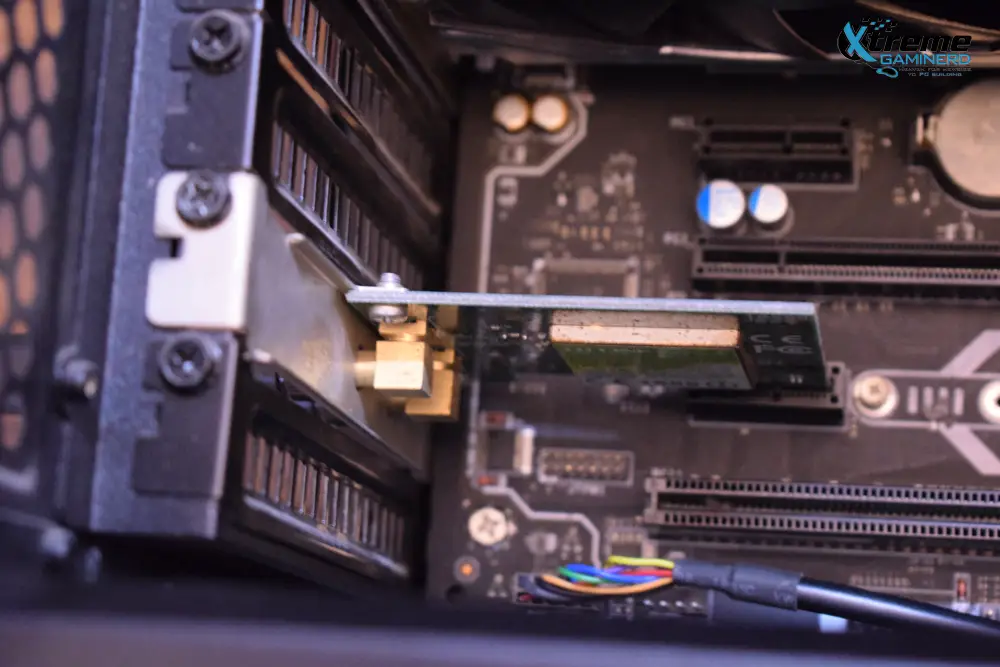
Installing an expansion card like a PCI-E Wifi card is very easy. You need to remove one expansion slot cover from your case just like you did when you installed the GPU.
Insert the Wifi card into the smaller PCI-E x1 slot and secure the card with one #6-32 UNC screw as shown in the image above. Now you can connect the antennas at the back by screwing them into the antenna threads.
Click to enlarge
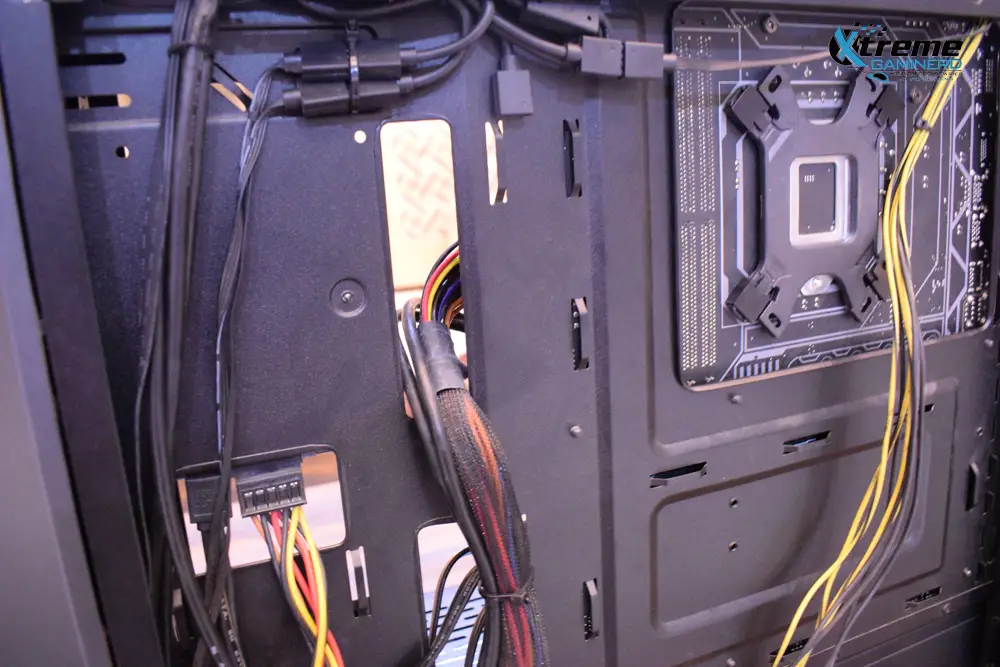
Use some zip ties after you have connected all the cables. It’s recommended to use a few zip ties to secure the cables, especially the ATX one to ease putting back the back panel without any force. Make sure that you evenly spread the thicker cables and fasten them together with 1-3 zip ties(as per requirement).
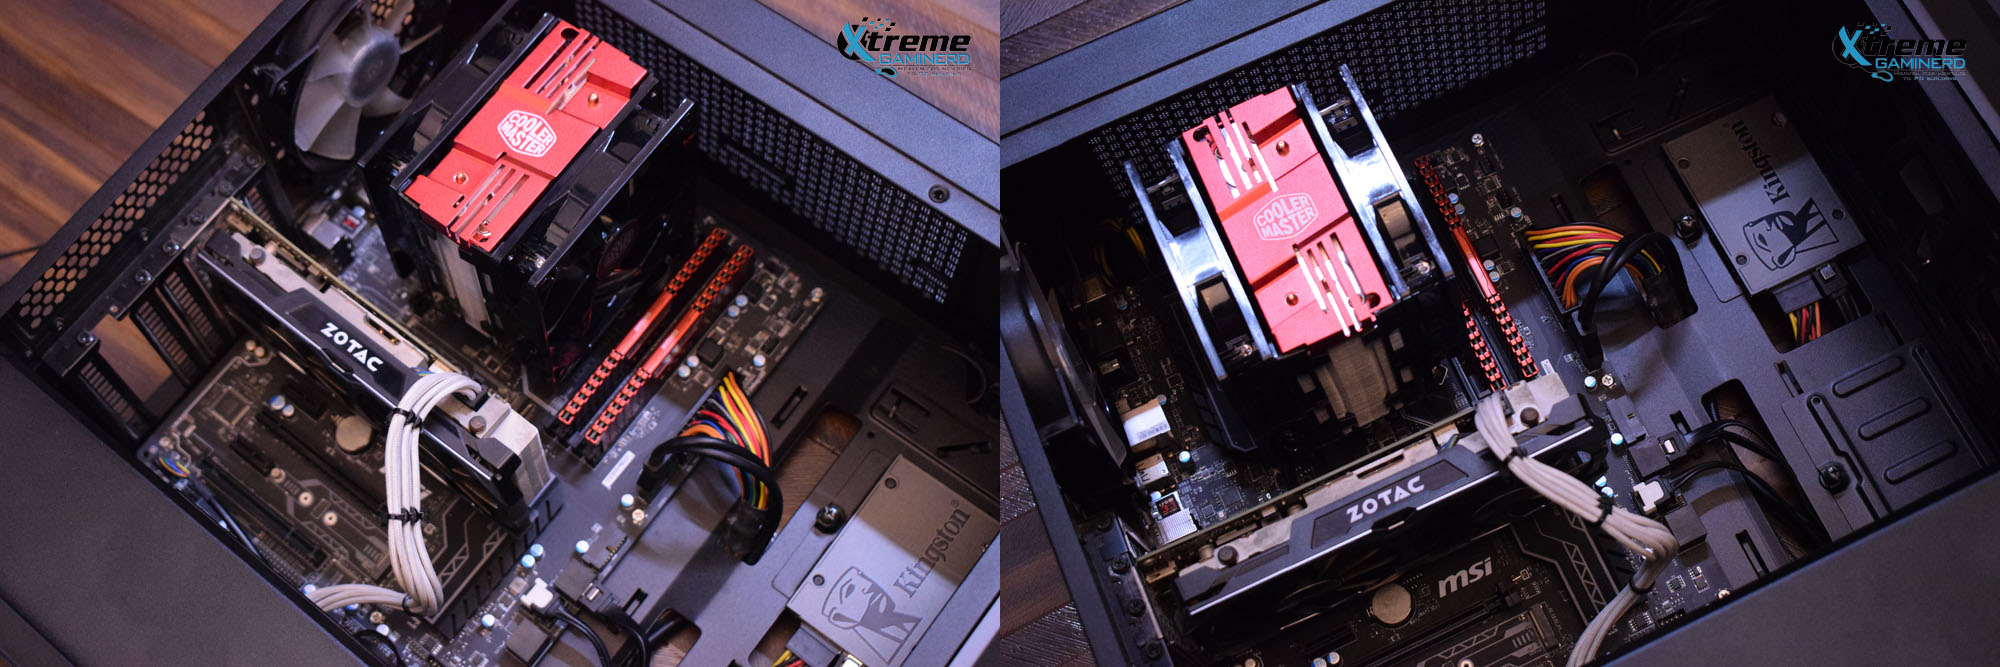
Click to enlarge
Your build is now complete and you can put back the side panel to get started with the boot and OS installation.
While Windows 11 is already out for a while, Windows 10 is still much better for any gaming PC. There are a couple of ways through which you can install Windows 10. The best way is to download Windows 10 from Microsoft’s official Windows page. Downloading from 3rd party sites is highly discouraged as those OS might contain malware.
You will need a USB drive to burn the ISO image of Windows 10 and you can use either Microsoft’s official media creation tool or a 3rd party software like Rufus for this purpose. Windows 10 can be installed for absolutely free but you will have limited customizability.
Windows 10 Home costs around $139 from the Microsoft store but we recommend getting a genuine copy of Windows from stores like Kinguin which provides it for $20-$25. You will need that key to unlock the full potential of your OS.
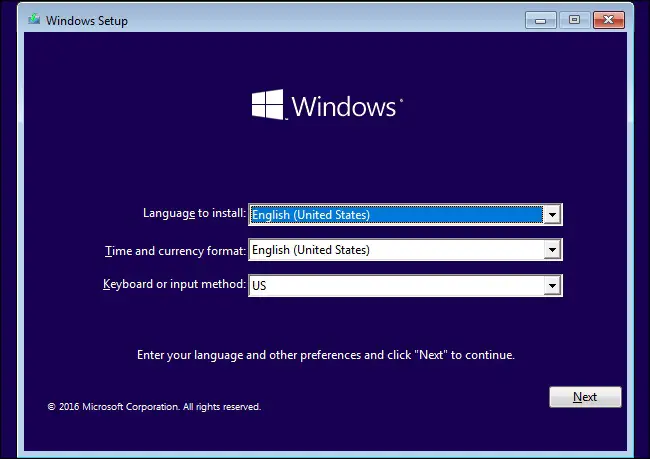
After you insert the bootable USB stick into your computer, you will have the follow the instructions to install a fresh copy of Windows 10 on your system. This is easy, but make sure you create a few partitions where the C partition is your primary one and the other can be used for storing games and other files.
Make sure you have good enough space on your C drive because the majority of your applications will be installed there. Also, format each partition drive in the Windows setup process to avoid any problems later.
Lastly, You can either put your license key at the time of installation or you can skip that for later. Your Windows 10 installation can take somewhere between 30 minutes to an hour depending on your PC configuration.