Overclocking a graphics card is fun and we all know how good MSI Afterburner is in terms of controlling various functions of graphics cards. Controlling the fan is among them.
There are a couple of ways to change the fan speed of your GPU from this software and if you are a newbie to this software, you should take a look at the following tutorial to master controlling your GPU fan speed in a couple of minutes.
This will be very helpful in controlling the graphics card temperature which may result in better long time performance.
The Basics
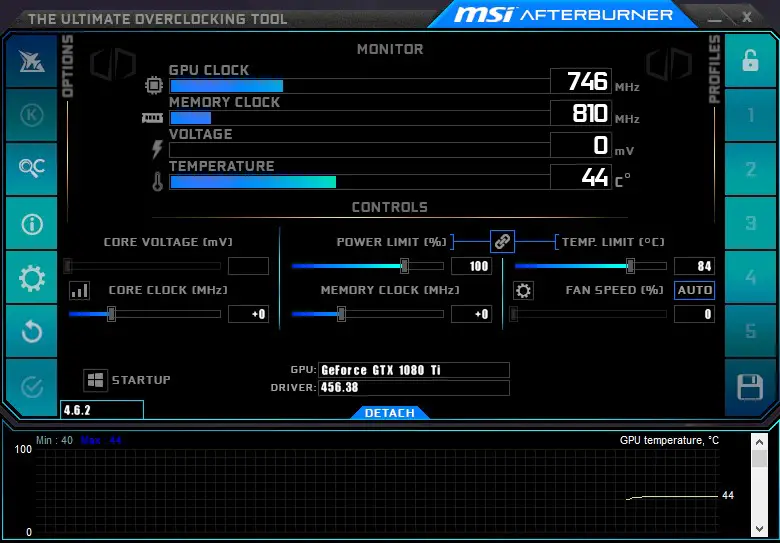
Start by installing MSI Afterburner from the official MSI website. If you have already installed then Open the software you will see a lot of options to monitor your graphics cards. From here you can check the current core and memory clock speeds as well as you can know about the temperature and GPU usage.
How to Check The Graphs
Scroll down in the graphs and you will find the GPU fan speed where you will get real-time info on fan speed. 0 here means that your GPU fan/fans are stopped and 100 means the max fan speed.
A fan speed bar is also available in the main interface where you will find the options to tweak the fan settings.
How To Change Fan Speed
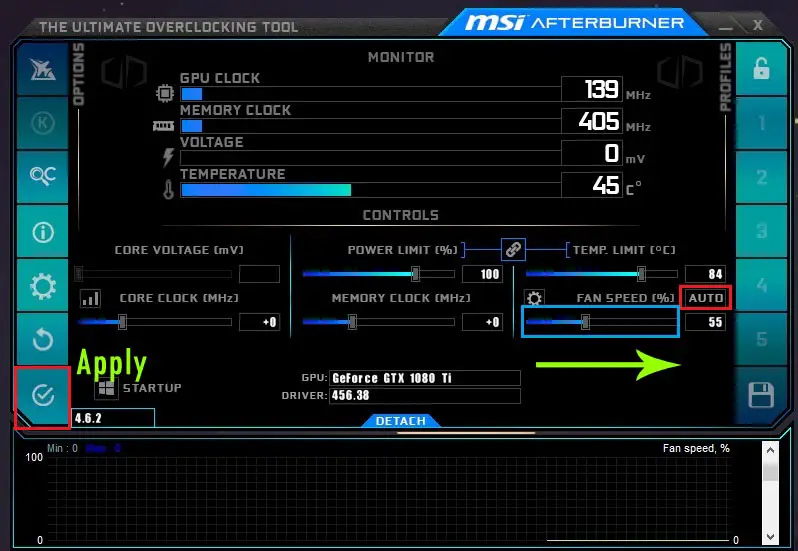
Your fan speed will be set on Auto by default and if you click on it you will be able to manually increase the fan speed. This is the very basic method of changing the fan speed.
You just have to slide the point on your fan speed bar and hit apply to make the changes saved. The fans will spin at a fixed speed regardless of your graphics card temperature. Taking the fan speed to 100% will increase the noise so, you will have to test out whether a particular fan speed is appropriate for your working area or not.
Related: How To Use MSI Afterburner- A To Z Guide
How To Use The Fan Curve
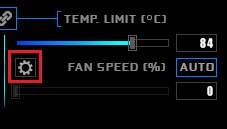
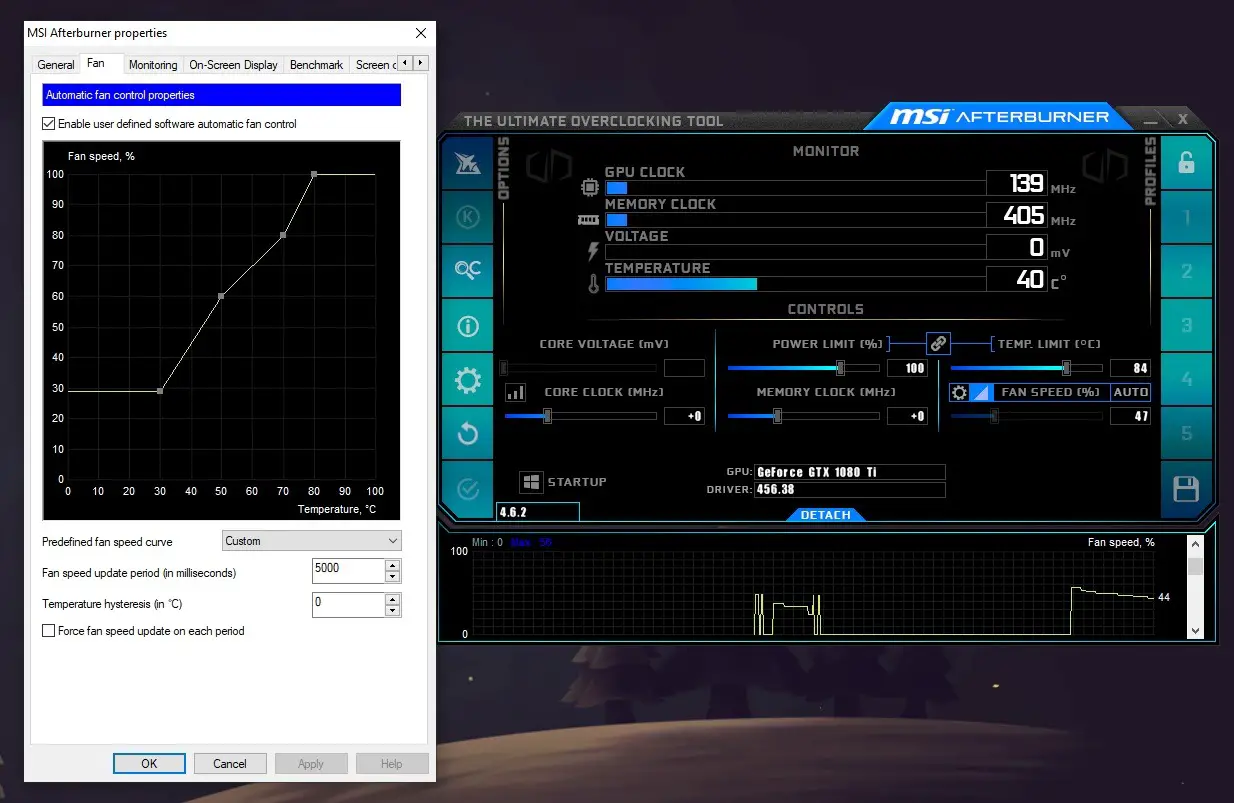
To get into the Advanced mode for controlling fan speed, click on the settings option nearby the Fan speed bar or you can get into the advanced mode through the big settings button also.
Now go to the Fan tab and check “enable user defined software automatic fan control“. This will let you tweak the fan curve for various conditions.

The graph here represents Temperature vs Fan speed. There will be a couple of points on the graph line that shows the fan speed at specific temperatures. You can shift those points to left-right or up-down to adjust fan speed according to the temperatures. You can also increase the points by clicking two times anywhere on the line.
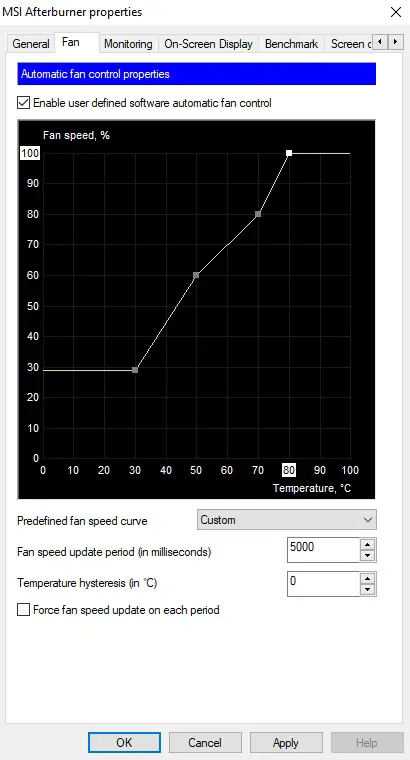
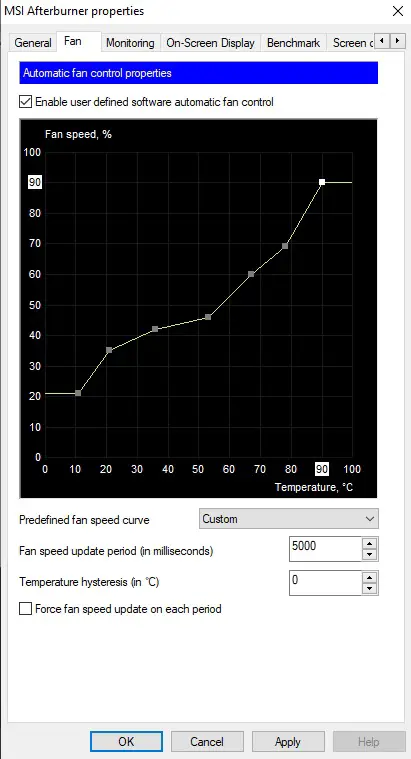
Now after adjusting the fan curve according to your needs, hit apply.
Monitoring
Step 5: Check the initial GPU temperature and fan speed to see if it matches the fan curve
Stress Testing
Step 6: Install Furmark for the stress test or any other software that can put around 100% load on your graphics card and increase the temperature.
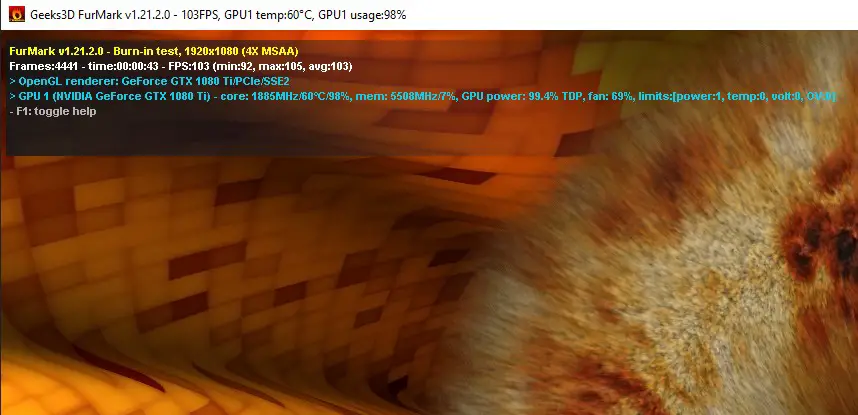
Check the temperature and note the corresponding fan speed in the software. It should be exactly as fixed in the fan curve.
Additionally, you can save a couple of profiles with different fan curves for different scenarios and make your graphics card work according to different conditions.
Related: Display metrics in any game through MSI Afterburner