Cable management is an important part of building a PC for a neat and clean look. Benefits are several. Not only your cables and wires are properly managed but you can actually make your case airflow better. Poor cable management will easily lead to improper airflow in a case, where there are several fans are installed at the front and rear.
But with proper cable management, the air finds its way directly from the front to the rear of the case making cooling more efficient. But that’s only one advantage. The second advantage is easy upgradability. I remember my first build after a while 4-5 years ago which had terrible cable management. Because of that, I struggled to install the second RAM module and even when I would re-assemble the PC, it would easily take me more than an hour with a few components. Here is the pic if you haven’t seen my first PC.

Now tell me, is it looking good? Can I install a Ram stick easily in this? Not even an additional component will be easy to install in this case. So, cable management should be proper if you want easy upgradability.
The third benefit is eliminating any hardware related risk. A poorly cable managed build can lead the cables to enter into CPU heatsink fan or graphics card fans. This will be devastating. Your cables can be cut or your system can crash immediately.
It’s obvious and once it happens, the possibility of changing your hardware is there. The failure of hardware is not guaranteed, but “It” can happen. So, better tuck your cables somewhere else to avoid the risk.
The wrong approach
There are a few things that you should consider before building your PC. Cable management is not something which is only done after connecting and installing every component. Cable management should be planned before starting to put in the components. If you install every component first, then there are several problems which will be posed like that of connecting the front panel headers to the motherboard after installing the graphics card on a Mini-ITX/Micro-ATX motherboard.
Every case is differently made and the cables are routed differently. Do not just take every cable directly to their ports from anywhere and do not tie them in the middle of the case. These are a few wrong approaches one should not practice and for sure it’s something that is common when you build your PC for the first time. If it happens, no problem, try again until you learn the proper way.
6 Best TIPS to master Cable Management:-
1. Use a good case with a proper cable management system
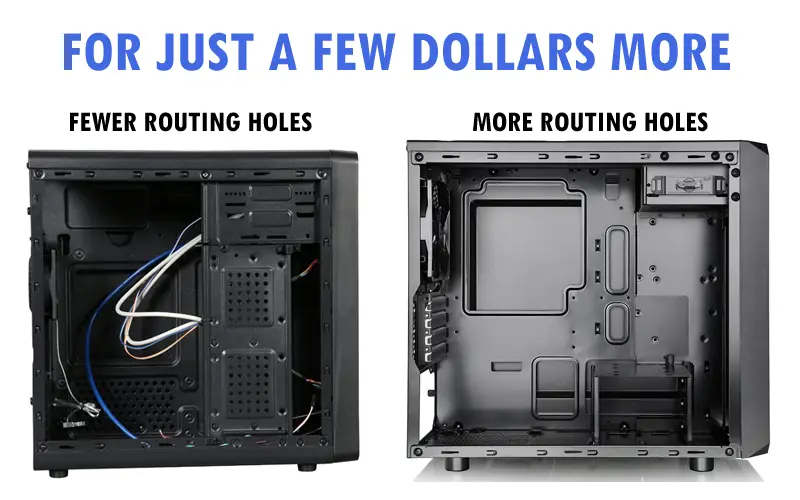
You should always check alternatives for a particular price to see which case has more routing holes. Also, before you go on to do cable management in your case, consider the fact that only the case which already has some cable management features pre-equipped can be used to do cable management and not the one which comes without these features. Generally, a good case will have 3-6 routing holes in the motherboard tray, will have a PSU shroud, and at least a half an inch space behind the motherboard tray and between the side panel.
Get one of these Cable Management Cases to avoid cable clutter!
Some cases may look good to you but the real thing is inside. When you see such cases, don’t forget to check the interior and check for the following 3 things:-
a) The case should have several routing holes all over the motherboard tray for CPU cable, 24 pin cable, Front header cables and SATA cables. But there is another important thing to check. Make sure these holes are big enough for routing your cables. If you think that the ATX 24 pin power cable can not pass through the hole that is near to the motherboard at the right side of tray, then avoid that case. Also, check whether the holes have rubber grommets or not. It will make your cables look cleaner and hide unnecessary space.
b) A PSU shroud is recommended:- If there isn’t any, then go with a case which has PSU installing space at the bottom of the case and not top because there will be several problems with the cable management if the PSU installing space is at the top.
c) The space between the motherboard tray and the side panel should be enough so that the thick 24 pin power cable can be easily routed from the back which will also allow the side panel to be put easily. Look for a case that has this space around half an inch to one inch.
If these are present in your case, then you can follow the following steps.
2. Use every routing hole properly
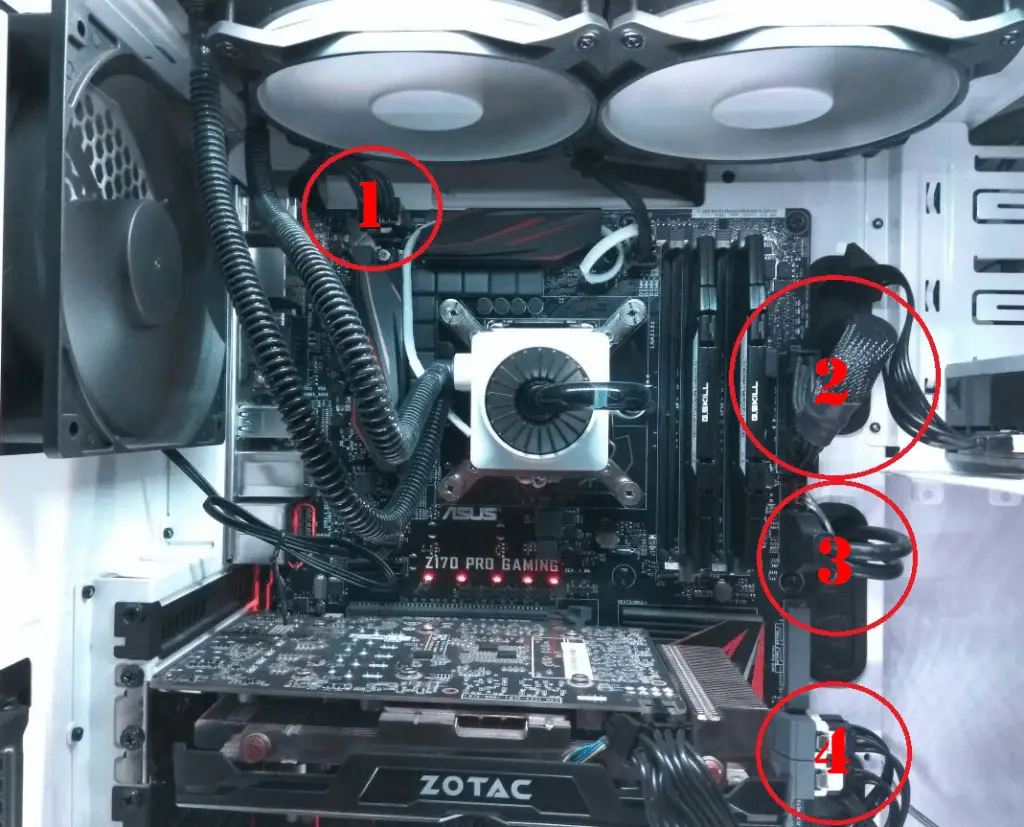
When you route your cables, make sure that you use every hole if possible. The CPU cable, motherboard ATX 24 pin cable, SATA cables, front header cables, all have their ports in different locations on your motherboard. Every motherboard has different positions of one or more ports. But the CPU power port, 24 pin Port and front headers are mostly present in similar locations on every motherboard.
The CPU port will be located at the top-left location of the motherboard(1). So, route the 4(4+4) pin power cable from the back of the case to the top left hole on the motherboard tray. Make sure you have enough length of your cable because some PSU’s fall short in these cases but it will be rare and should not be a thing to be worried about.
The motherboard 24 pin ATX power port will be present at the right side on the motherboard somewhere in the middle(2). Use the nearest routing hole to route the cable from the back of the case to hide the cable properly.
The front header ports and SATA ports will be mostly present on the right bottom of the motherboard, so use the bottom routing hole if present. Or use the nearest routing hole. Other ports like USB 3.0 front header, Audio/USB 2.0 header may be present on the left or right side. So, check which routing hole can be used for them to route them easily. (3) and (4)
3. Tuck everything under PSU shroud or behind the motherboard tray
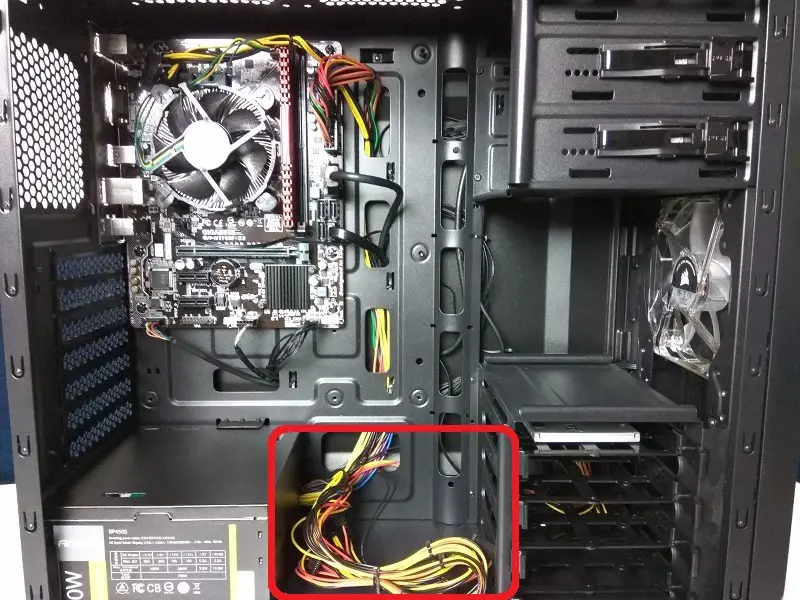
After you connect every cable, it’s time to clean the rest of the stuff. If you have a non-modular power supply(PSU which come with all the cables pre-connected and un-detachable), then there will be some cables left unused and they will probably be SATA power cables or PCI cables. All you have to do is tie them together and tuck them into your PSU shroud. Do not tuck them without tying because they will spread and will look dirty.
Or if you don’t have a PSU shroud, use the space beside your PSU or tuck them behind the motherboard tray if possible. This will hide all of your unused cables.
Related:- Best RGB Power Supplies
4. Use cable sleeves and bundles
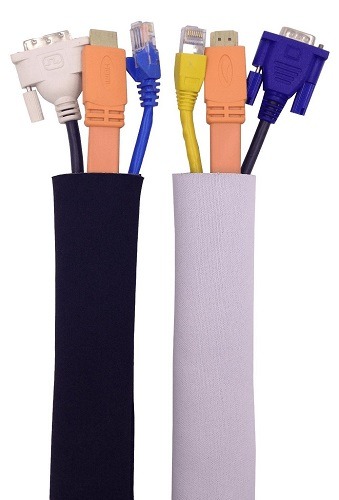
You also use these ones inside your PC if there are a lot of cables.
Cable sleeves and bundles should be used only if you have too many cables going through one area together. This will help you collect them in one place without acquiring so much area. Not only it will look cleaner but will protect them from damage. Some cases, come with straps and cable management cover like that in Corsair 570X. Use them if you don’t have sleeves.
5. Use Zip ties, twist ties and case pass-throughs
Hmm, this one is one of my favourite areas of cable management. It’s easy and is very cost-effective. Buy some cable ties or twist ties to keep the cables together. Generally, your case or motherboard will come with a few of them which will be enough for tying cables together but it’s better to buy some more in case you have too many wires and want to manage the cables even better. Use the cable ties from bottom to top along with all the cables. Use small pass-throughs present in the motherboard tray to fix them at one place.
Twist ties will be temporary and you can untie them anytime if you want to but they will be loose and less effective than the Zip ties. Zip ties will tighten your cables together and can only be removed by a cutter. So, keep a cutter also if you use several Zip ties. I myself use Zip ties more than the twist ties to properly manage the cables together.
Want cables that aren’t ugly and provide super-fast transfer speeds? You can’t go wrong with these USB C Cables!
6. Scatter some cables
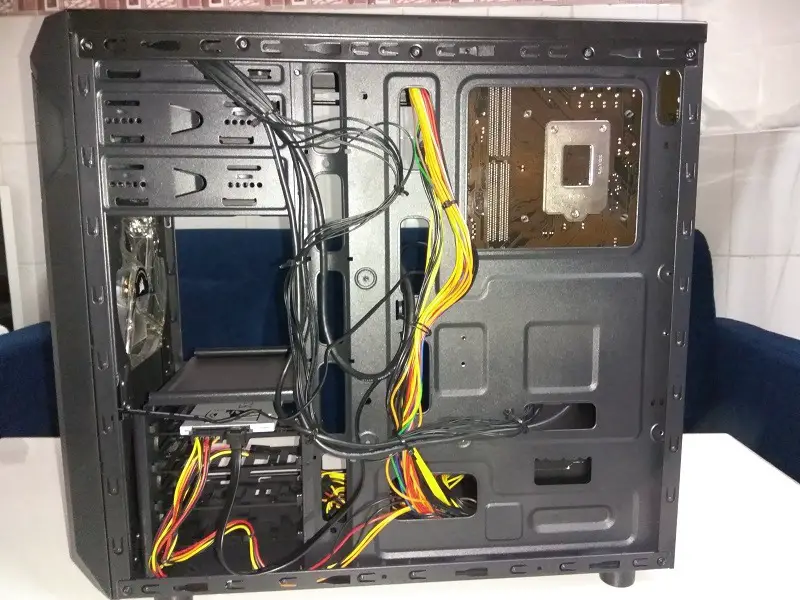
In case you have too many thick cables and there is less space between the motherboard tray and the side panel, then instead of tying them together, spread some of them to easily put the panel back to the case. Keep the 24 pin ATX power cable separate from the other cables because that is the only cable that will probably cause some trouble. Other cables like SATA power cables have several connectors at different places on the cable itself. Make sure you use the connectors according to the length required to reach the hard drive or SSD. Separate these from other cables. The CPU power cable will have a completely different way for reaching the motherboard. So, it won’t pose a problem in putting the side panel back.
Additional tip: – Some motherboards will pose difficulty in the wiring if you install graphics card first. Front panel headers are one of those ports which may be present near to the PCI-Ex 16 slot and this is common in Micro-ATX motherboards and Mini-ITX motherboards. So make sure, that you connect the wires first before installing your graphics card.
