Cooler Master launched this new cooler when the new AM4 platform launched. It’s because of the success of the Cooler Master Hyper 212 EVO, that a solution for the AM4 socket was needed.
So, of course, it also needed some improvement and changes. This cooler is similar but at the same time better in performance and for a little higher price, Let’s see if this cooler can really catch the attention of Am4 platform users.
Specifications
| Product Name | Hyper 212 LED Turbo | ||
| Model number | RR-212TK-16PR-R1 (Black Top Cover) | RR-212TR-16PR-R1 (Red Top Cover) | |
| CPU Socket | Intel® LGA 2066 / 2011-3 / 2011 / 1366 / 1156 / 1155 / 1151 / 1150 / 775 socket AMD® AM4 / AM3+ / AM3 / AM2+ / FM2+ / FM2 / FM1 socket | ||
| Dimensions (L x W x H) | 120 x 108 x 163 mm (4.7 x 4.3 x 6.4″) | ||
| Heat Sink | Dimensions (L x W x H) | 120 x 60 x 160 mm (4.7 x 2.4 x 6.3″) | |
| Material | Aluminum Fins (4 Heat Pipes / Direct Contact) | ||
| Weight | 468g | ||
| Heat Pipes Dimensions | Ø6mm | ||
| Fan | Dimensions (L x W x H) | 120 x 120 x 25 mm (4.7 x 4.7 x 1″) | |
| Speed | 600-1,600 RPM ± 10% | ||
| Airflow | 66.3 CFM ± 10% | ||
| Air Pressure | 1.7 mmH2O ± 10% | ||
| MTTF | 40,000 hours | ||
| Noise Level | 9-31 dBA | ||
| Connector | 4-Pin | ||
| Rated Voltage | 12 VDC | ||
| Rated Current | 0.19 A | ||
| Power Consumption | 2.28 W | ||
| Warranty | 2 years | ||
| EAN Code | 4719512054130 | 4719512054147 | |
| UPC Code | 884102030239 | 884102030246 | |
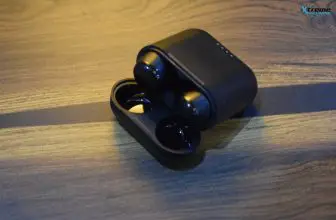
Unboxing
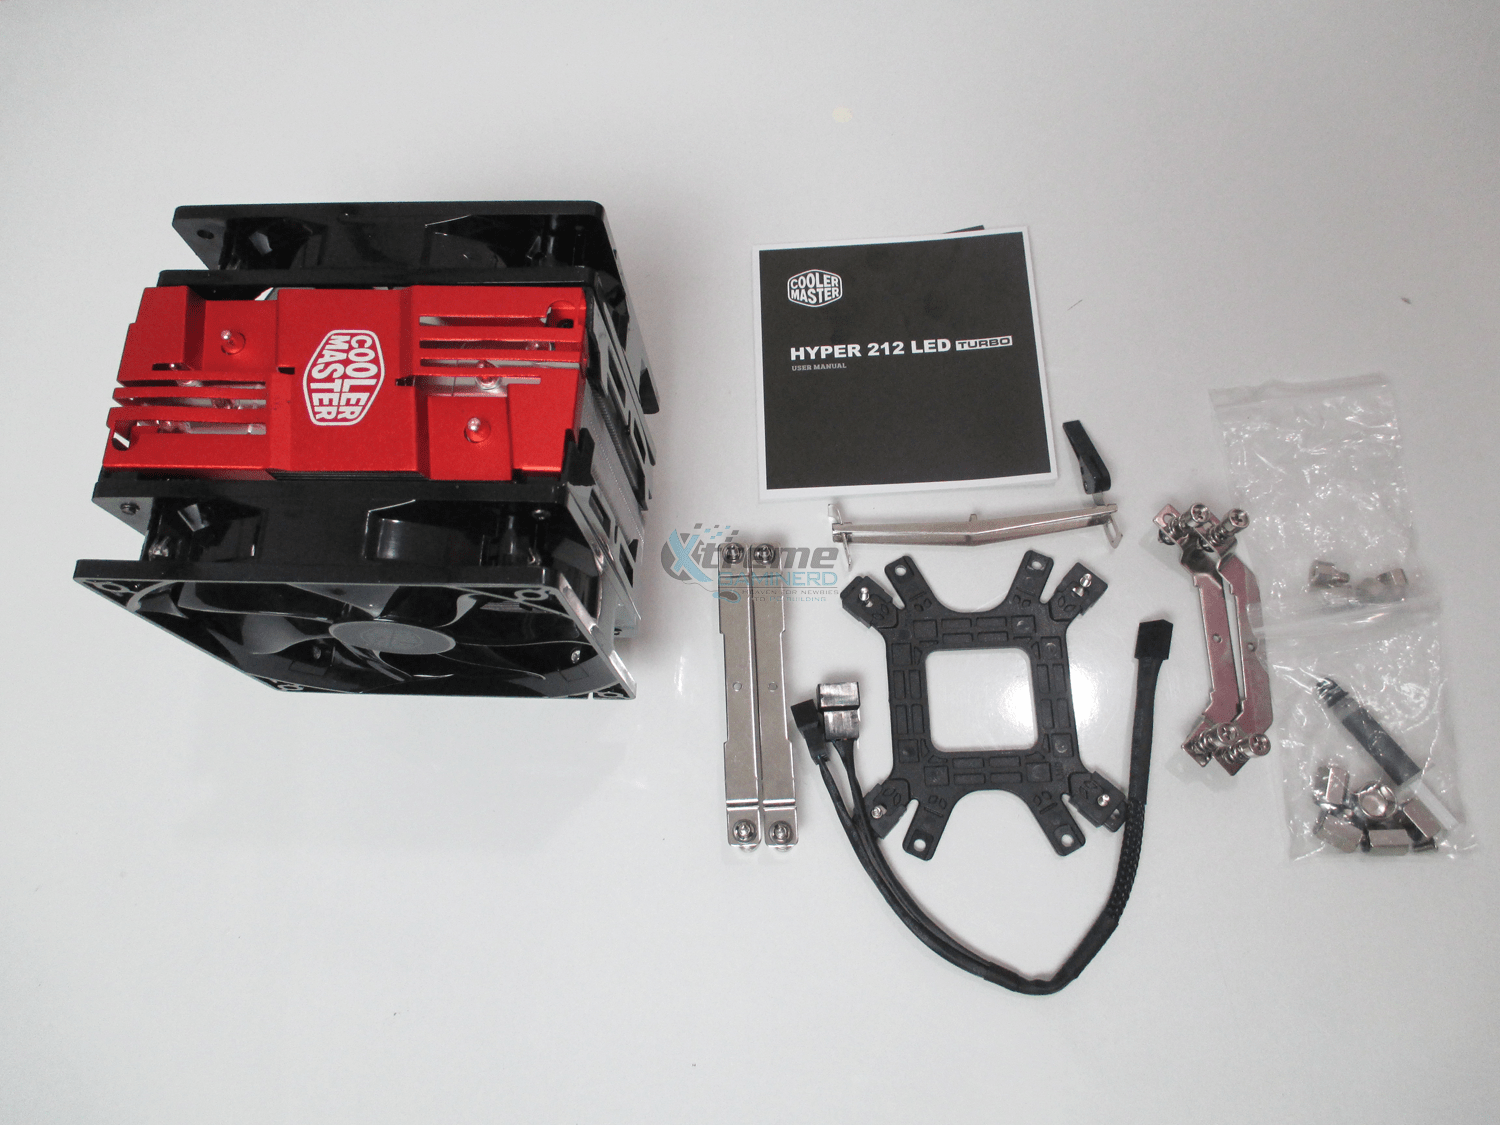
Packaging was just normal and the components were packed properly. The cooler was in a plastic cover with fans pre-installed and there was a separate box for the accessories which is the norm with Cooler Master. Inside the accessories box, there was a single bracket for Intel and AMD AM4 sockets and there were two clips for the Intel socket, 2 for the AM4 socket, and 1 separate traditional clip for previous AMD sockets. The box also came with a small thermal paste tube and all the other screws or nuts were present there for easy installation.
Taking a Closer Look
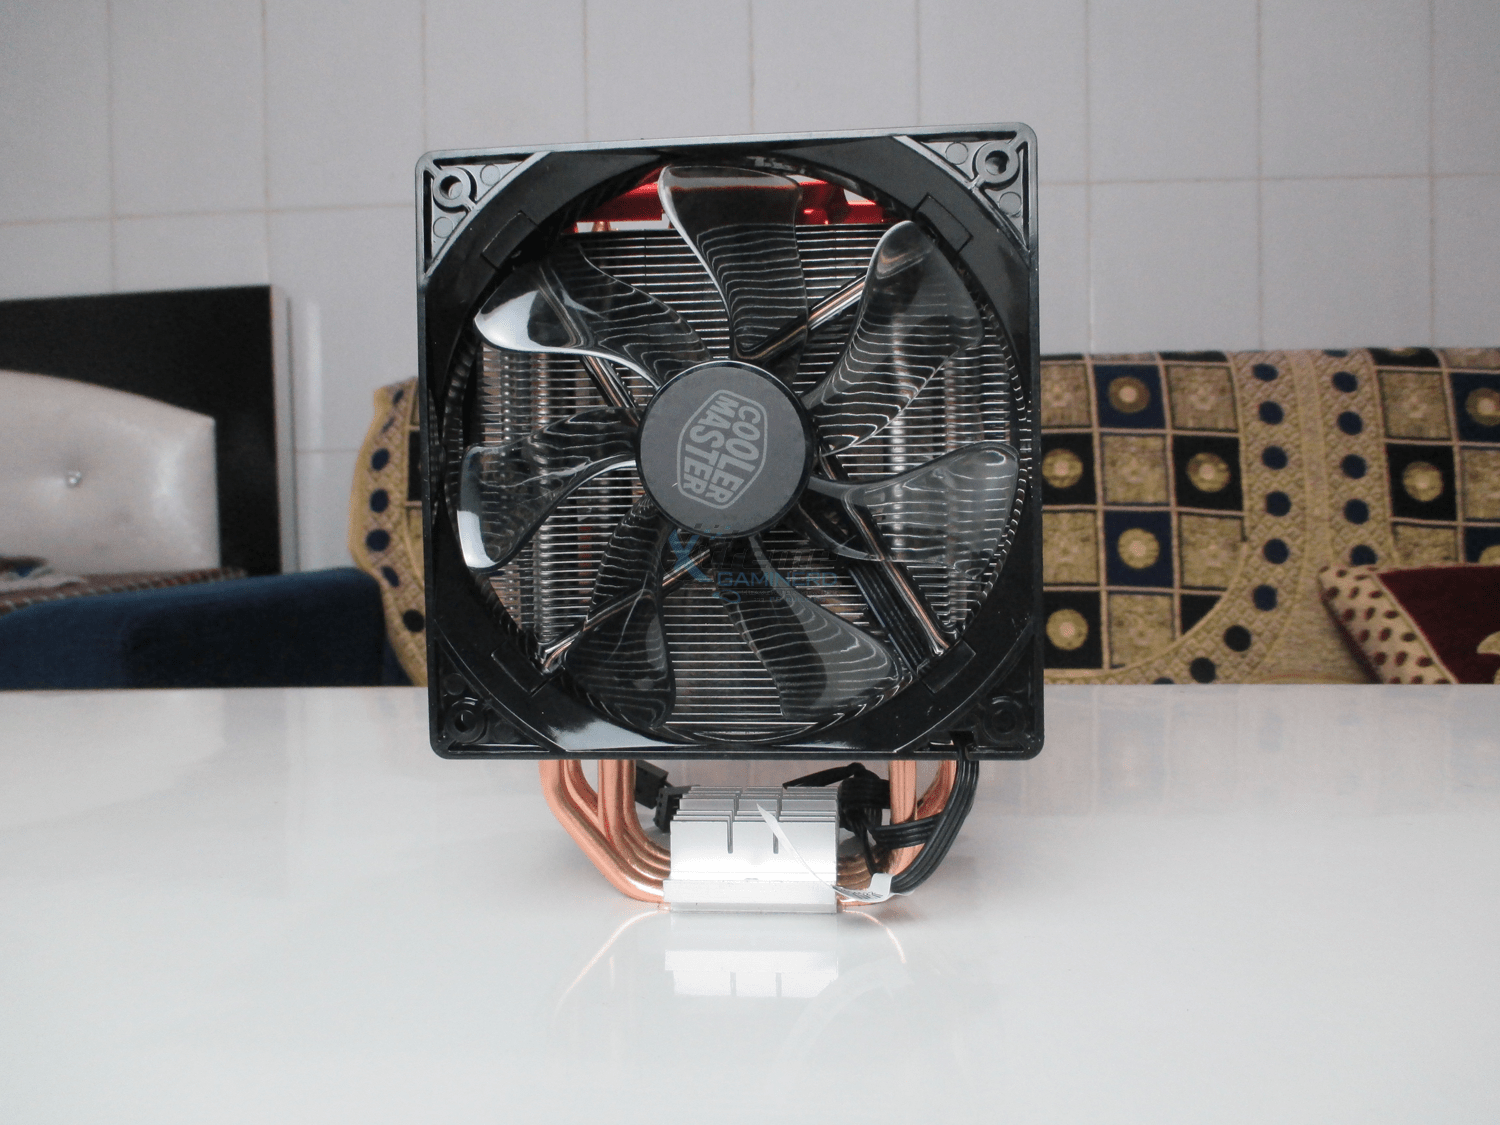
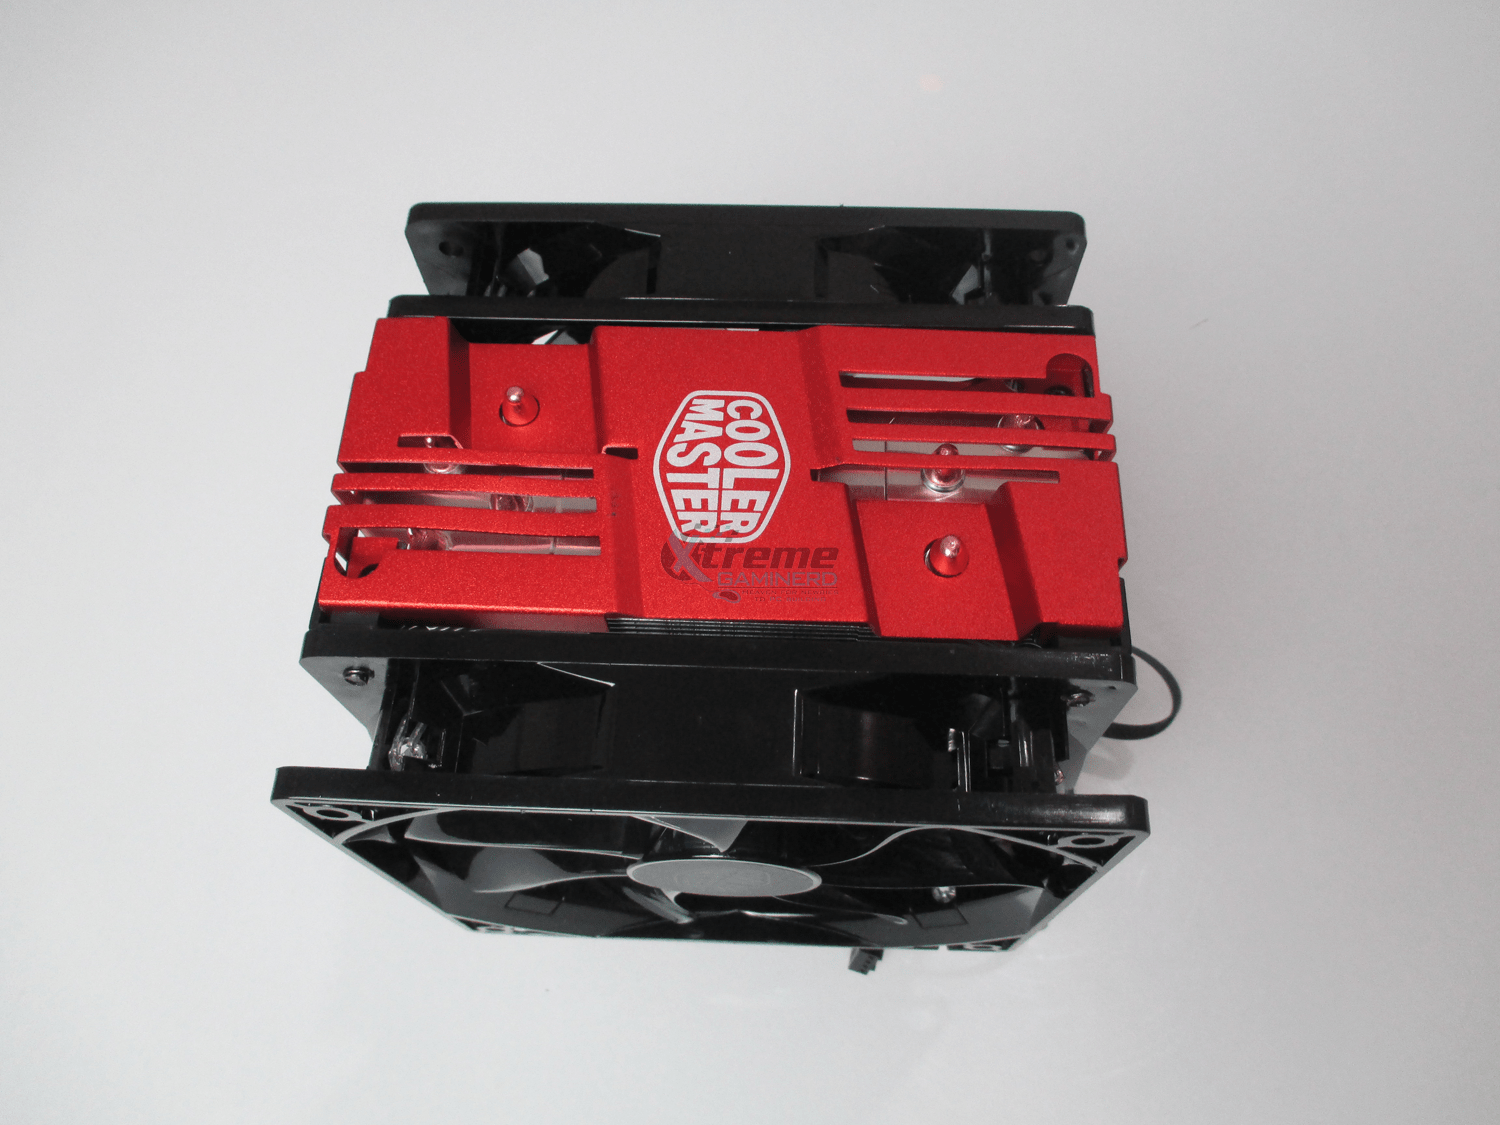
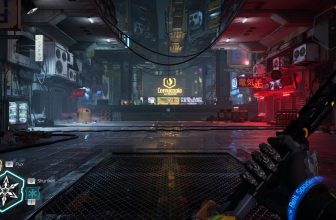
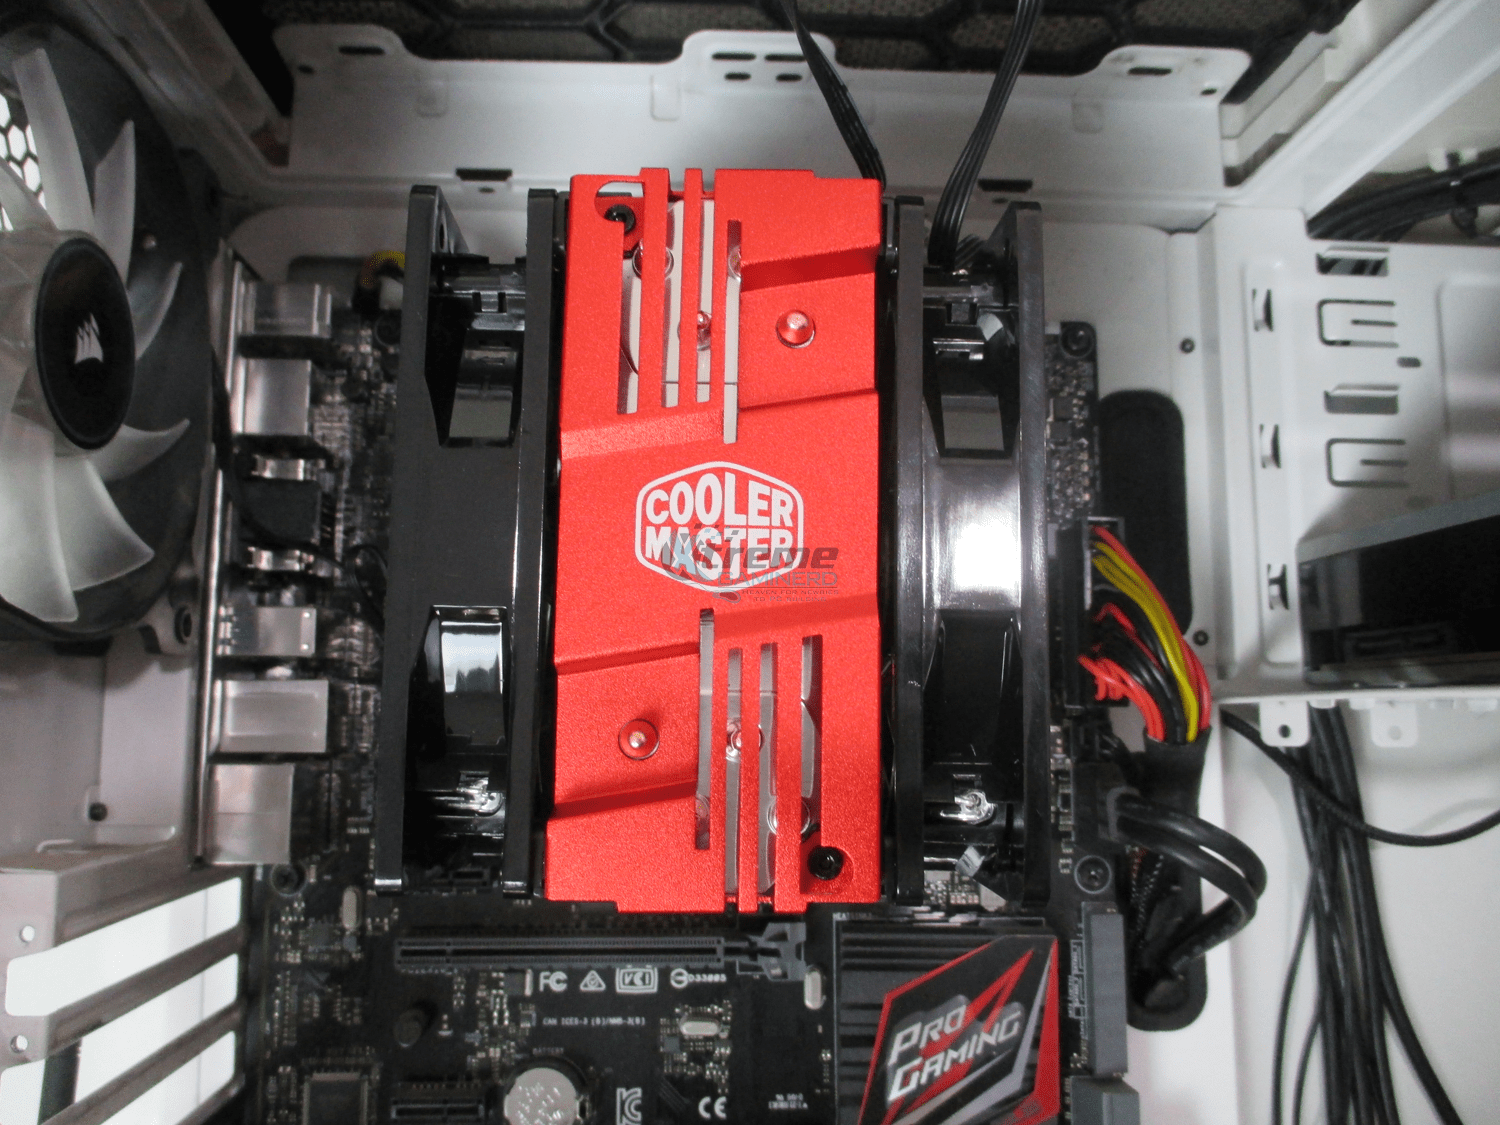
The cooler is big enough when both the fans are installed. the Heatsink features the Red coloured aluminium cover at the top with the Cooler Master LOGO which is also available in Black.
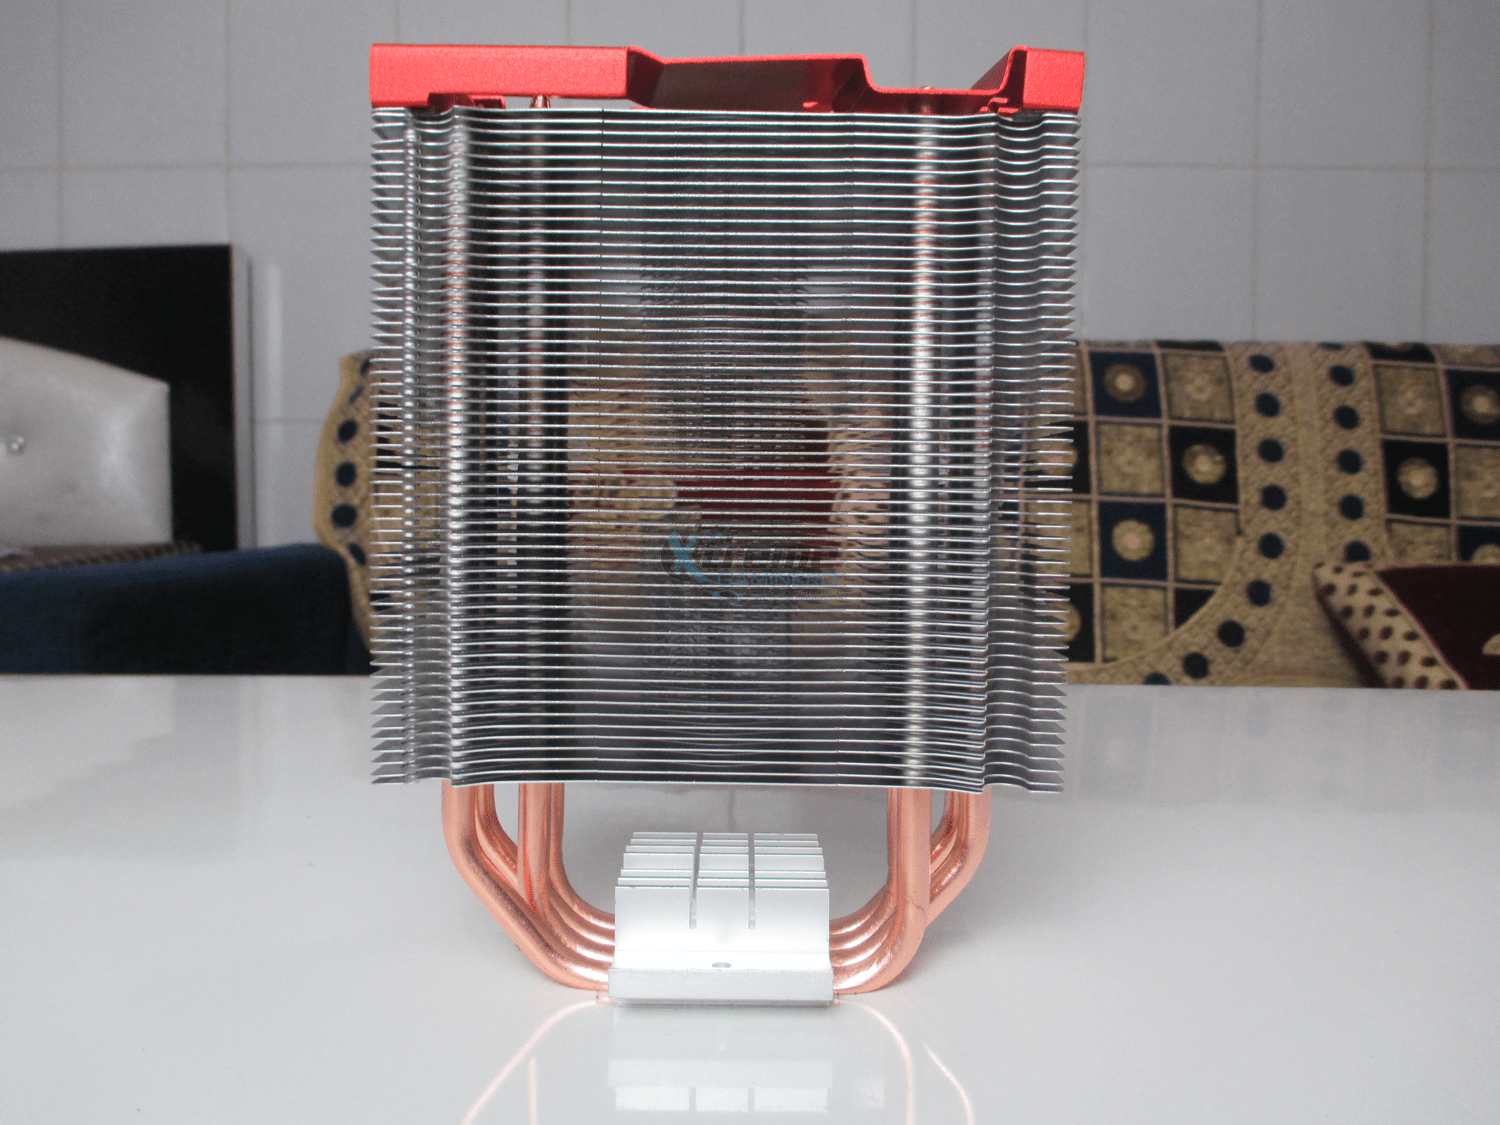
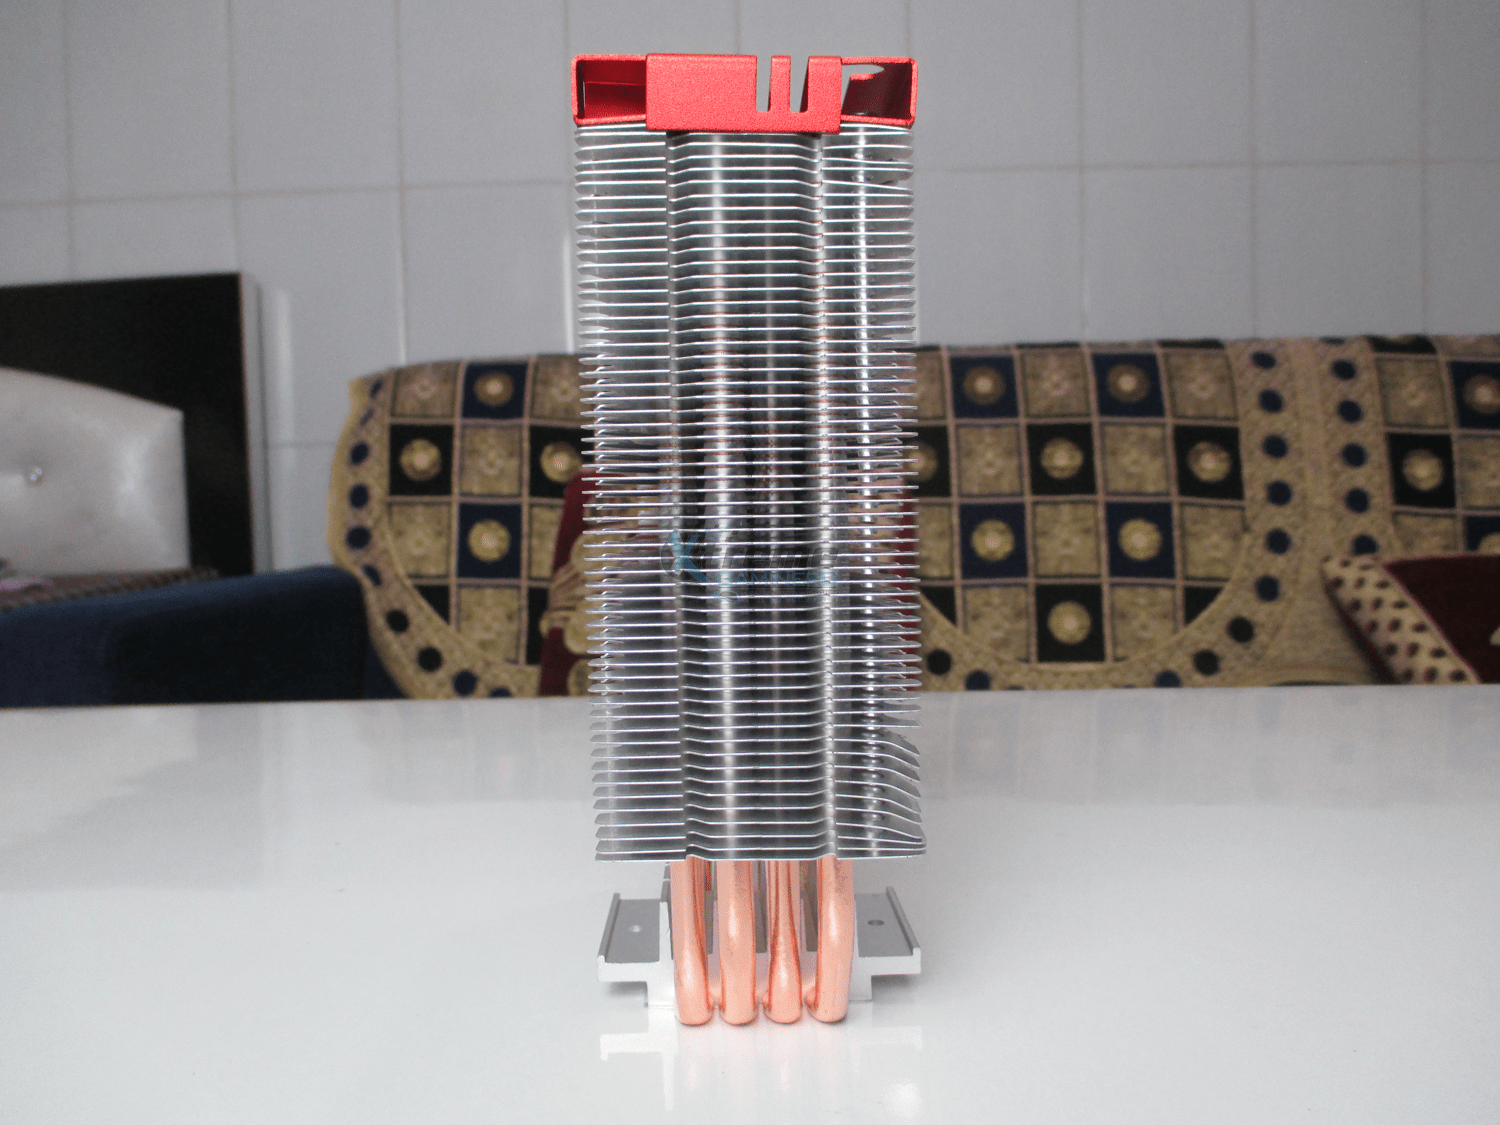
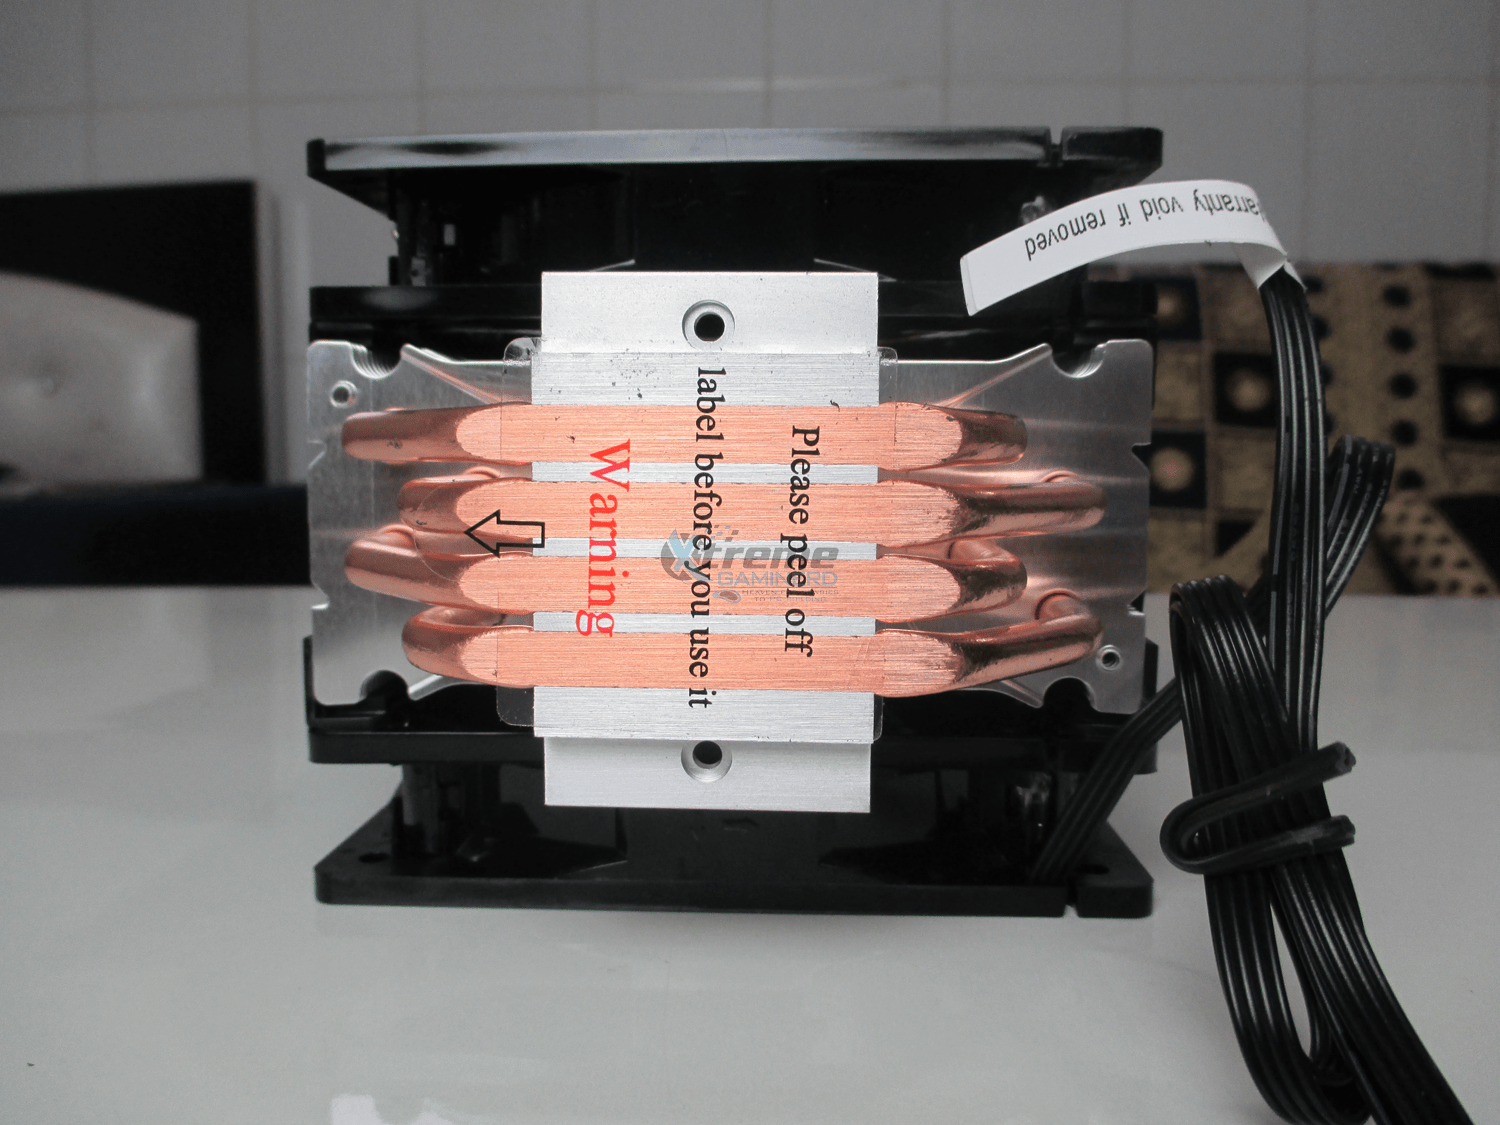
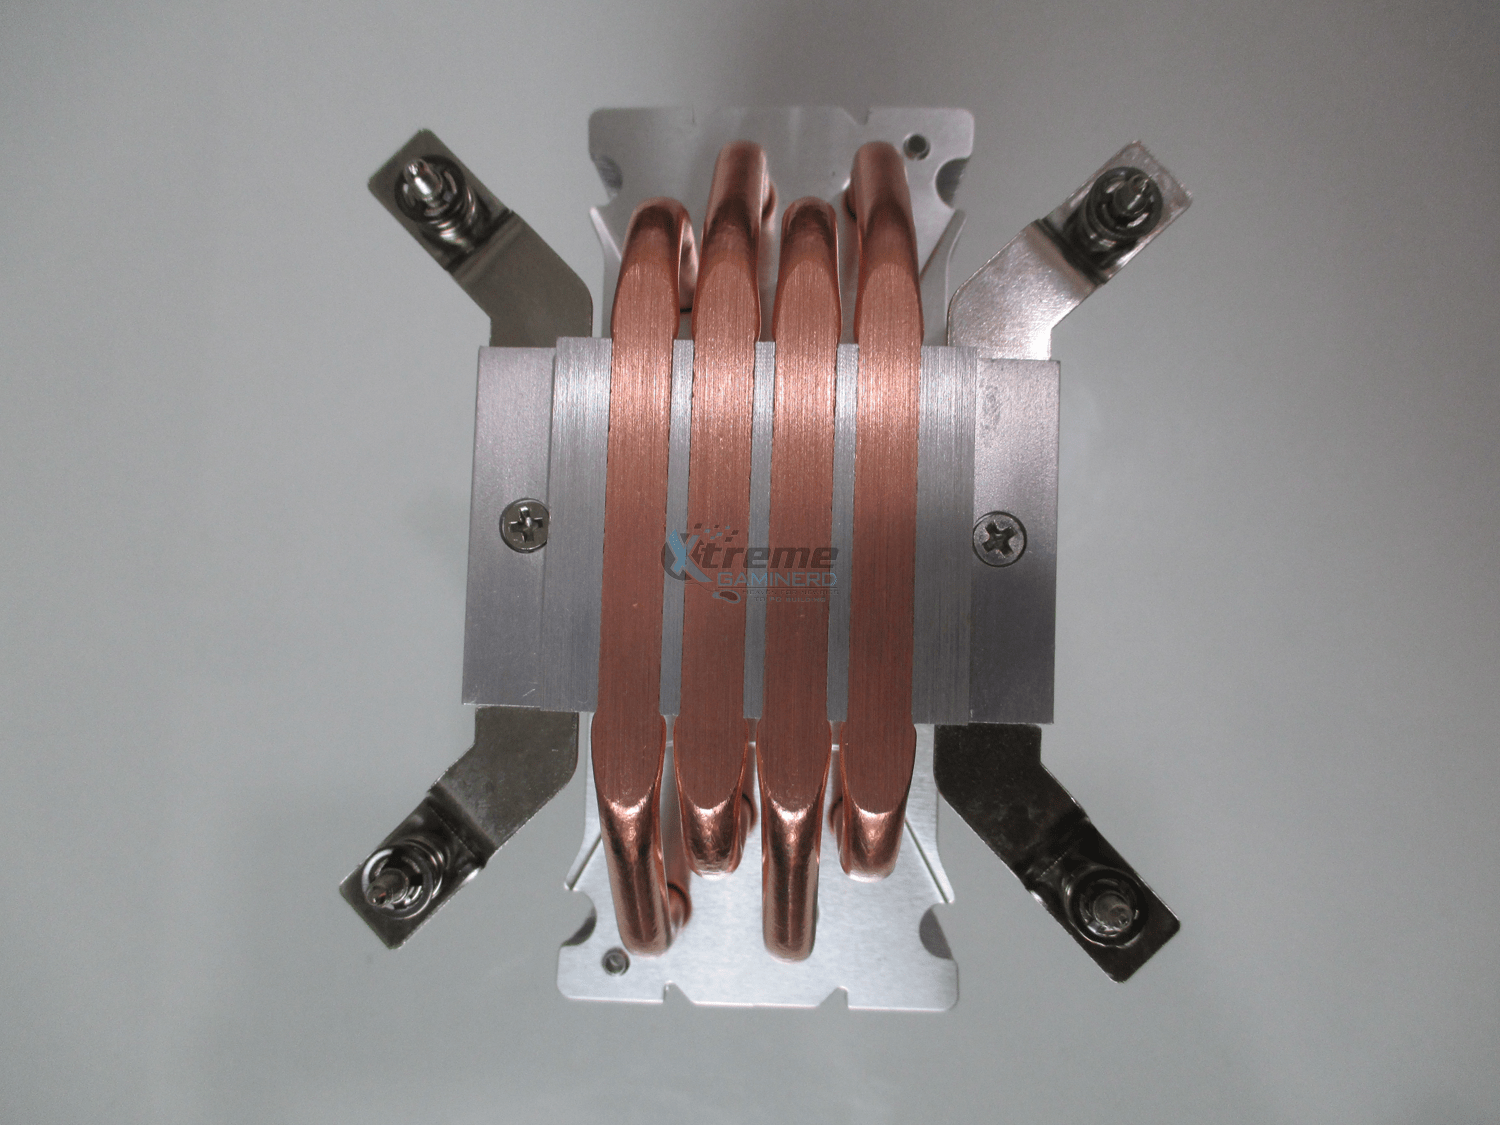
Taking a look at the heatsink, it’s not something that is spectacular but the construction is appreciable. The aluminum fins are strong and the base is composed of both aluminum and copper heat pipes. The base is well-finished and smooth and there are a total of 4 copper heat pipes that pass through the base from one side to another.
The heat pipes are extended to the top of the heatsink and share the heat equally. The base needed direct contact with the heat pipes because it transfers heat quickly as the small aluminum base isn’t that efficient alone in eliminating the heat from the processor.
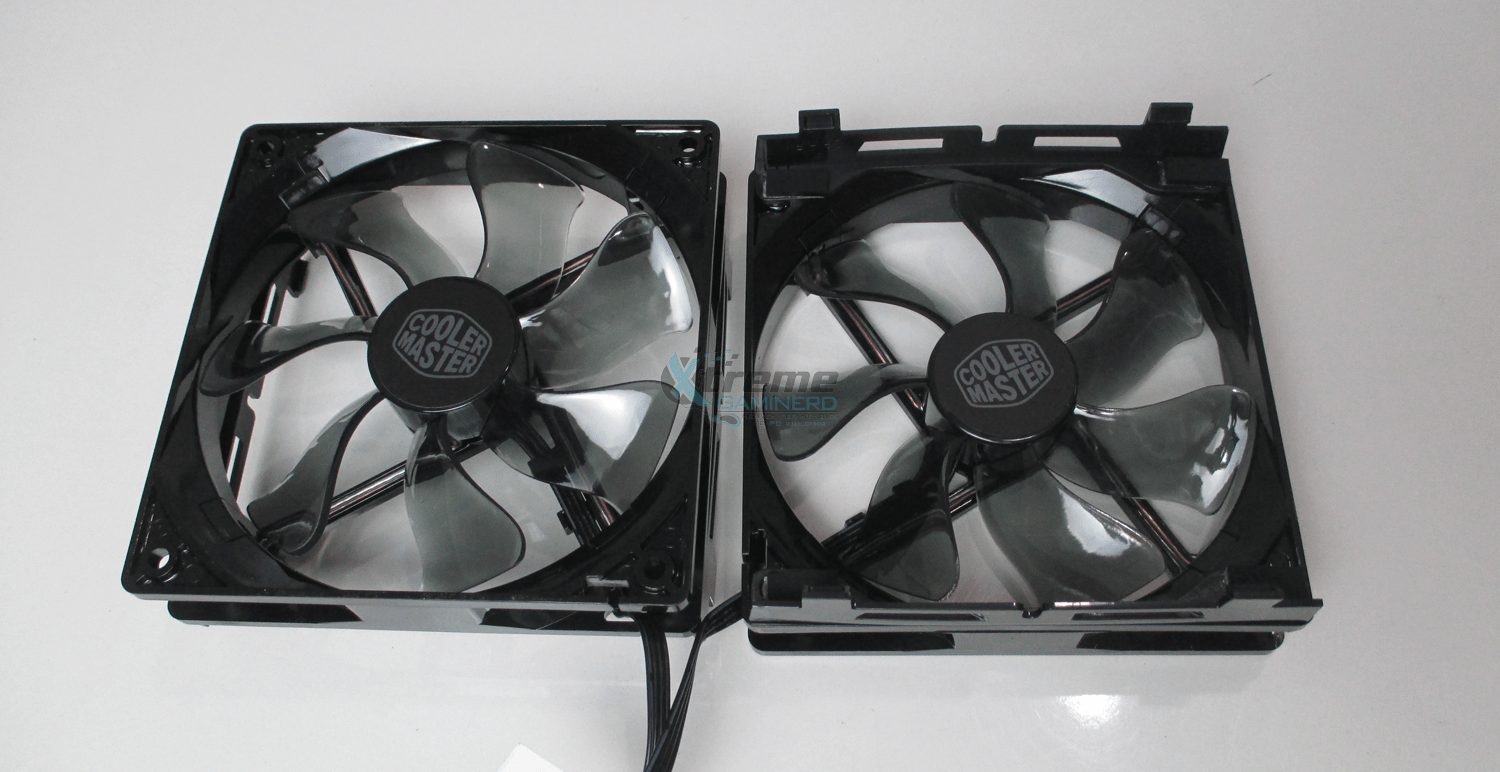
Coming to its fans, they are the traditional airflow fans which are commonly used in most of the Cooler Master heatsinks and use the same design. They are strong and have RED LEDs to match the RED accent of the cooler. For a price less than $50, it justifies the use of two Fans as there will be a good push-pull configuration. The fans can be easily removed and installed and can be connected to the cable splitter provided in the box itself for powering the two fans with one motherboard 4-pin power port.
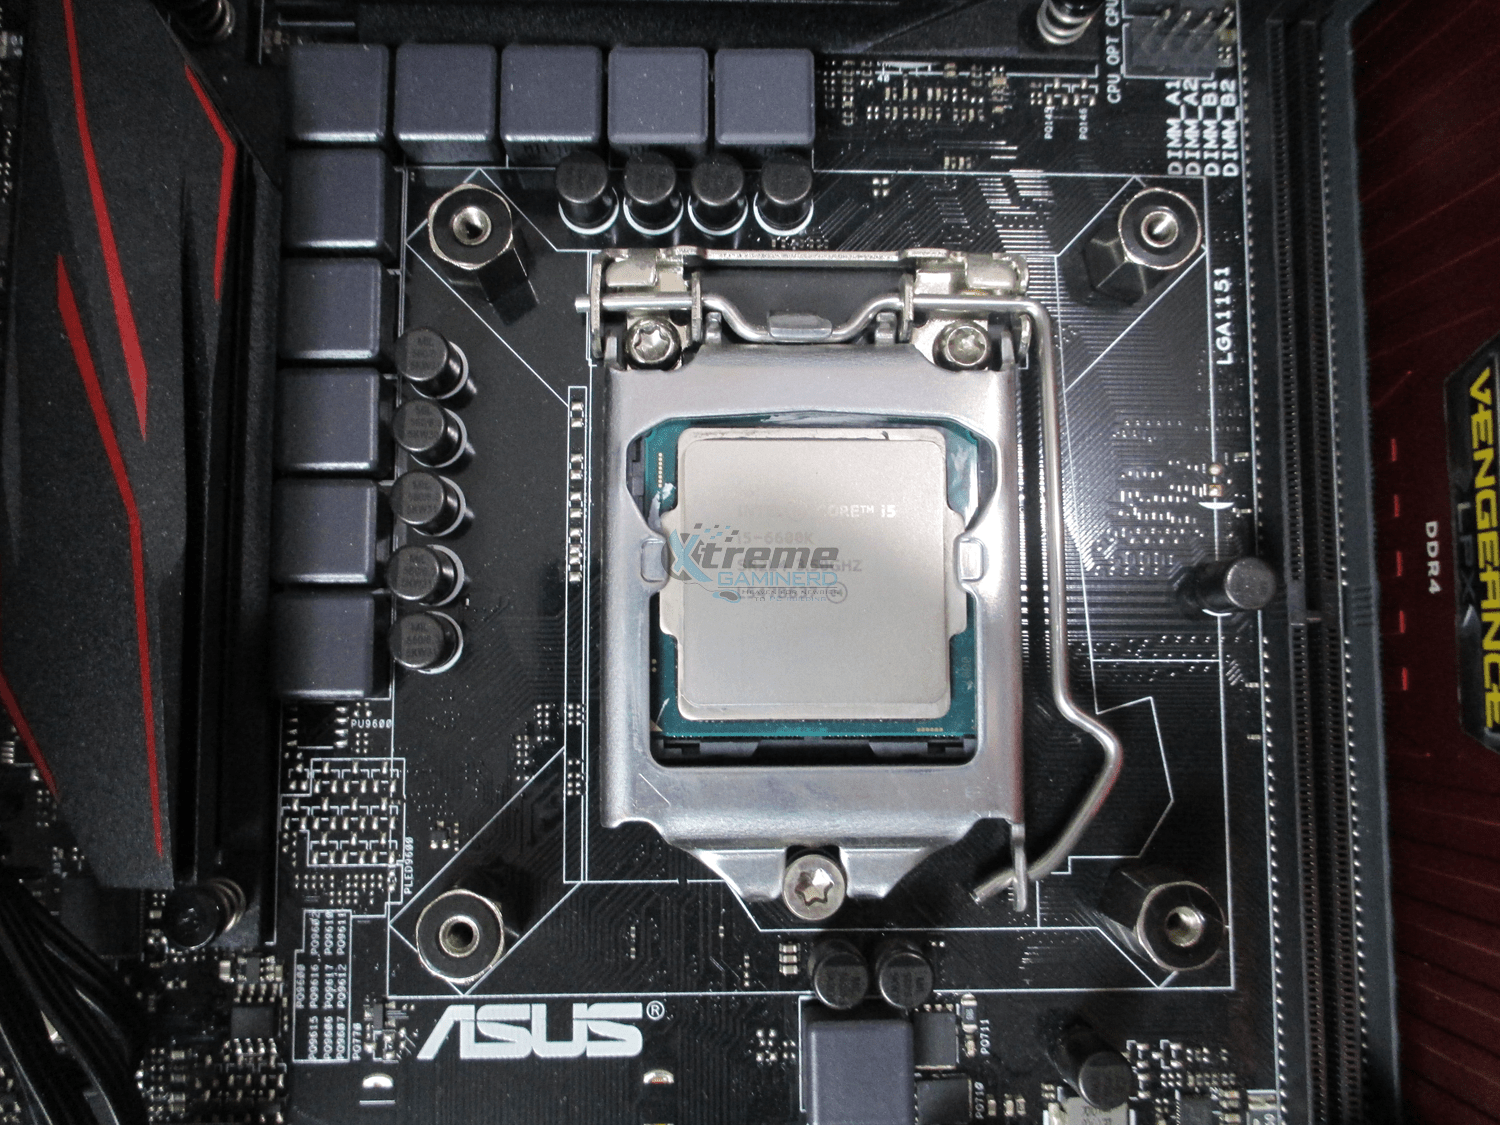
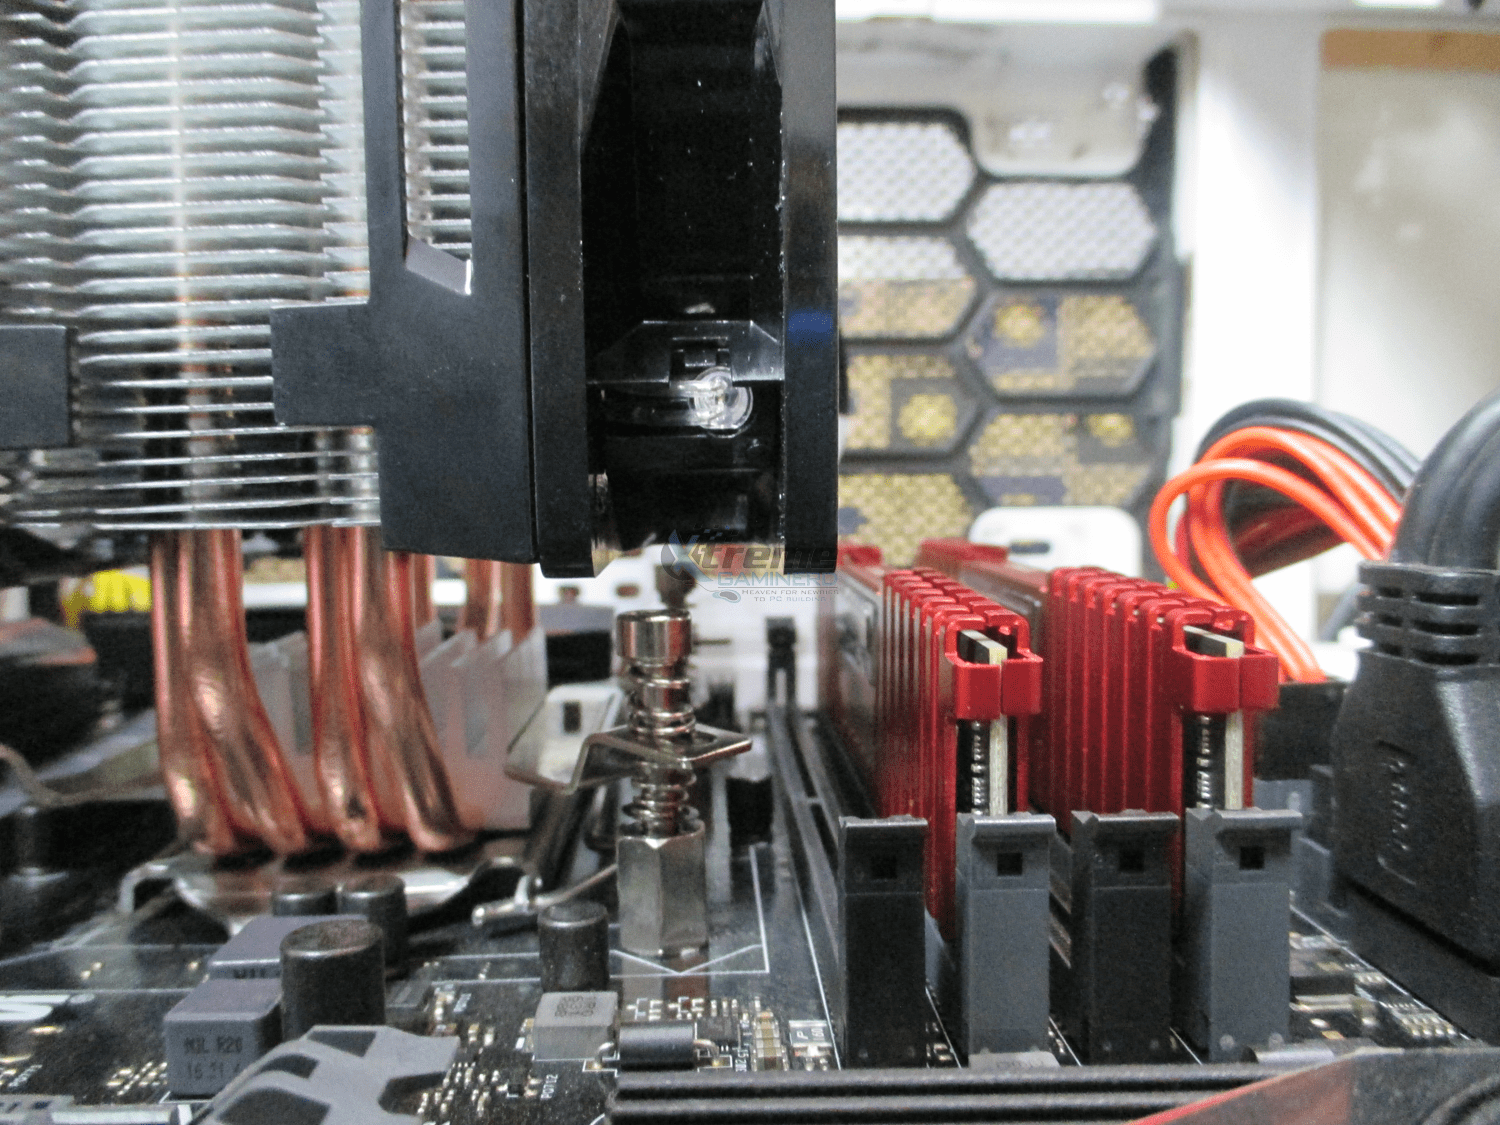
Before installation, I used Isopropyl alcohol to remove the old thermal paste of my i5 6600K and also cleaned the base of the heatsink as the sticky plastic left some sticky residue on it. First I installed the bracket from the back and secured the two Clips with two screws. It was very easy and the accessories box came with a nut bolt tightener with which it is easy to tighten the hollow bolts into the motherboard as you can see in the picture above.
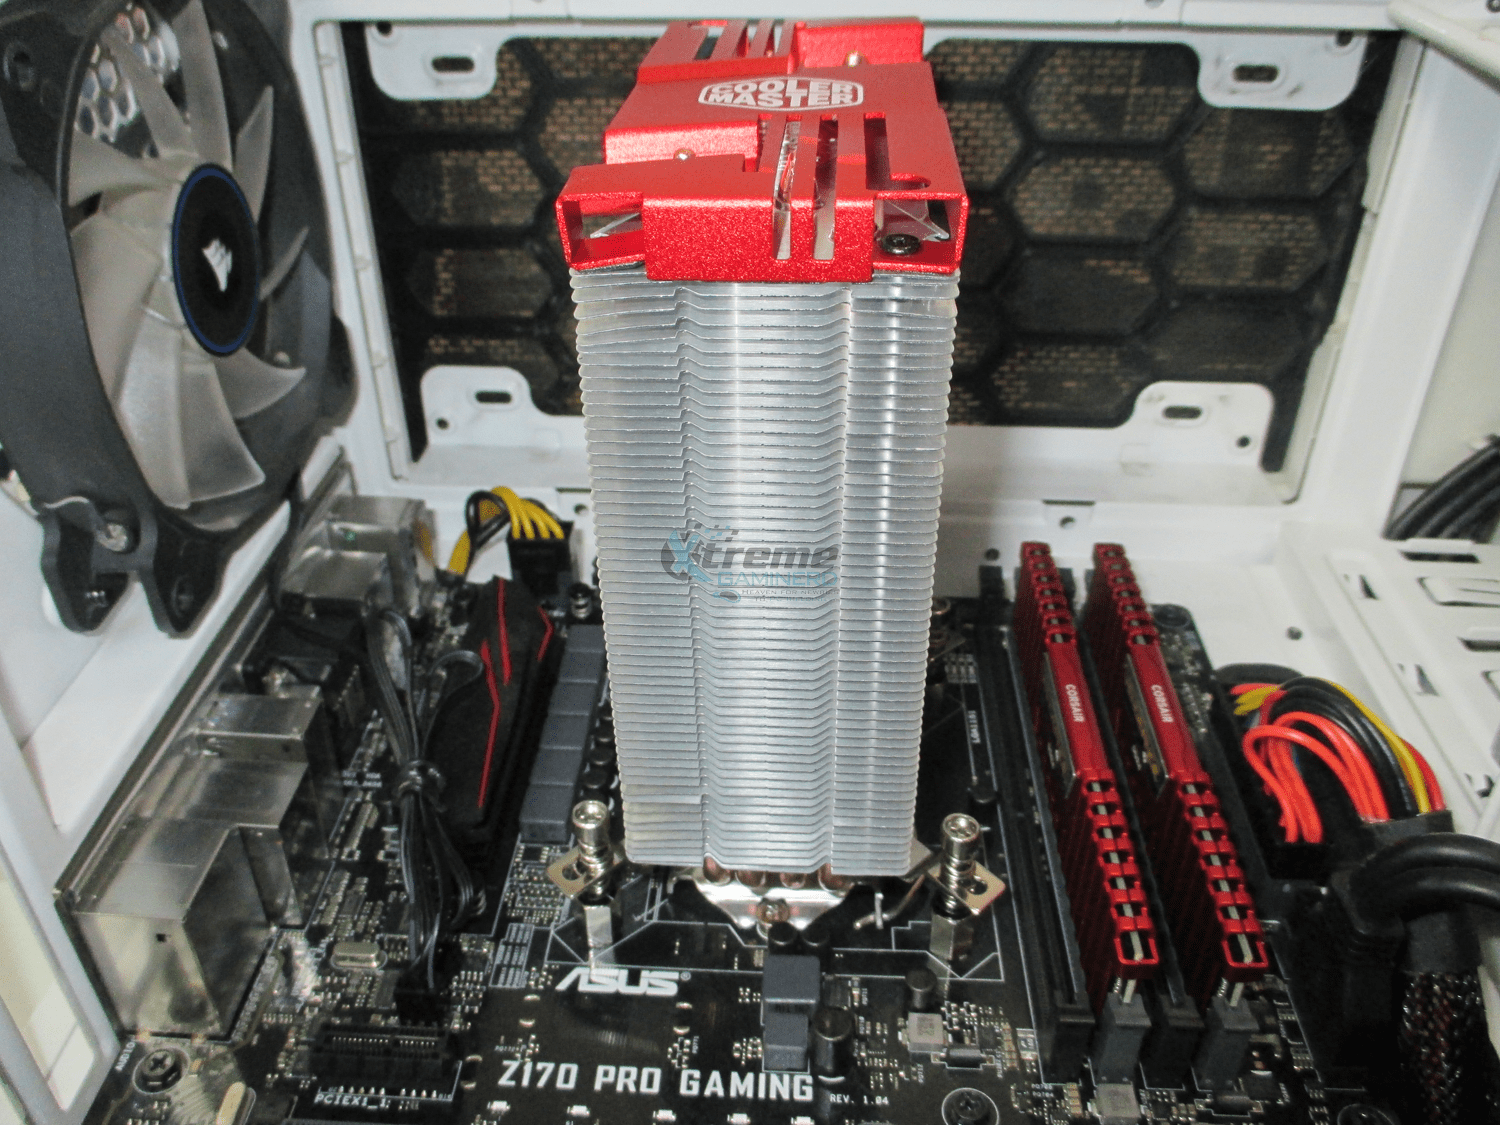
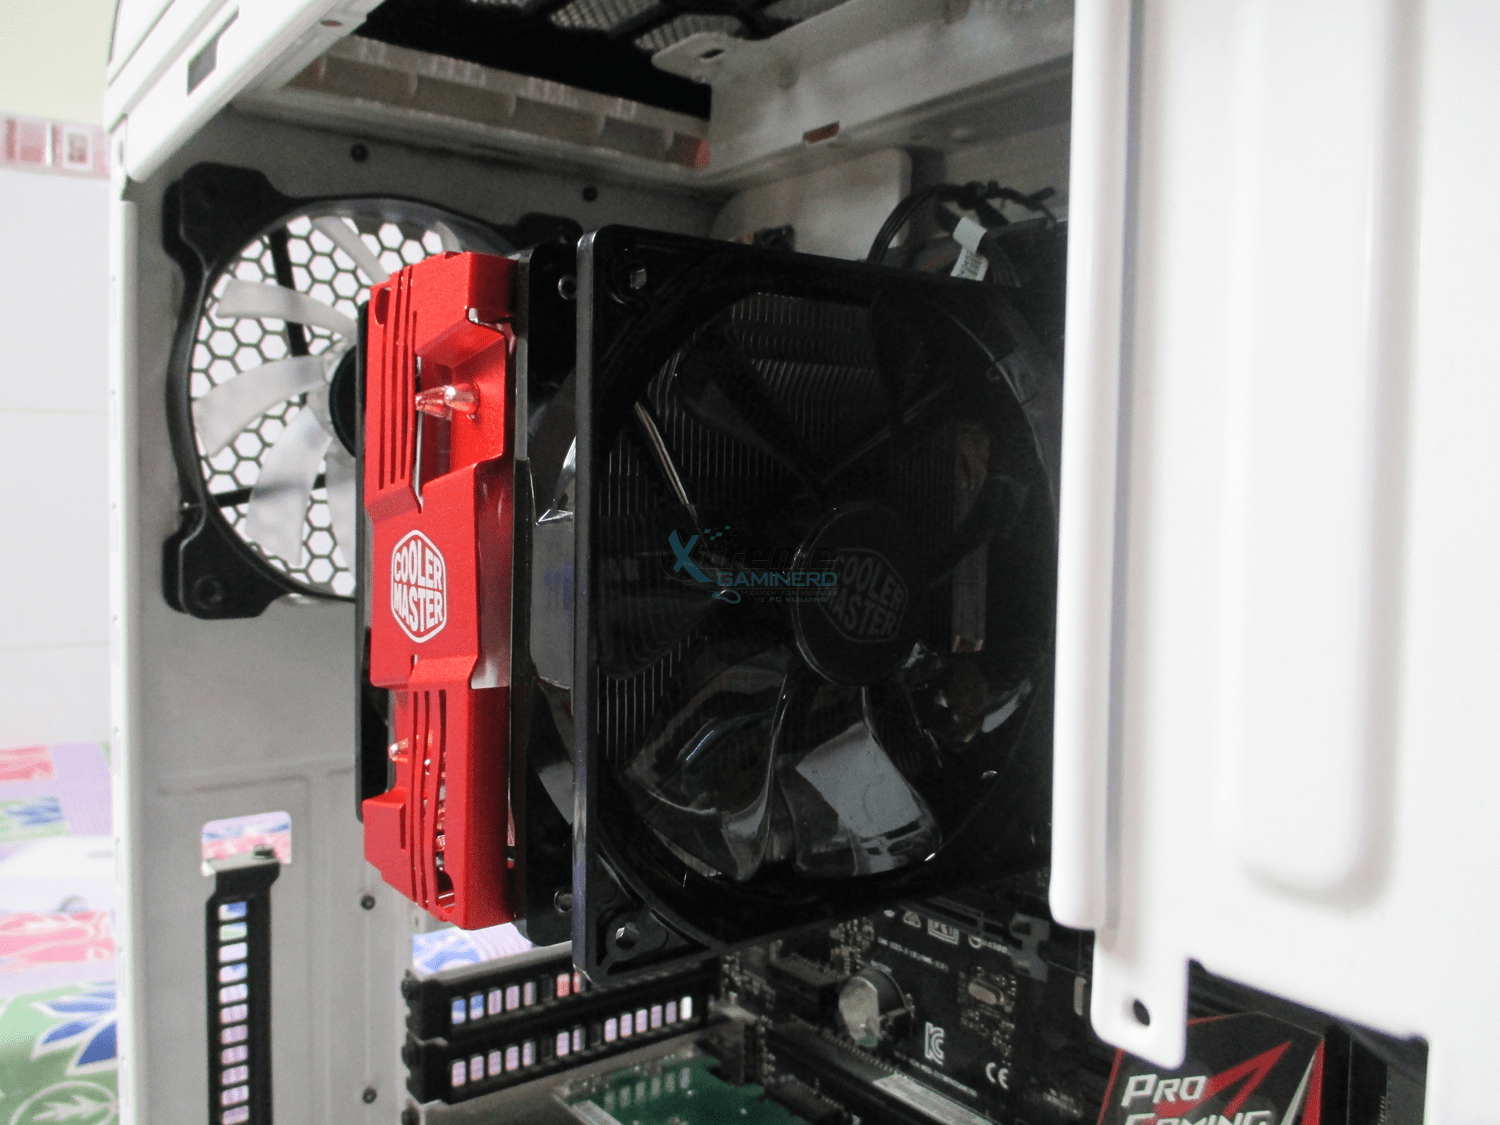
So, I removed the two fans from the heatsink before installing it on the motherboard and also installed the RAM sticks before it to pose no difficulty. Then I secured the cooler with the screws that are pre-installed into the clips and it was done.
Fans were installed and there was enough clearance for the Corsair Vengeance LPX Ram when I installed them in the 2nd and 4th DIMM sockets. I don’t think that you can install a taller RAM stick in the first DIMM slot so make sure you buy a short-height RAM stick like mine. 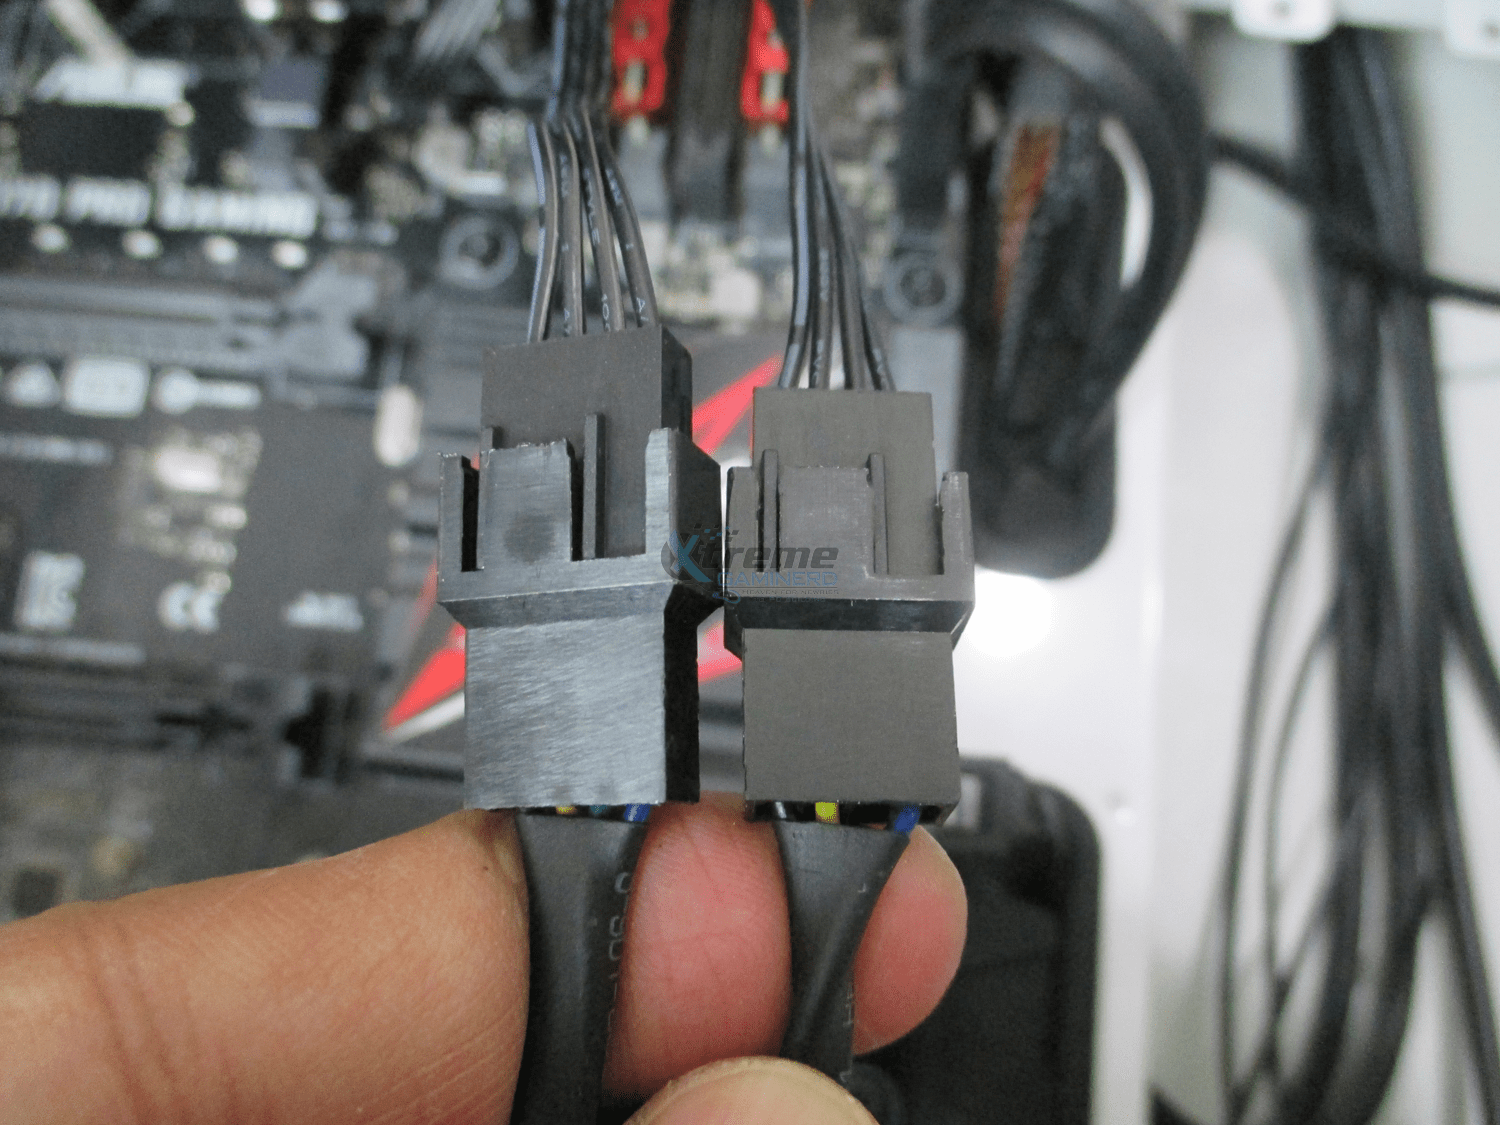
I used the fan splitter cable that came with the cooler to power the fans and used a single 4-pin power port which is the CPU_Fan header on the motherboard.
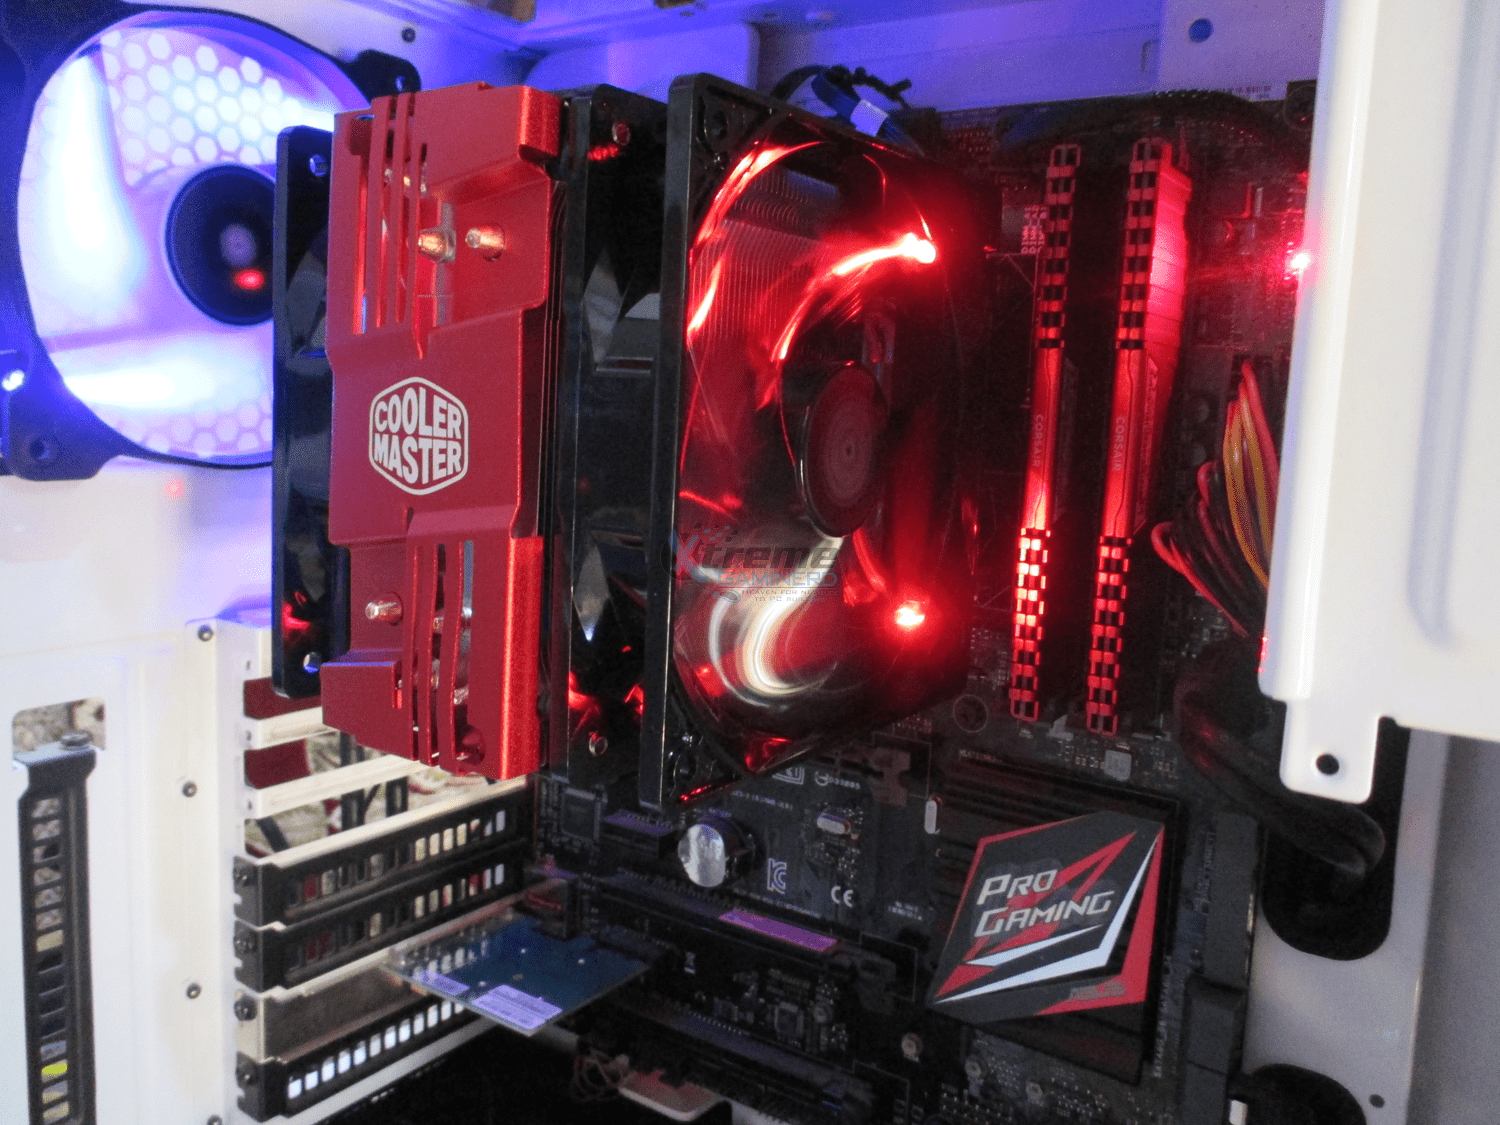
There was enough clearance to close the side panel as my case is wide enough but this will be the case in most of the mid towers as its height is 163mm which is very common. The RED LEDs were bright but were not of very good quality as a premium fan would have.
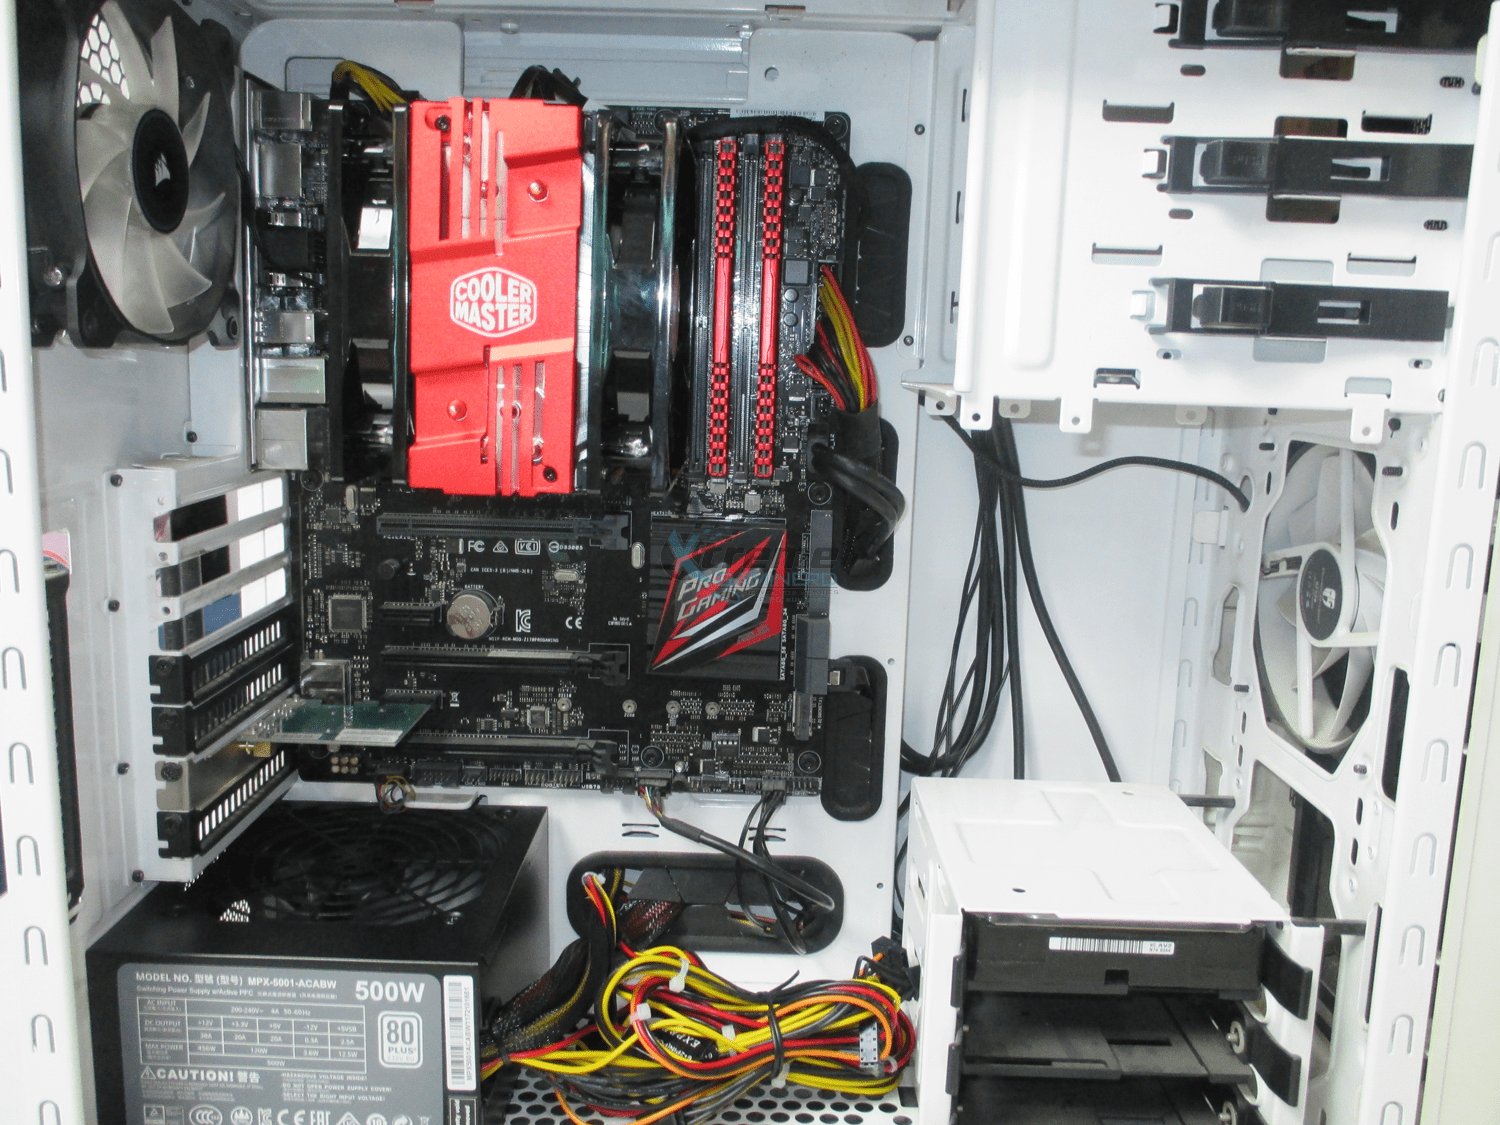
Here is the RIG I used for testing the cooler(I use this same rig for every other cooler to keep the results fair):-
- CPU: Intel Core i5 6600K
- MOBO: Asus Z170 Pro Gaming
- RAM: 2x 4GB DDR4 2400Mhz Corsair Vengeance LPX
- HDD: 320GB WD HDD
- WIFI: TP-Link N300 Wifi PCI Card
- PSU: Cooler Master MasterWatt Lite 500W
- CASE: Cooler Master 690 III
- FAN: 1x 120mm Corsair AF fan at the rear, 1x 120mm DeepCool TF120 fan(Used from Radiator)
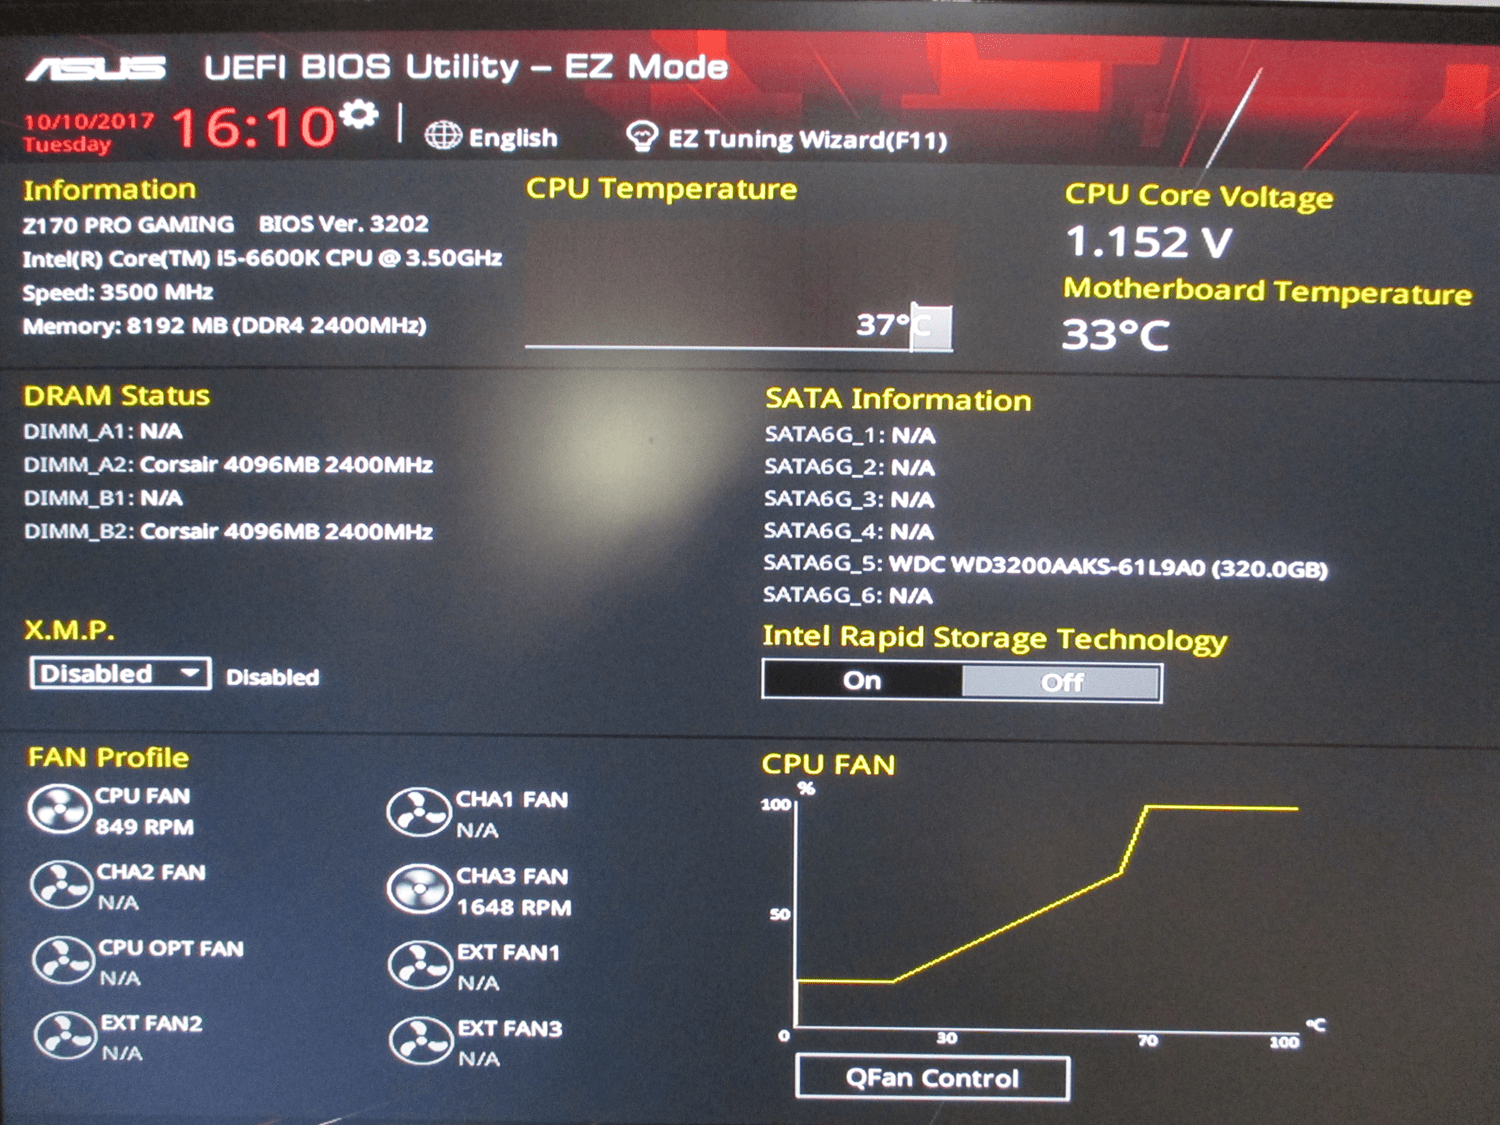
I used the HeavyLoad software for testing the CPU cooler on 100% Load on different clocks and gave the cooler 5 minutes time to cool down with full fan speed after each test for it to be stable at its lowest idle temperature which is 33 Degrees Celsius(Same as the room temperature at the time of testing). Each test was conducted for approximately 15 minutes and the following are the results of this test in Degree Celsius. Fan speed measurement and CPU temperature measurement were done using CPUID HWMonitor.
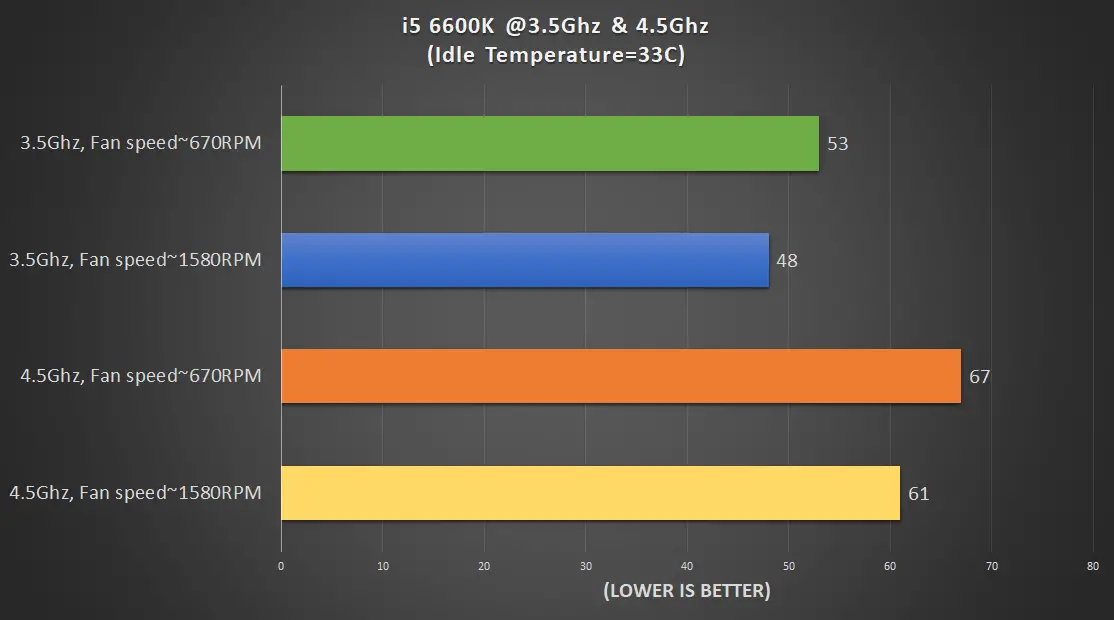
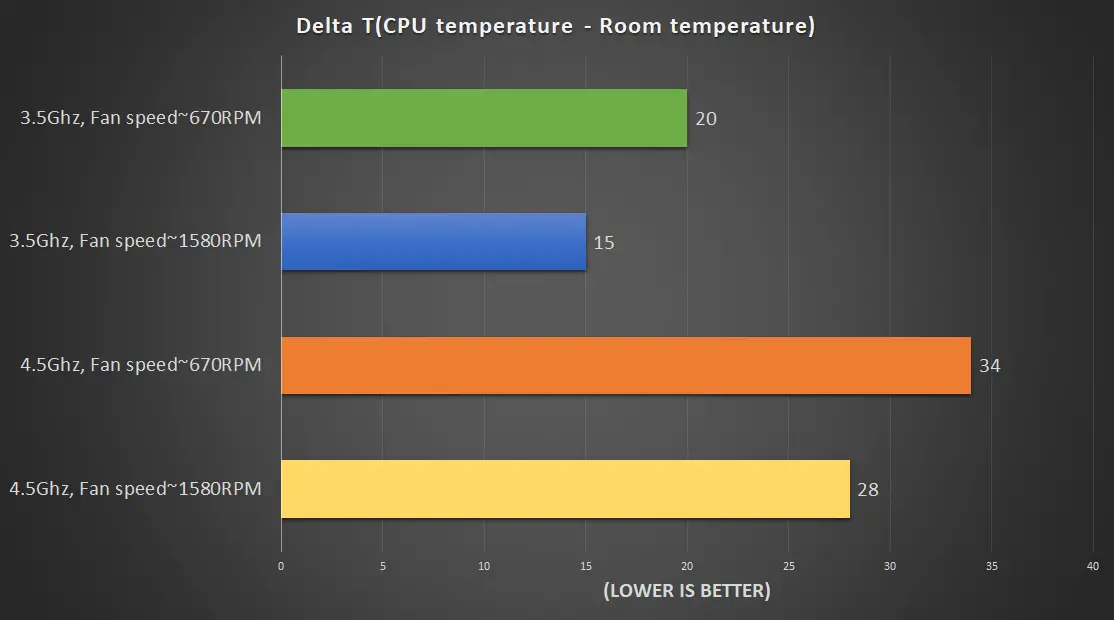
The temperatures were very good and healthy for the processor. If a non-overclocker uses this cooler on his CPU at full load with minimum or standard fan speed, then expect the temperature to be around 50C but the fans came up to perform really well when they were running at full speed. The temperature went down up to 6C both at 3.5Ghz and 4.5Ghz but creating a little noise. Although, it wasn’t disturbing at all. At silent profile with around 670RPM speed, there was almost no noise from 1 meter away and this thing is very quiet even if the side panel is removed.