Some Asus motherboards come with Q-LED indicators that help the users troubleshoot the problem related to the PC hardware.
If any of these individual LEDs turn on continuously without any blinking, it indicates that your computer is unable to establish a proper connection with one of your PC components.
This results in a boot failure and your PC won’t enter your operating system until the problem is resolved with the associated piece of hardware.
Types Of Q-LED Indicators On Asus Motherboards
Asus Motherboards with Q-LED indicators contain 4 individual LEDs. These are mostly present on the right edge of an Asus motherboard and indicate problems caused by different components of a computer.
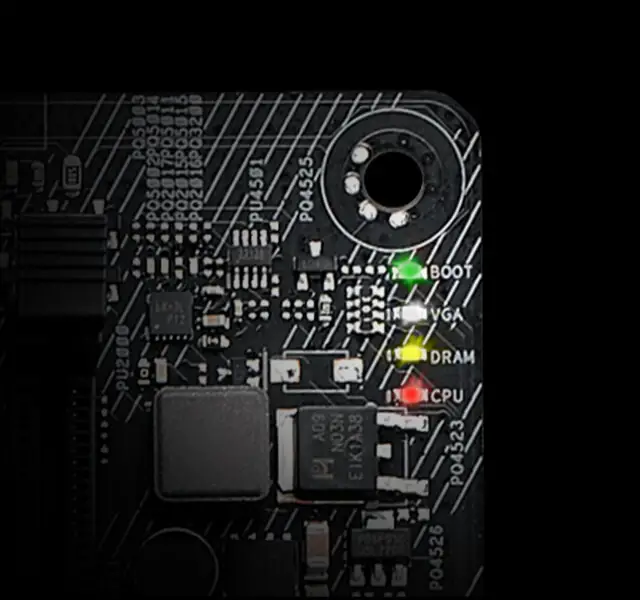
Image credit- Asus
The Q-LEDs on an Asus motherboard are as follows-
- BOOT– Green LED
- VGA– White LED
- DRAM– Orange/Yellow LED
- CPU– Red LED
Each LED is associated with different components of a computer where BOOT LED is related to storage drives, VGA to the graphics card, DRAM to RAM/Memory, and CPU to CPU/Processor.
Whenever your system fails to detect or establish a proper connection with any of the mentioned components, the associated LED with turn on. These LEDs turn on continuously if there is a hardware failure until the problem is sorted out and don’t let the computer boot into your OS or even BIOS.
Asus motherboards generally cycle through each of these LEDs one by one after switching on a computer. Each LED automatically turns off and your computer boots if there is no anomaly detected.
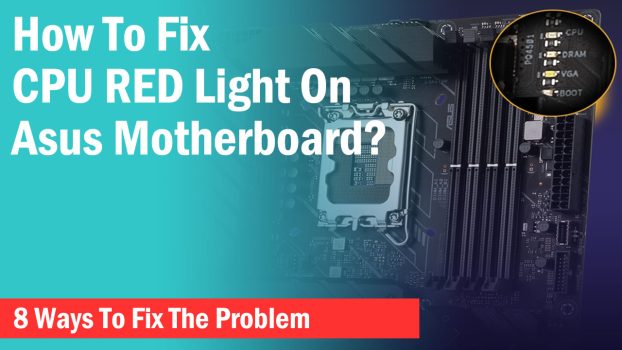
Reasons For Asus Motherboard Red LED Light
A continuously always ON Red LED on Asus motherboards indicates no CPU or a faulty CPU. This basically means that your computer cannot detect your CPU or Processor which is resulting in a boot failure.
This problem can arise due to several reasons and doesn’t necessarily mean that your CPU is dead.
Some of the reasons that might be the culprit for a Red LED can be an improper installation of a CPU or a bent CPU pin.
The same can also result due to an improper or no voltage to your motherboard from your power supply. Sometimes even a little dirt at the contact of the CPU and CPU socket can stop the computer from booting.
How To Fix Asus Motherboard Red LED Light?
By carefully inspecting your PC hardware, you can figure out the possible cause of a RED LED. Here are 8 ways through which you can sort out the problem which will do a guaranteed fix for your CPU Red LED on your Asus Motherboard-
Check CPU Cable Connection
Every motherboard has a dedicated VRM section that feeds a filtered voltage to your CPU. If the correct power is not being supplied to your CPU, your computer won’t start. The result will be similar if there is no power connection.

Click to enlarge
-> Turn off your computer and remove the case side panel.
-> Check for the EPS connectors at the top left on your motherboard. Make sure the EPS cable connectors from your PSU are properly inserted into the EPS ports on your motherboard.
EPS connectors are generally 4-8 pin and are located above the VRM section. If you haven’t plugged in the connectors or if the connection is loose, you won’t get any display signal on your monitor.
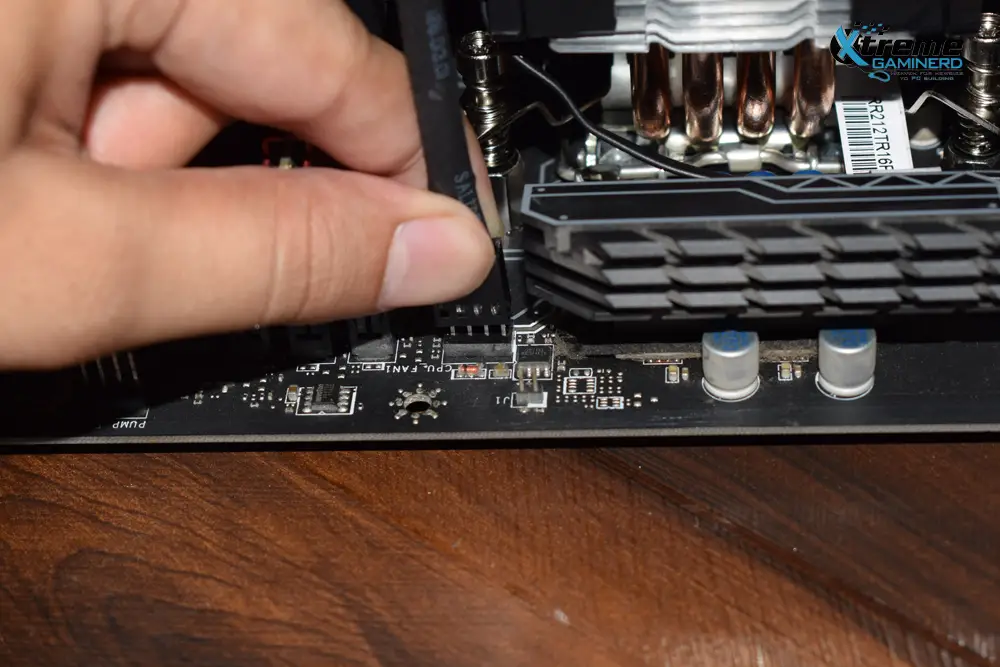
Check Your CPU Fan
The CPU uses a CPU cooler for continuous cooling and if it stops working, your CPU may either fry or your computer won’t start in order to protect it.
Each motherboard has a CPU fan header that is generally a 4-pin header situated at the top.
Click to enlarge
-> Turn off your system and check for the CPU_Fan header on top of the motherboard.
– > Make sure the CPU fan connector from your CPU cooler is properly connected to the CPU_Fan header. If you are unsure, simply reconnect the CPU cooler connector again by properly inserting the connector all the way in.
Now turn on your computer to see if your CPU cooler fan is spinning as it should.
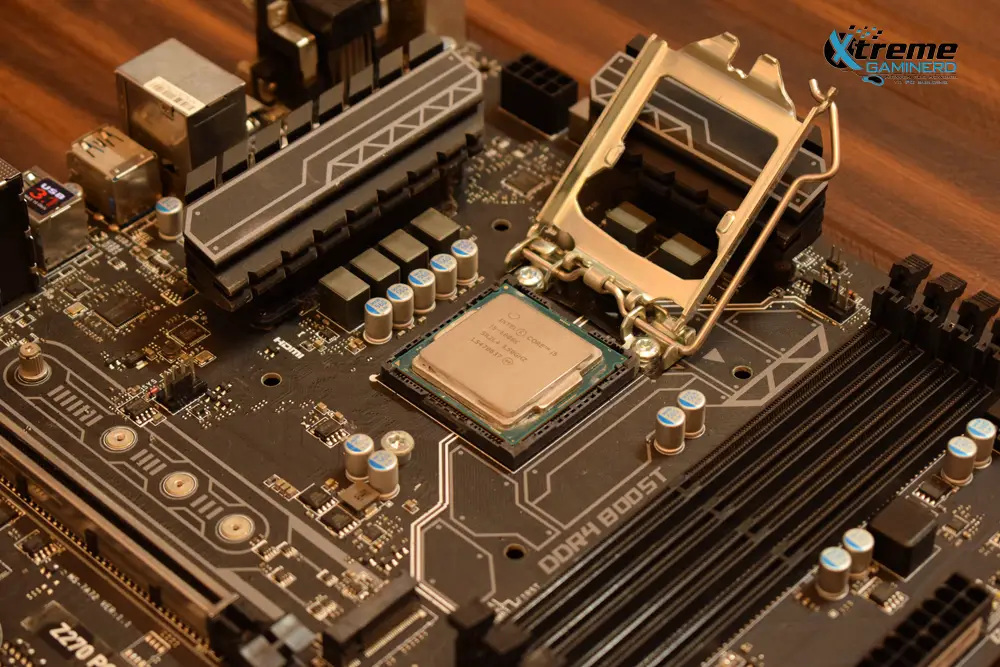
Reinstall the CPU
If you have connected all the wires properly as said above but nothing works, you might need to install your CPU again. This can take 10-20 minutes depending on the type of CPU cooler you have installed.
Click to enlarge
-> Turn off your computer and remove the side panel.
-> Unplug the CPU cooler fan connector and uninstall the cooler. Remember that each cooler has a specific way of installation and therefore, removing it may require you to check the manual it came with.
-> Remove the CPU from the socket by pulling the socket lever up.
-> Put back the Processor gently by aligning the small arrow mark on your socket and CPU.
Clean The Dirt
Now before you put back the CPU cooler again, it is important that you check for any dirt on the CPU or the CPU socket.
Even if there is a little dirt anywhere in the socket or the CPU, you will need to remove it with the help of an electronic brush.
Either your CPU or the CPU socket will have hundreds of small pins. If the dirt is stuck inside those pins, use an air blower instead of anything that can possibly bend a pin.
Check For Bent Pins
In case a pin or several pins on either your CPU or CPU socket are bent, your CPU won’t work.
Check for any bent pins on your CPU or the socket and if there are multiple bent pins, you may have to replace either your CPU or the motherboard.
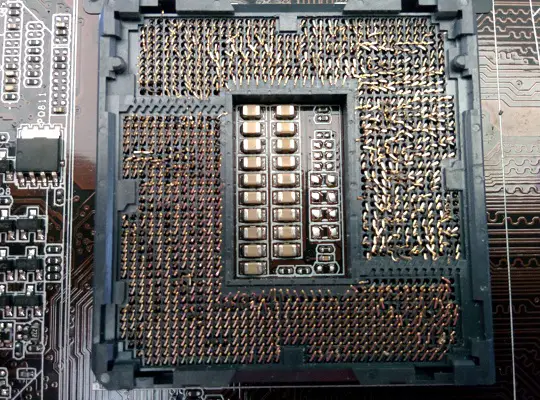
Image credit- Superuser
If the bent pins are very few and aren’t bent to a degree that they might break by straightening them, try to straighten them with the use of a small tool that can reach between the pins. Remember that if you put too much pressure on any pin, it will break and you will have a dead CPU or motherboard.
Reset BIOS
If after performing all the steps, the problem still persists, Resetting the BIOS may help.
BIOS stores the information of your hardware and establishes a connection between your computer and input devices. If you recently updated your BIOS, then it is possible that the new version is causing some compatibility issues with your CPU.
Simply resetting the BIOS will restore the defaults that will fix the problem if it was associated with it.
There are two ways to reset a BIOS-
- Removing the CMOS battery for a couple of minutes.
- Shorting the CMOS jumper pins.
In the first method, you need to locate the CMOS battery on your motherboard. Generally, it is located somewhere at the bottom and you can easily identify it by searching for a silver coin-sized battery in a socket.
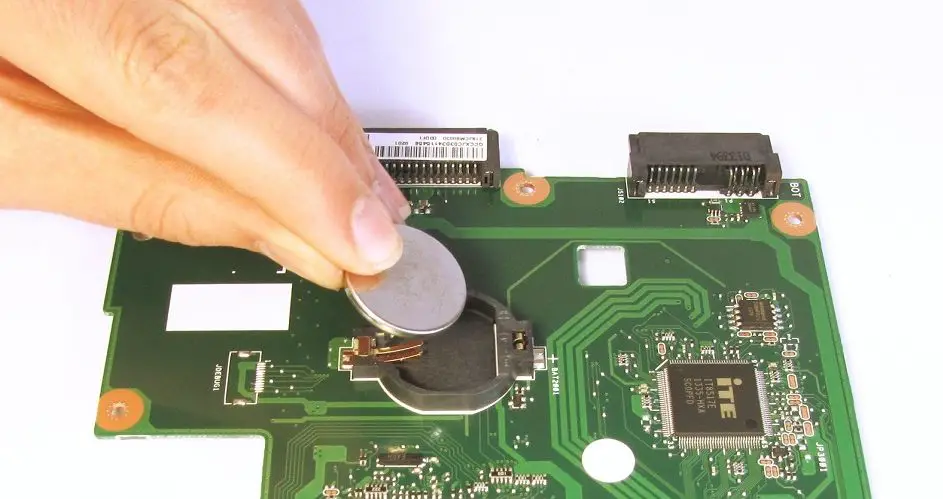
Do not confuse it for the BIOS chip which is a completely different thing.
The second method requires you to short the CMOS jumper pins after switching the computer On. Both these methods will restore the defaults and hopefully, your problem will be fixed.
Boot With The Essentials
Sometimes the problem can be associated with a different component than we think. If you boot your computer by connecting only the essentials, it may help narrow down the problem.
I recommend removing all the components from your computer except for the CPU and RAM. This will identify the exact cause of the problem.
You should also try to boot your system using only one RAM stick and change the DIMM socket if the problem still persists.
Change Your CPU
If you have got a spare CPU that is compatible with your motherboard, try switching your CPU to verify if the CPU is causing the problem here. Make sure you establish a proper cable connection and clean the socket and CPU pins before installing the new CPU.
Final Words
If following all the above methods doesn’t fix the Red LED problem, then you might need to change your motherboard. But before that, I recommend reconnecting and reinstalling all the cables and components. This sometimes fixes the problem but if that doesn’t do, your motherboard may be the culprit here.