Thermaltake’s new Contac Silent 12 is one of those coolers that grabbed the attention of those who wanted to build a system that will run cooler and can also provide some headroom for overclocking. The cooler also promises to be silent and perform well in every test as Thermaltake said on their site.
As I have tested a lot of CPU coolers, I wanted to take a look at Contac Silent 12’s performance and whether it could compete against some of the best CPU coolers out there on the market. Read the full review to find out if it’s worth your $25 or not.
Specifications
| P/N | CL-P039-AL12BL-A |
| Compatibility | Intel LGA 1366/1156/1155/1151/1150/775 AMD AM4/FM2/FM1/AM3+/AM3/AM2+/AM2 |
| Dimension | 153H*127W*75.3L mm |
| Heatsink Material | Aluminum Fins Copper Heatpipes |
| Heatpipe | Φ6mm x 4 pcs |
| Dimension | Fan 120 x 120 x 25 mm(L xW x H) |
| Fan quantity | 1pcs |
| Fan Speed | 500~1500 RPM 400~1100 RPM (with LNC ) |
| Rated Voltage | 12V |
| Start Voltage | 9.0 V |
| Rated Current | 0.17 A |
| Power Input | 2.04 W |
| Air Flow | 74.33 CFM |
| Air Pressure | 1.68 mm-H2O |
| Acoustical Noise | 28.8 dBA 22.1 dBA(with LNC) |
| Life time/Fan Life time | 40,000 hours |
| pin connect | 4 pin PWM + LNC (Low-Noise Cable) 27% fan speed and 24 noise can be reduced |
| Cooling Power | 150 W |
| Weight | 700 g |
So, what we can see from the specs sheet is that everything is normal and nothing is at the top of the line and it’s totally fair because it’s a budget CPU cooler. The fan speed is having the range of only 500-1500RPM, so theoretically it means that it will run silently as the maximum speed doesn’t even reach 2000RPM. As far as the flow and Air pressure go, both are fine but the real test will show how much cooling can it perform, Let’s take a look at the cooler itself.


Unboxing
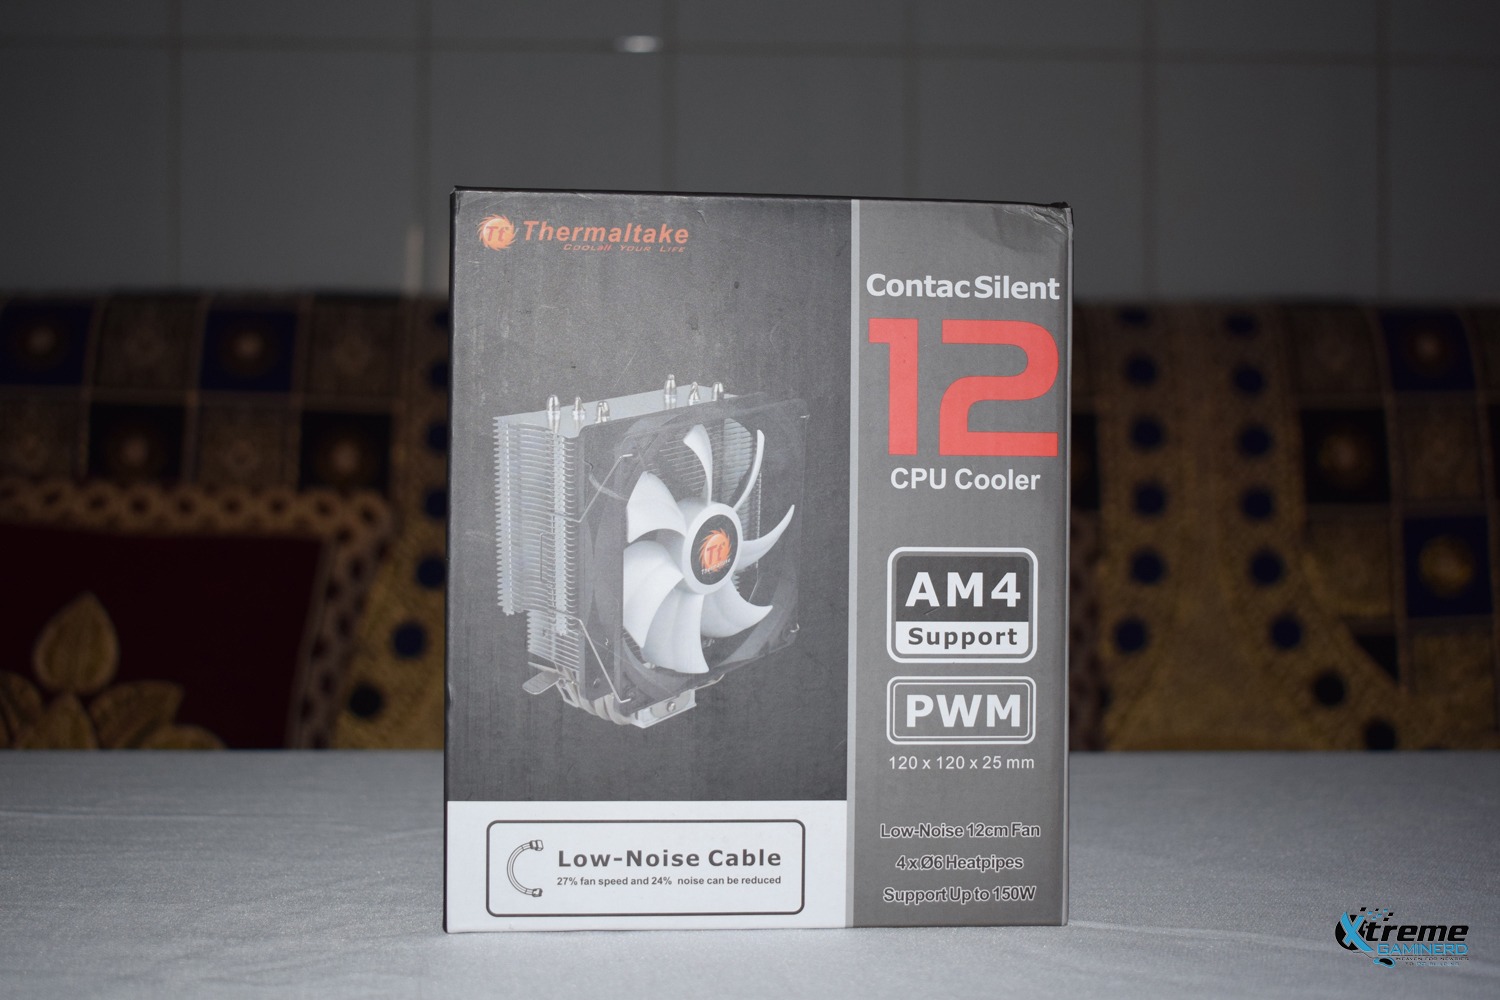

The box is pretty much similar to most of the coolers out there and the heatsink comes separated from the fan and a small white cardboard is there which contains the accessories.
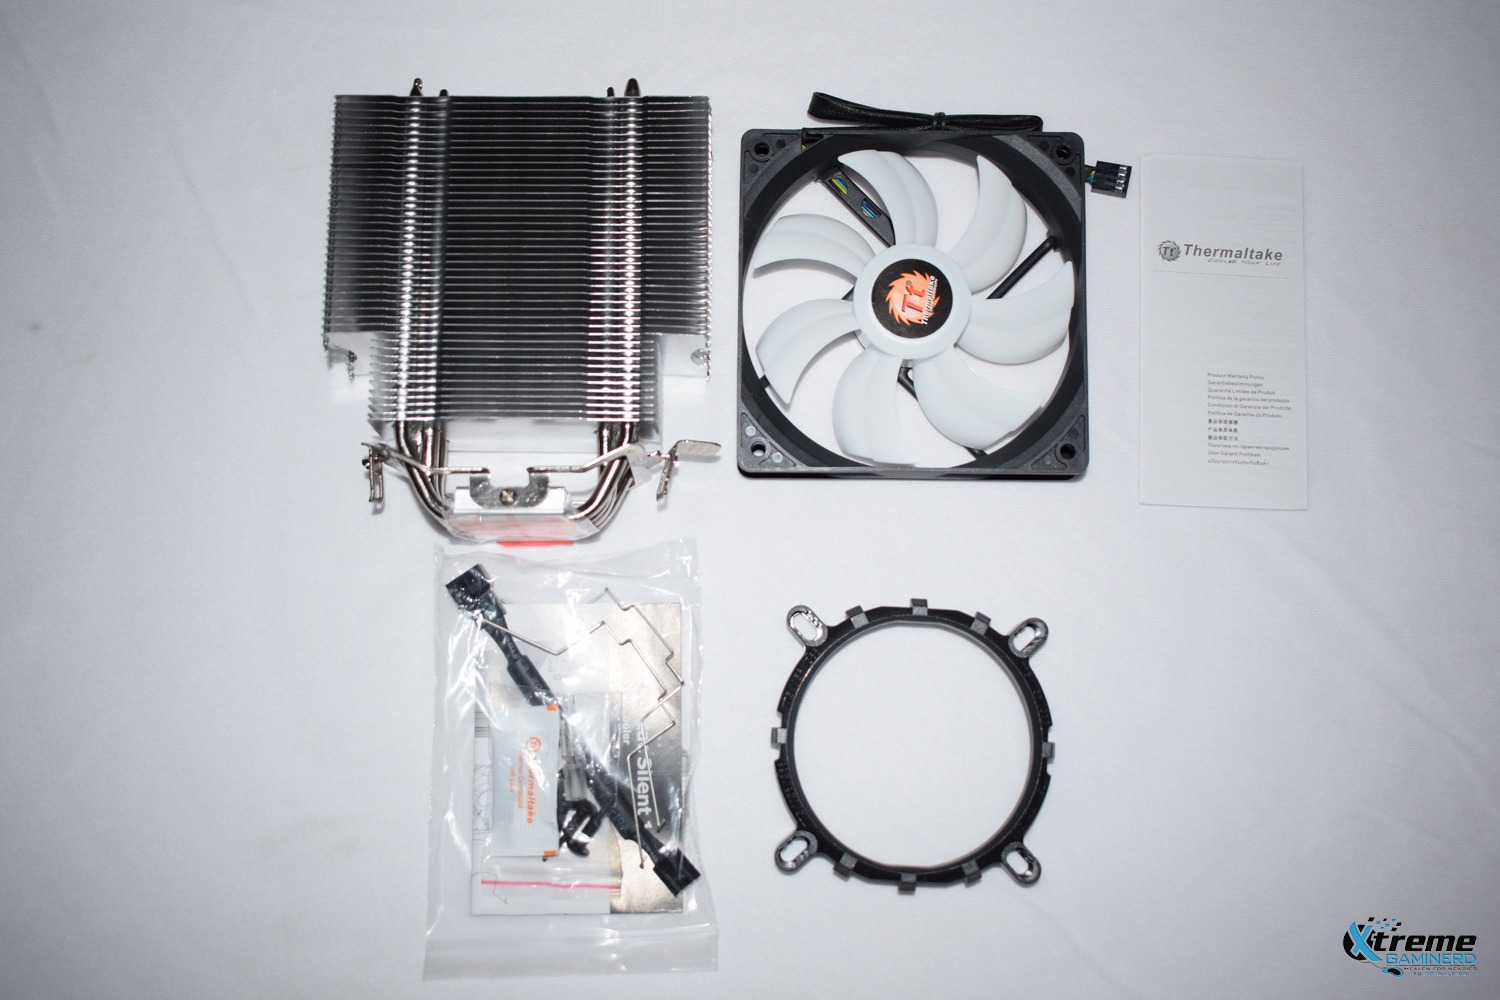
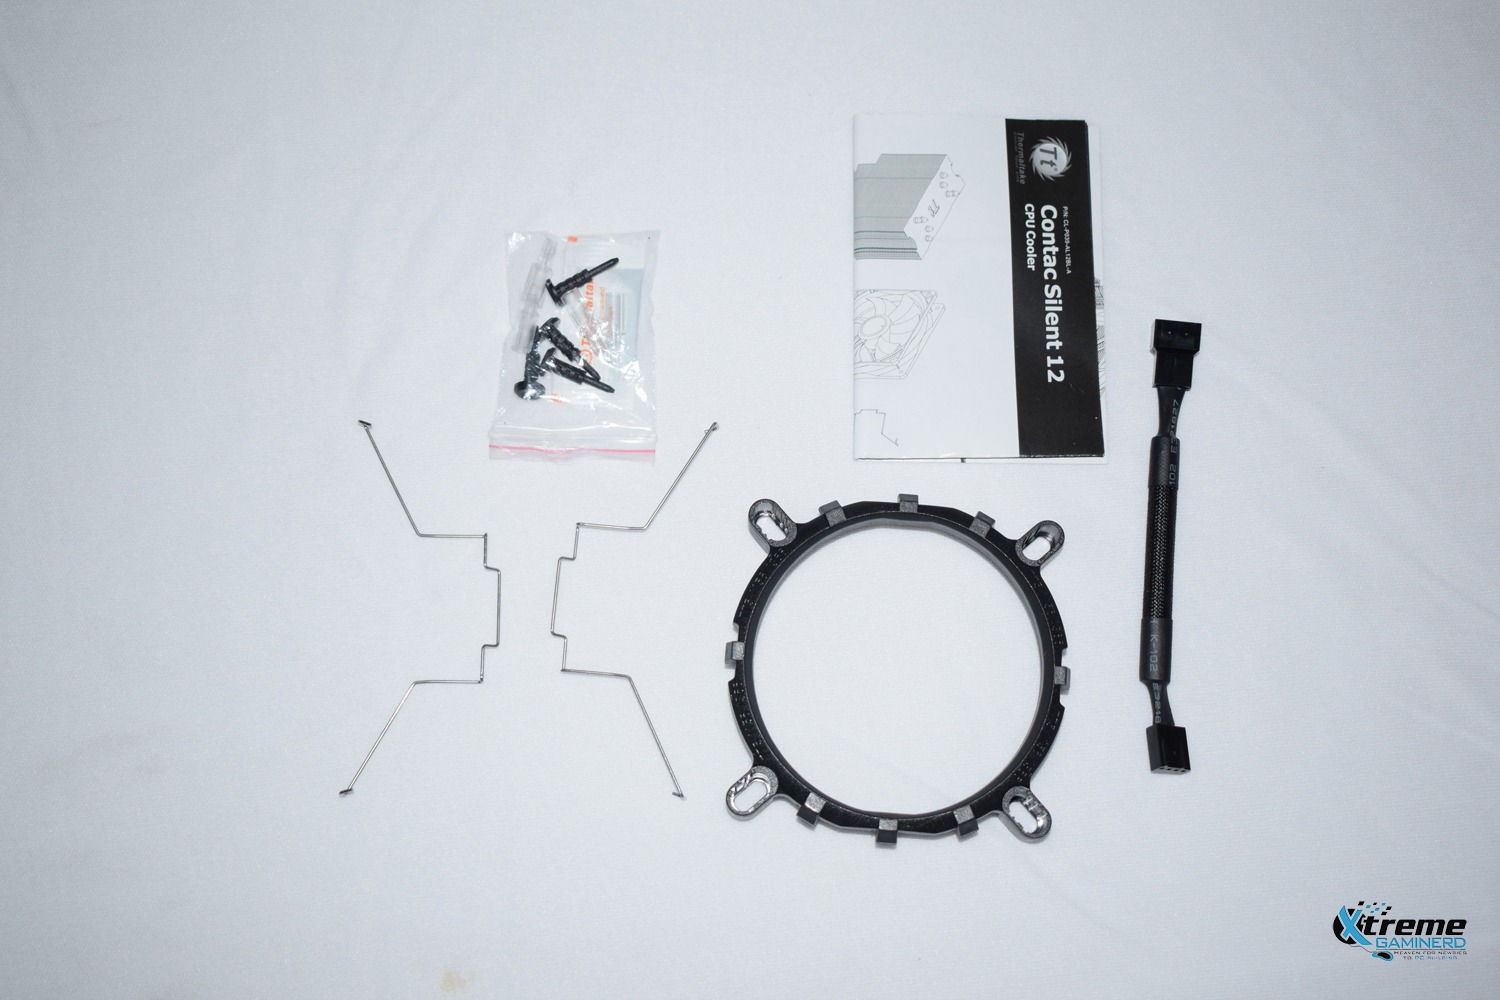
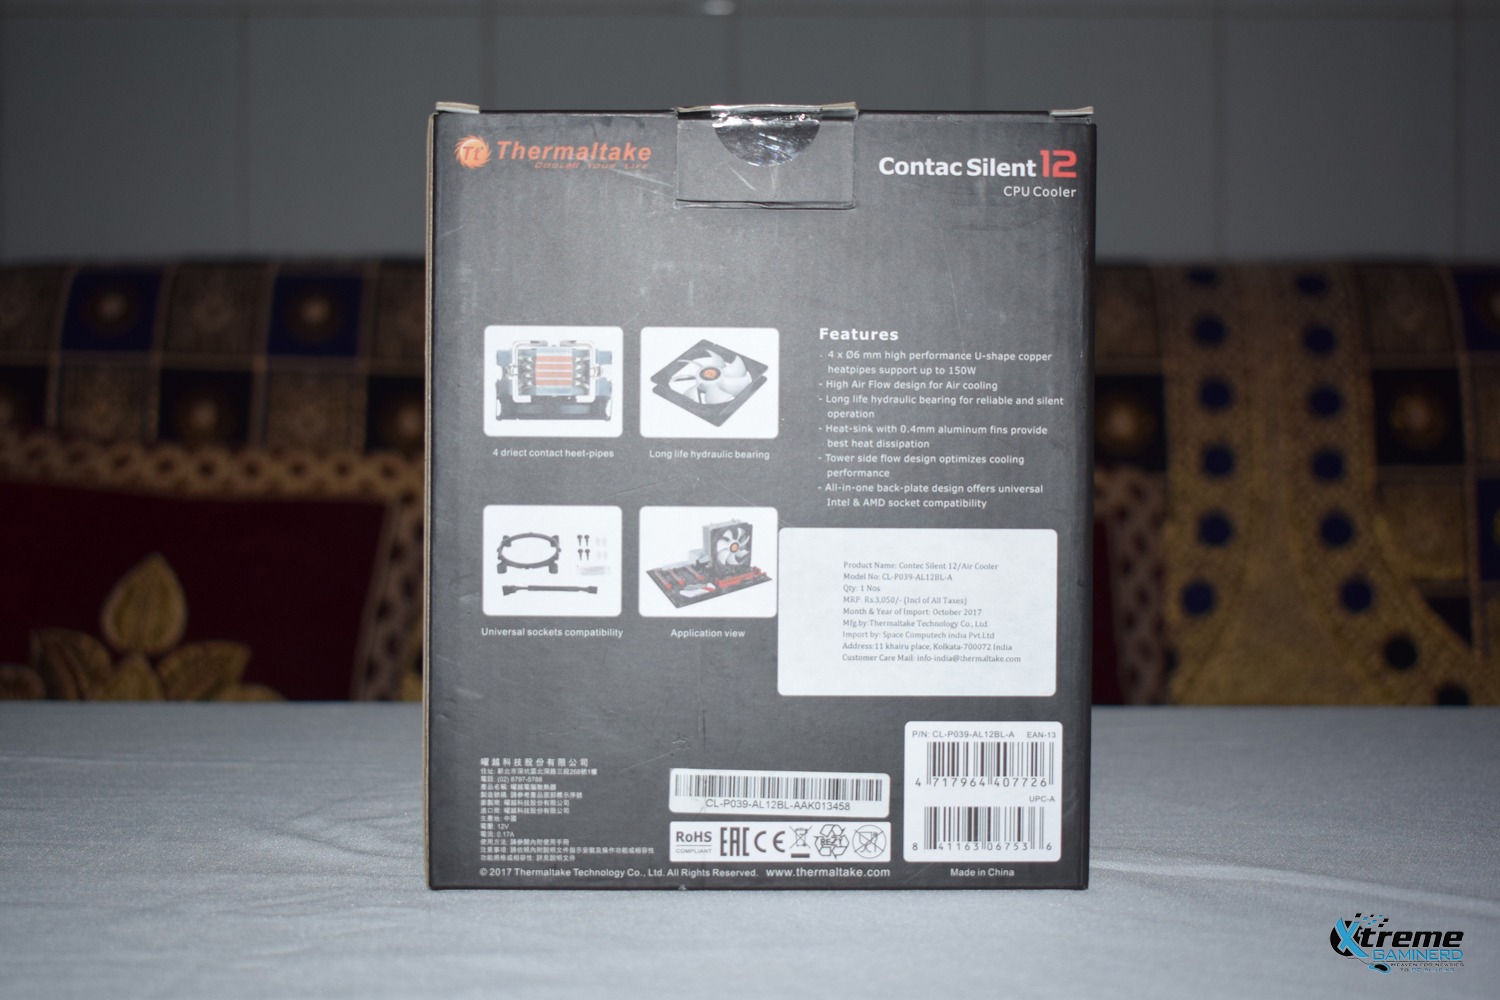
From the above images, you can take a look and see that there are very few things it comes with and Thermaltake is very clever in reducing the cost here to provide a good value for your money. So, I like this approach. There is a single bracket with two clips that are supposed to attach the fan to the heatsink. Four black screws and four white plastic screws are there in a small packet. Along with these, there is one manual and one Low Noise Cable.
This is very basic and I haven’t seen any less than that with any other cooler till now. But it doesn’t mean that it is a CON or limitation. Lesser is best if it can serve the purpose for all. But when I opened the packet I was searching for the thermal paste tube only to find that there is a small pouch that contains the paste in a very limited quantity that can supposedly fulfill your requirement at 2 times max. But I don’t think that it will serve you the second time. A horrible decision here.
Taking a Closer Look
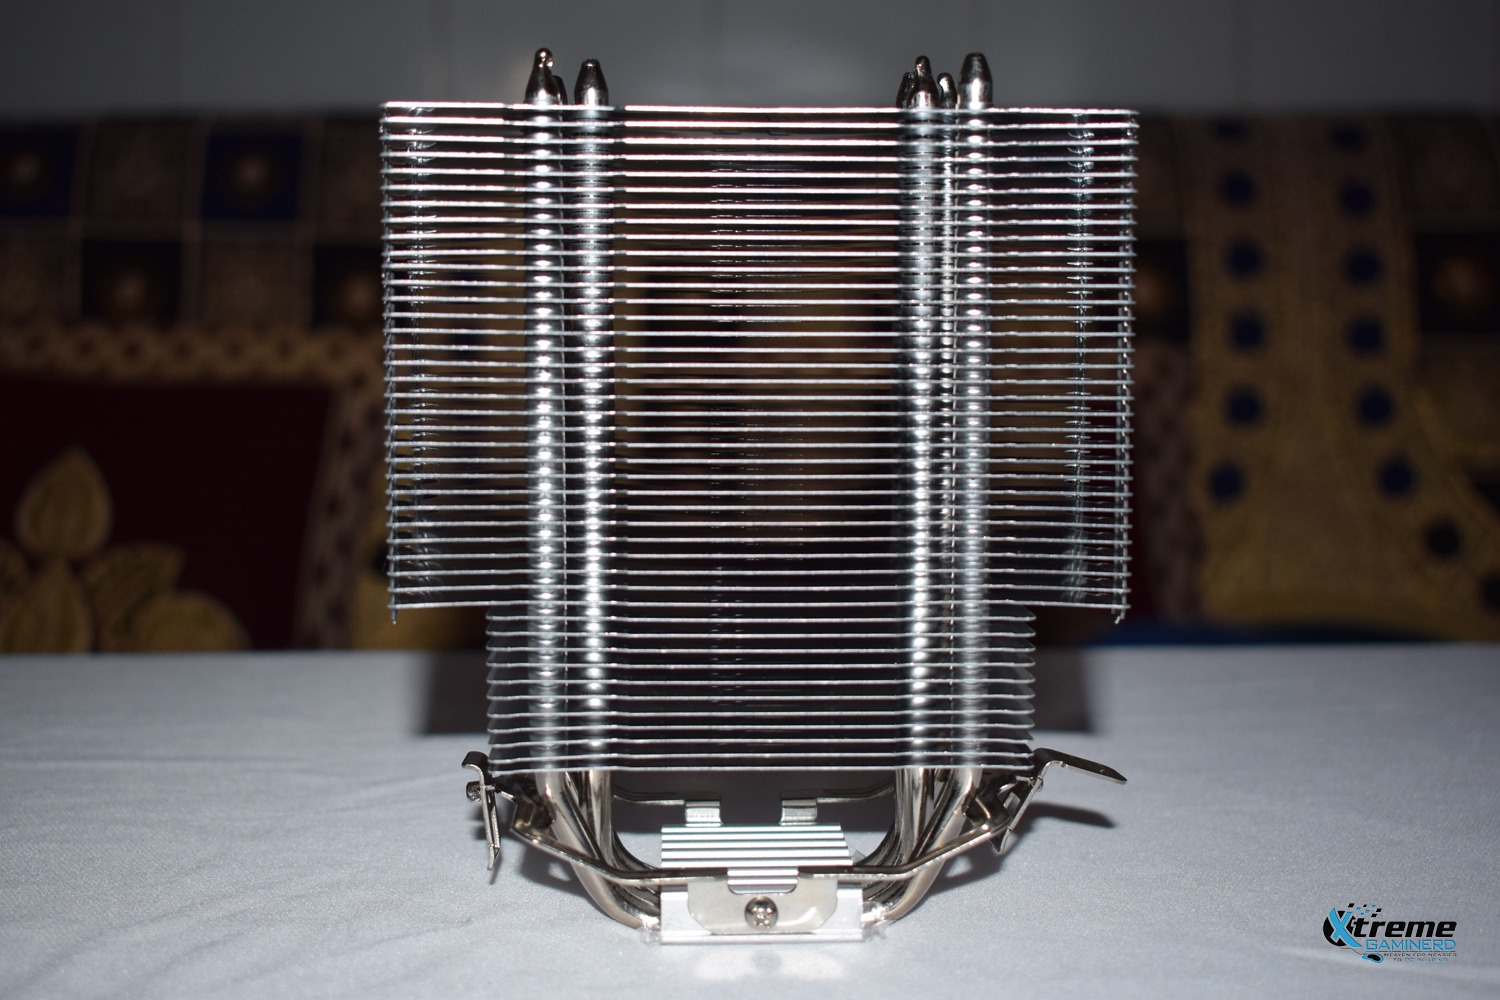
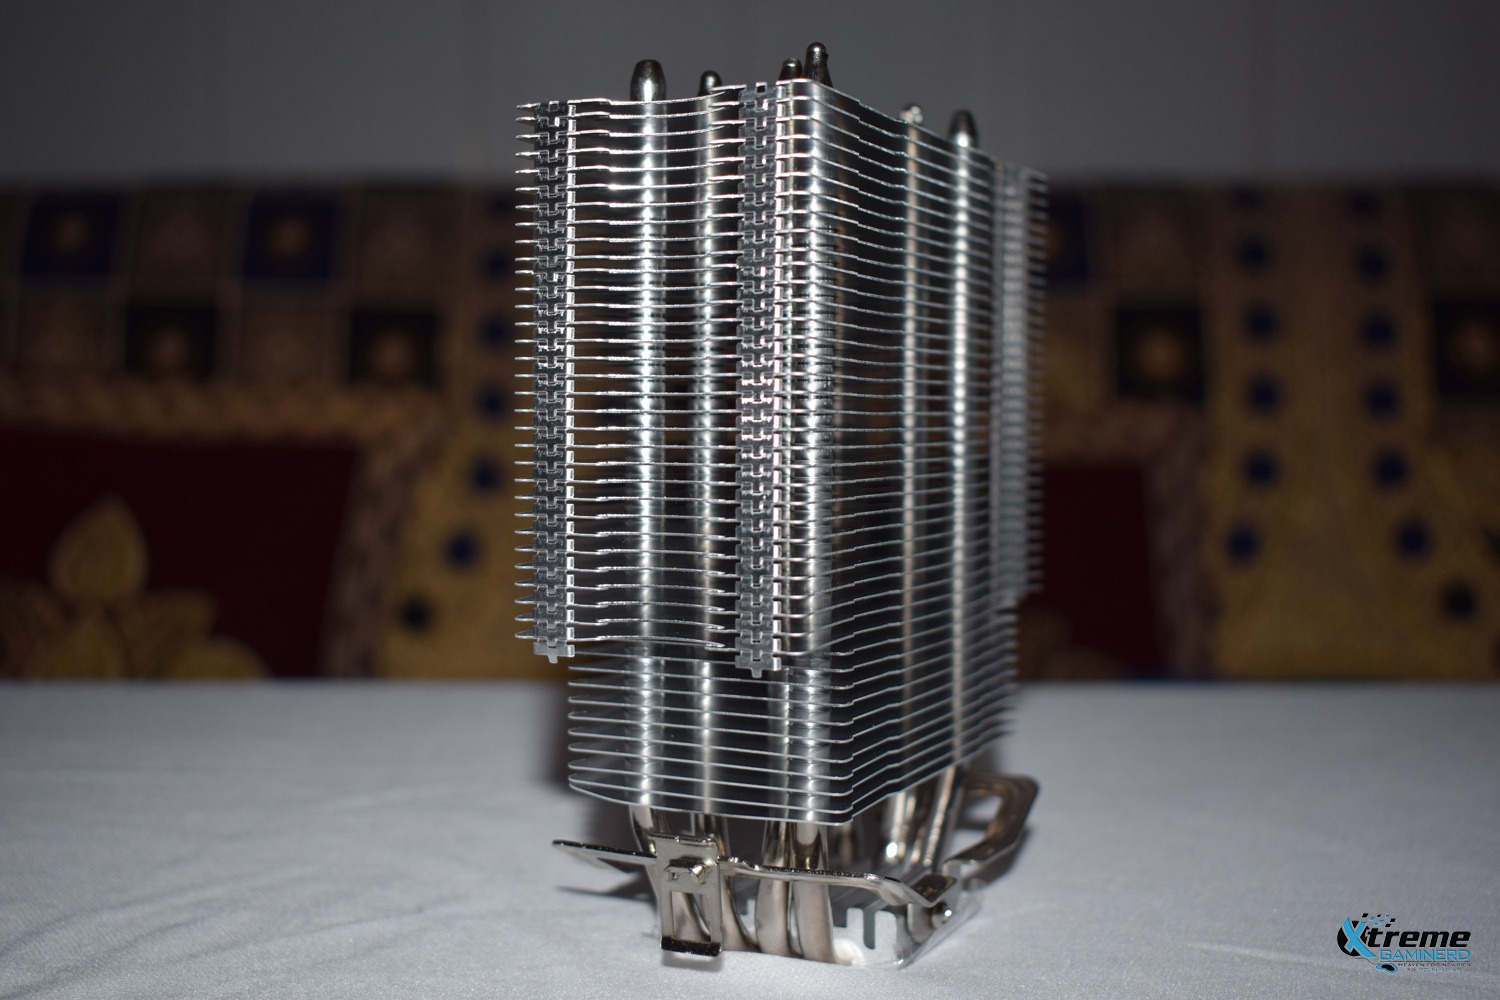
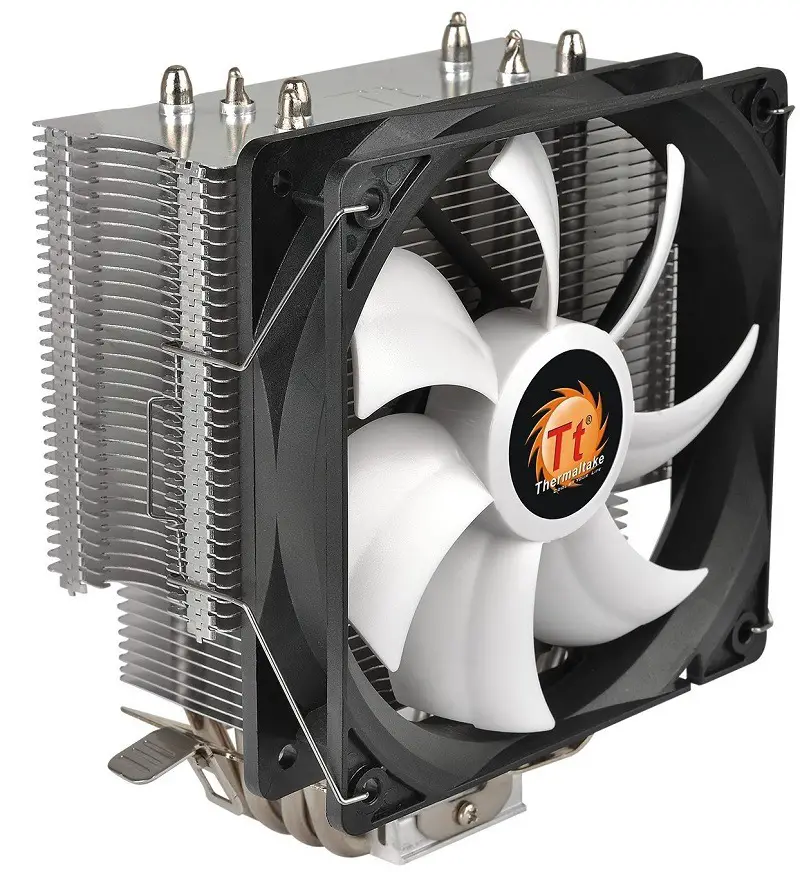
The heatsink is normal with each fin 0.4mm thick and having 2.2mm spacing between them. The heatsink can have two fans at the same time on both sides because it’s ergonomic and the fins are neither too strong nor too weak. It is intermediate in quality but don’t put pressure on it because it can be bent easily if put a lot of pressure, unlike the MSI Core Frozr L cooler which has a very strong heatsink.
Theoretically, it should work well and should have good airflow in between the fins but we will see it in the benchmarks.
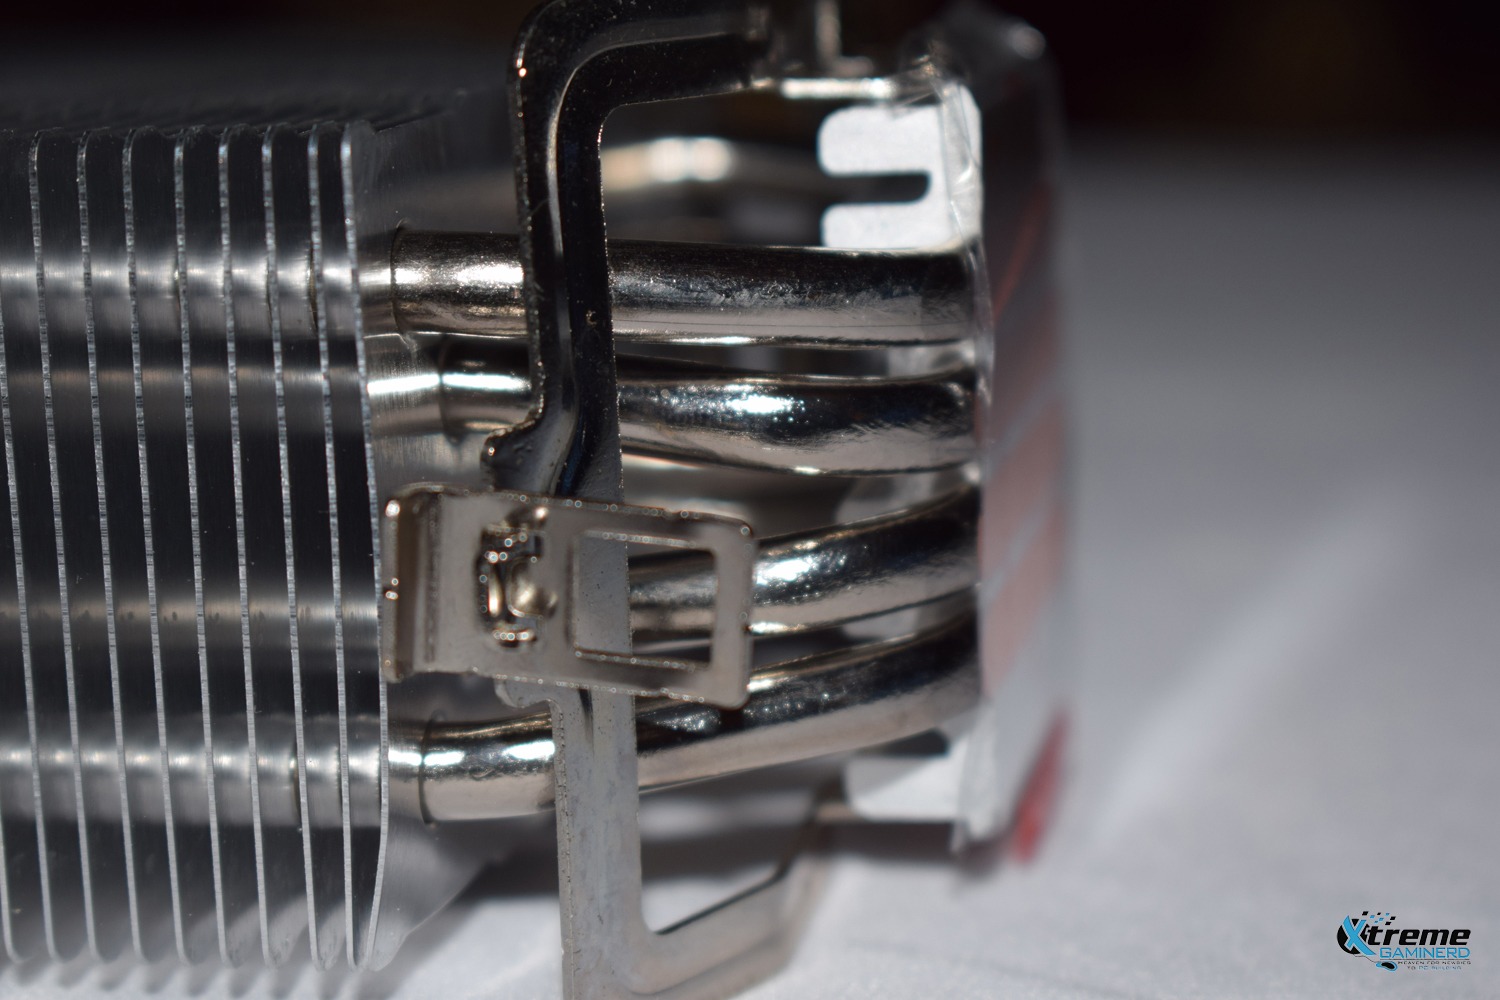
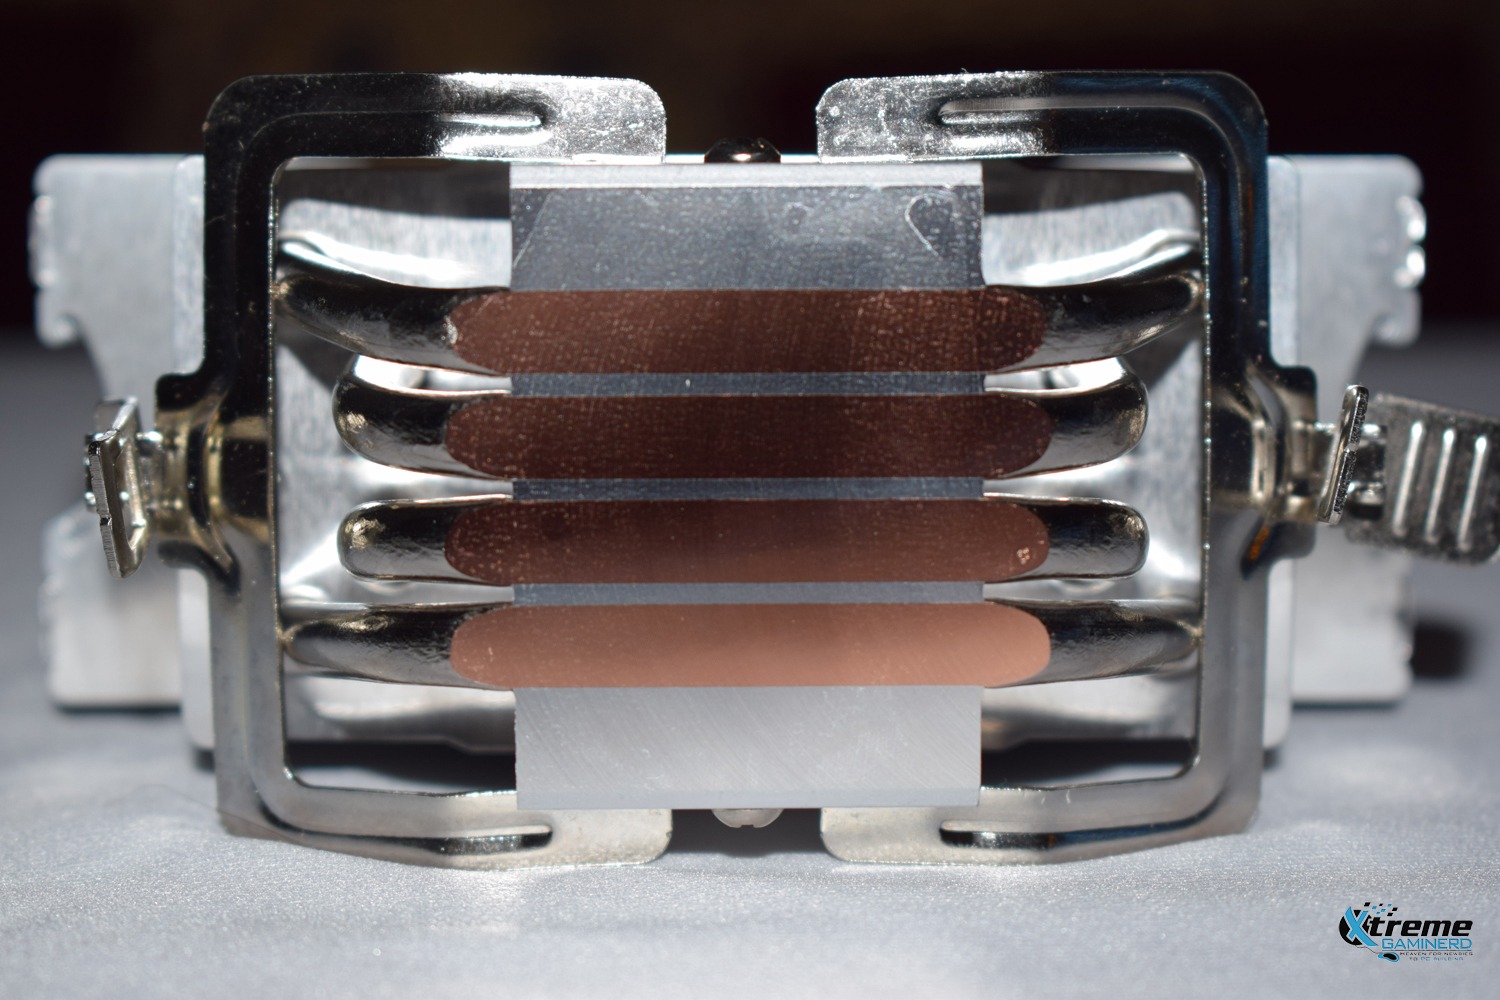
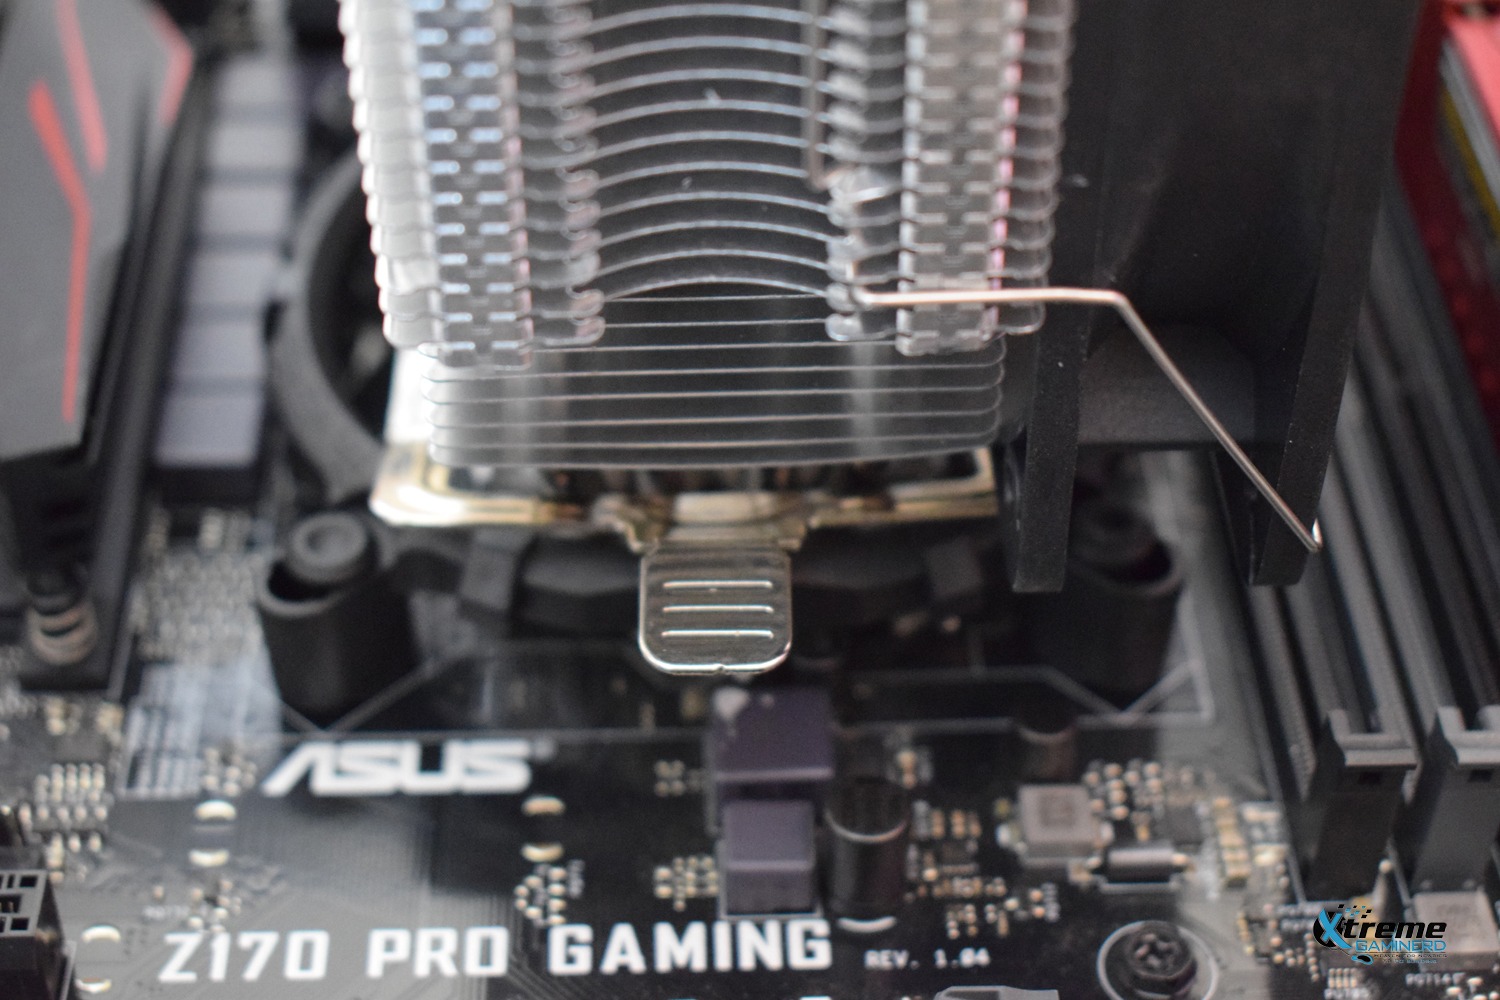
Now coming to its base, it has 4 copper heat pipes that are exposed at the base along with the aluminum heatsink base and will take the heat from the CPU to the main heatsink above. The base is well-finished and it’s better than the base of the Cooler Master Hyper 212 LED Turbo cooler.
The base also comes with a pre-installed bracket that has two screws at two sides that makes it attach firmly to the base. You can remove it but there is no need because without it you can’t install the cooler.
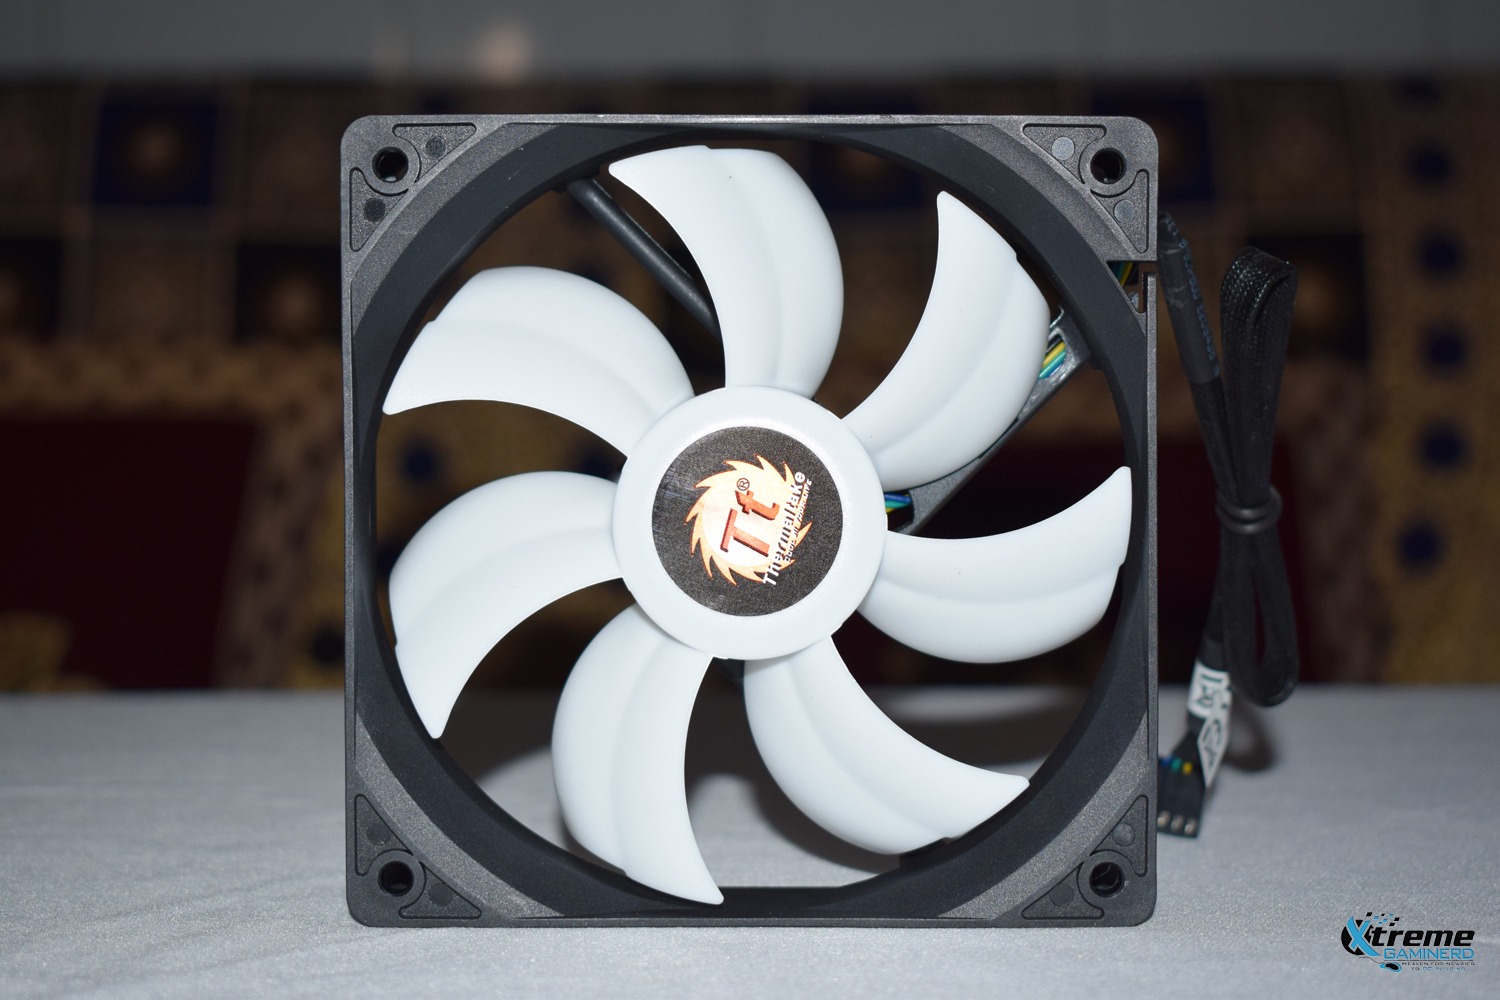
The heatsink uses an air-pressure fan although the Thermaltake site mentions it as a good airflow fan but it’s more oriented towards air pressure than airflow as the blades are wider and the speed range is 500-1500RPM only which is too low when compared to a good airflow fan.
The quality of this fan is not so good but it is adequate to cool down the heatsink. The screw holes will use the included clips to attach to the heatsink but this fan can only be used as a chassis fan. The cable is well protected just like the BioniX F120 Gaming Fan.
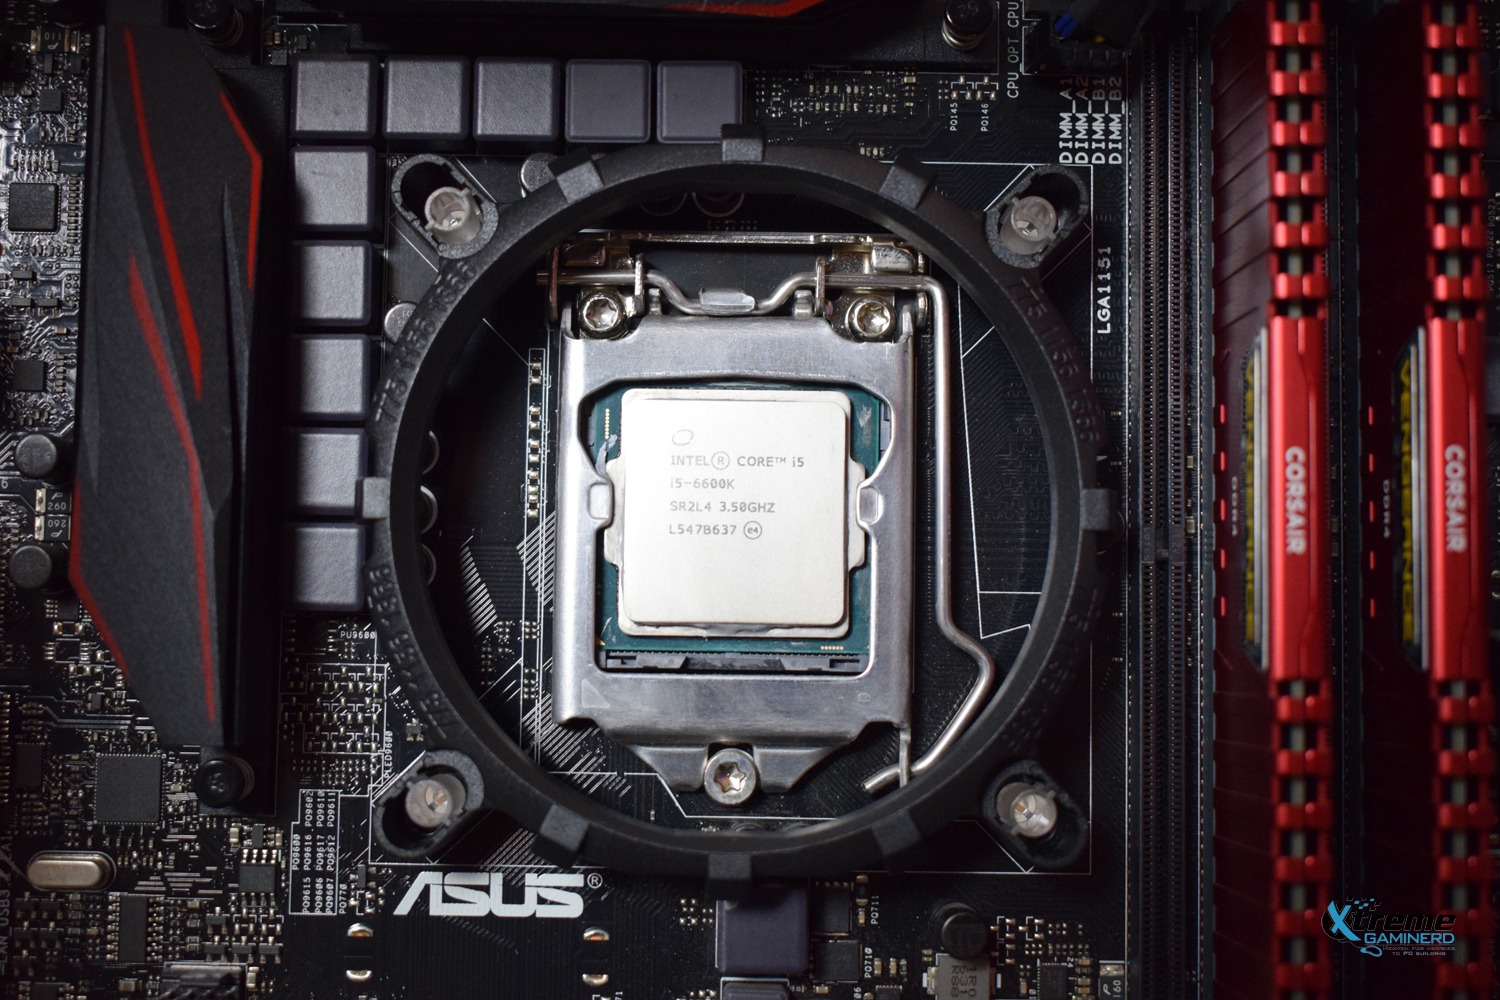
As usual, I removed the old thermal paste from the CPU and cleaned the base of the heatsink too so that the results will be best.
The cooler uses a universal bracket for installation and this alone is enough for any Intel or AMD platform including AM4. So it’s a big PRO that Thermaltake managed to create a single bracket that supports all the sockets and reduces the overall cost.
The 4 black screws are first needed to secure the bracket and then the white plastic screws will tighten the bracket because without these white screws, the bracket will be loose and you can literally shake it with your hands. Although it’s not as strong as a traditional bracket would be, it’s very easy to use this as you don’t have to remove the back panel of your case. It’s really easy and a 10/10 installation technique.

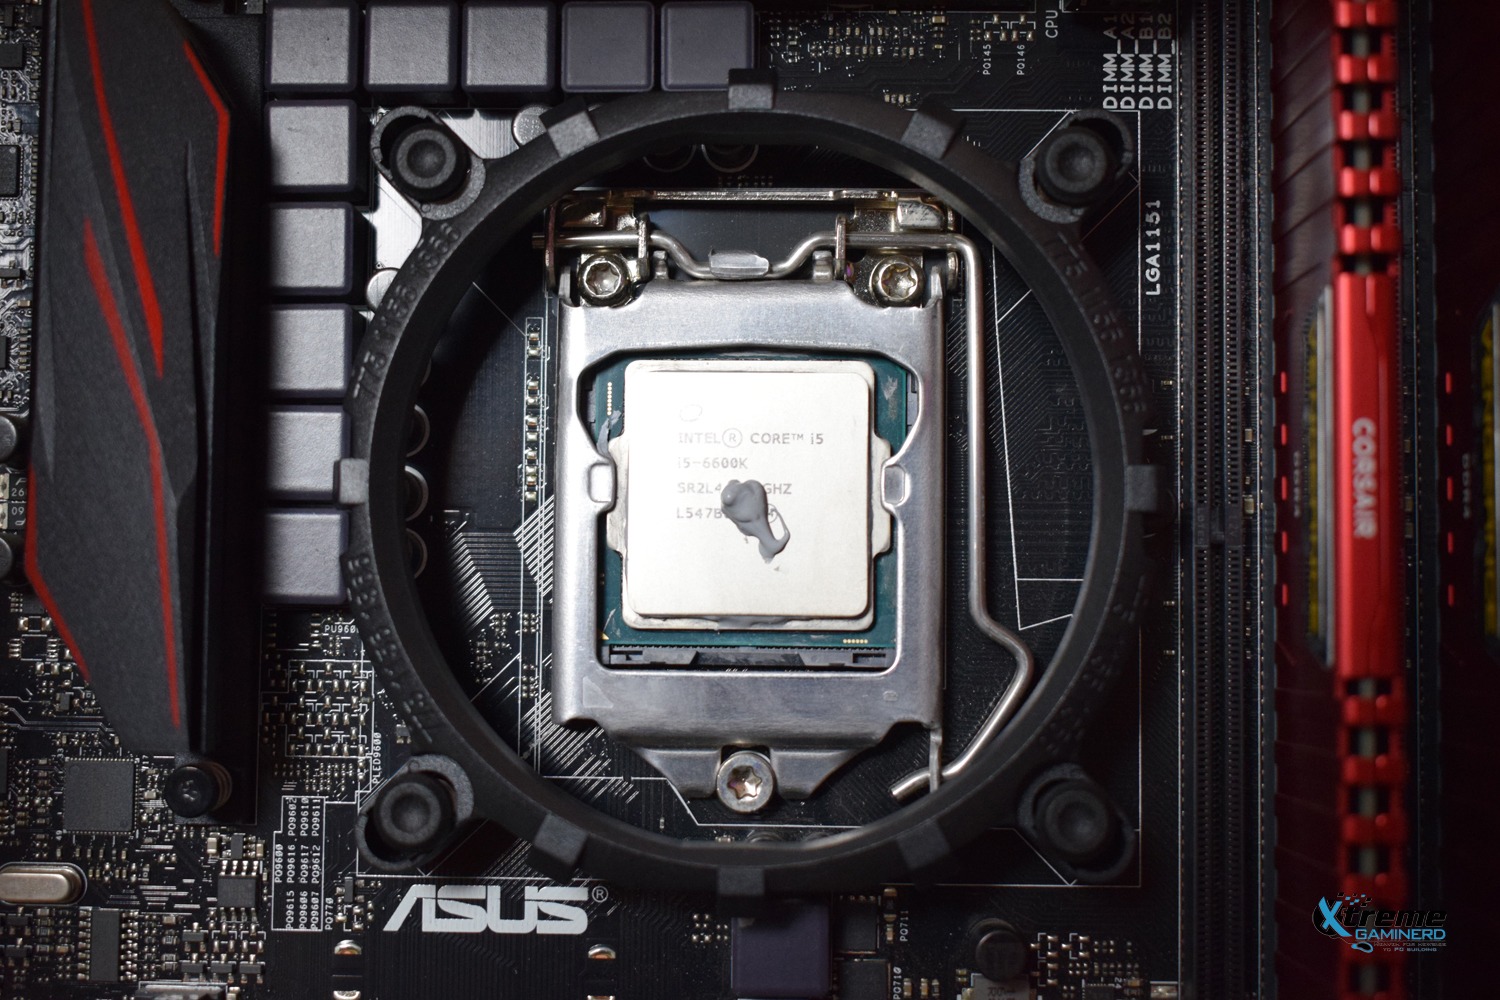
After installation, I applied the Arctic’s MX-4 paste which they provided me with their BioniX F120 fans. It’s a well-known thermal compound and should work well.
Now came the installation of the heatsink and damn! It has the traditional method of installation used on AM3 and AM4 platforms, which is attaching two clips to the plastic lock on the bracket. This is the worst form of installation and I hate it more than any type of installation. Please Thermaltake if you are reading this, don’t use it in any cooler. It’s my humble suggestion.
I tried very hard to press the clips from both sides but it was so difficult that at one point I thought, I shouldn’t continue or I would bend my motherboard socket pins. But I somehow managed to do it after a lot of tries. I don’t know if I am the only one who struggles with this type of installation or if it is really bad. Anyways the finished product after installation of the fan is as below.
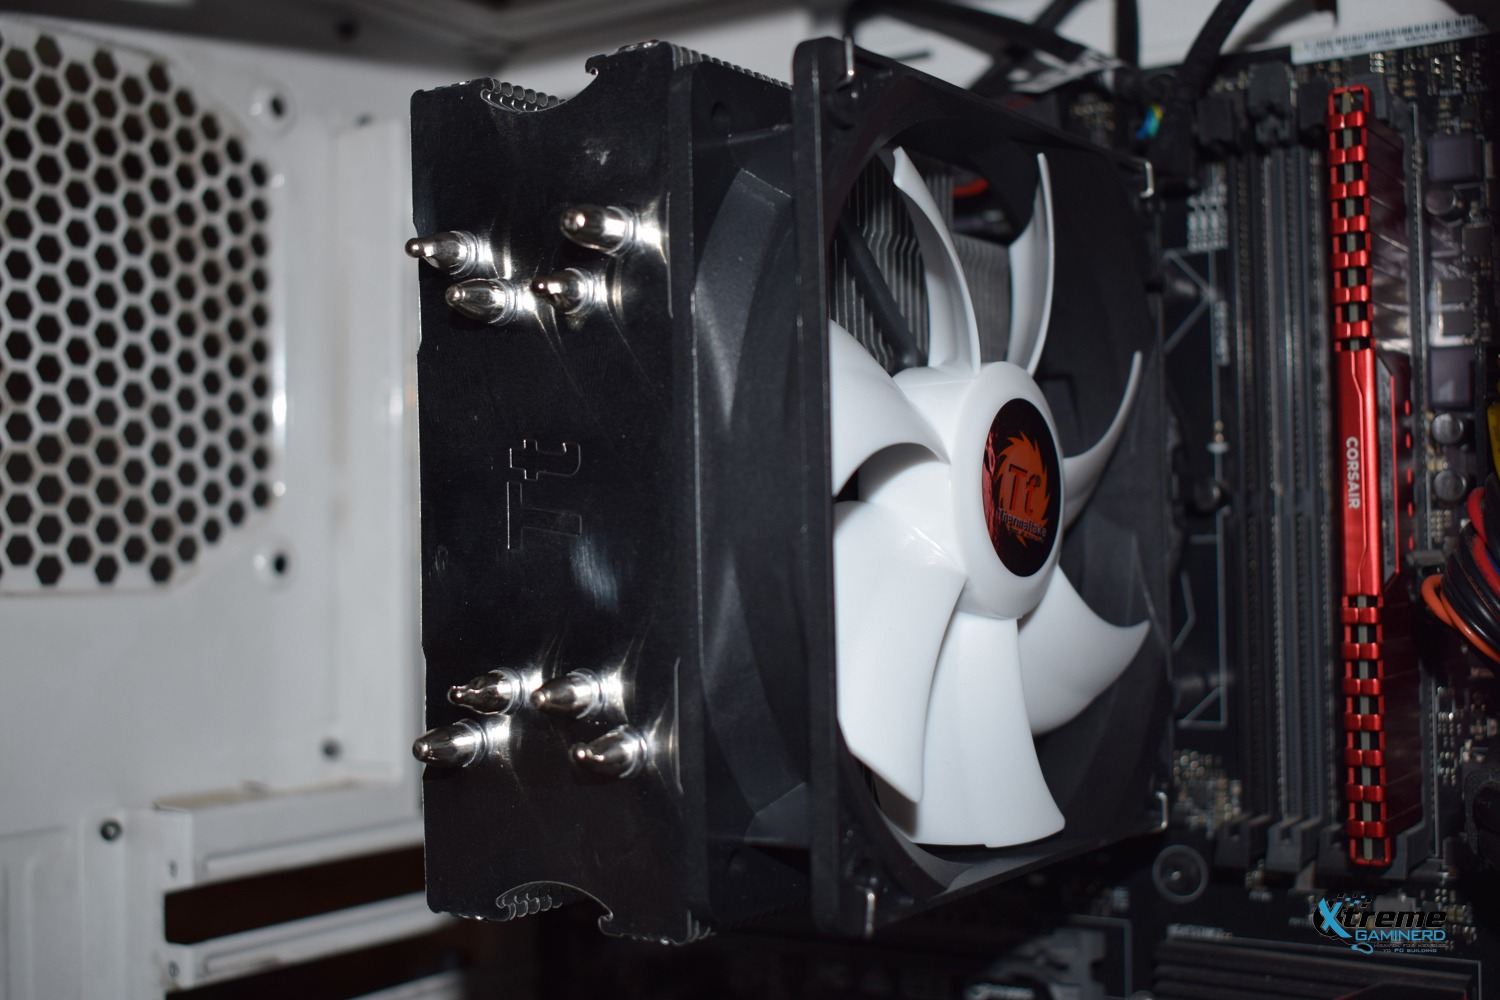
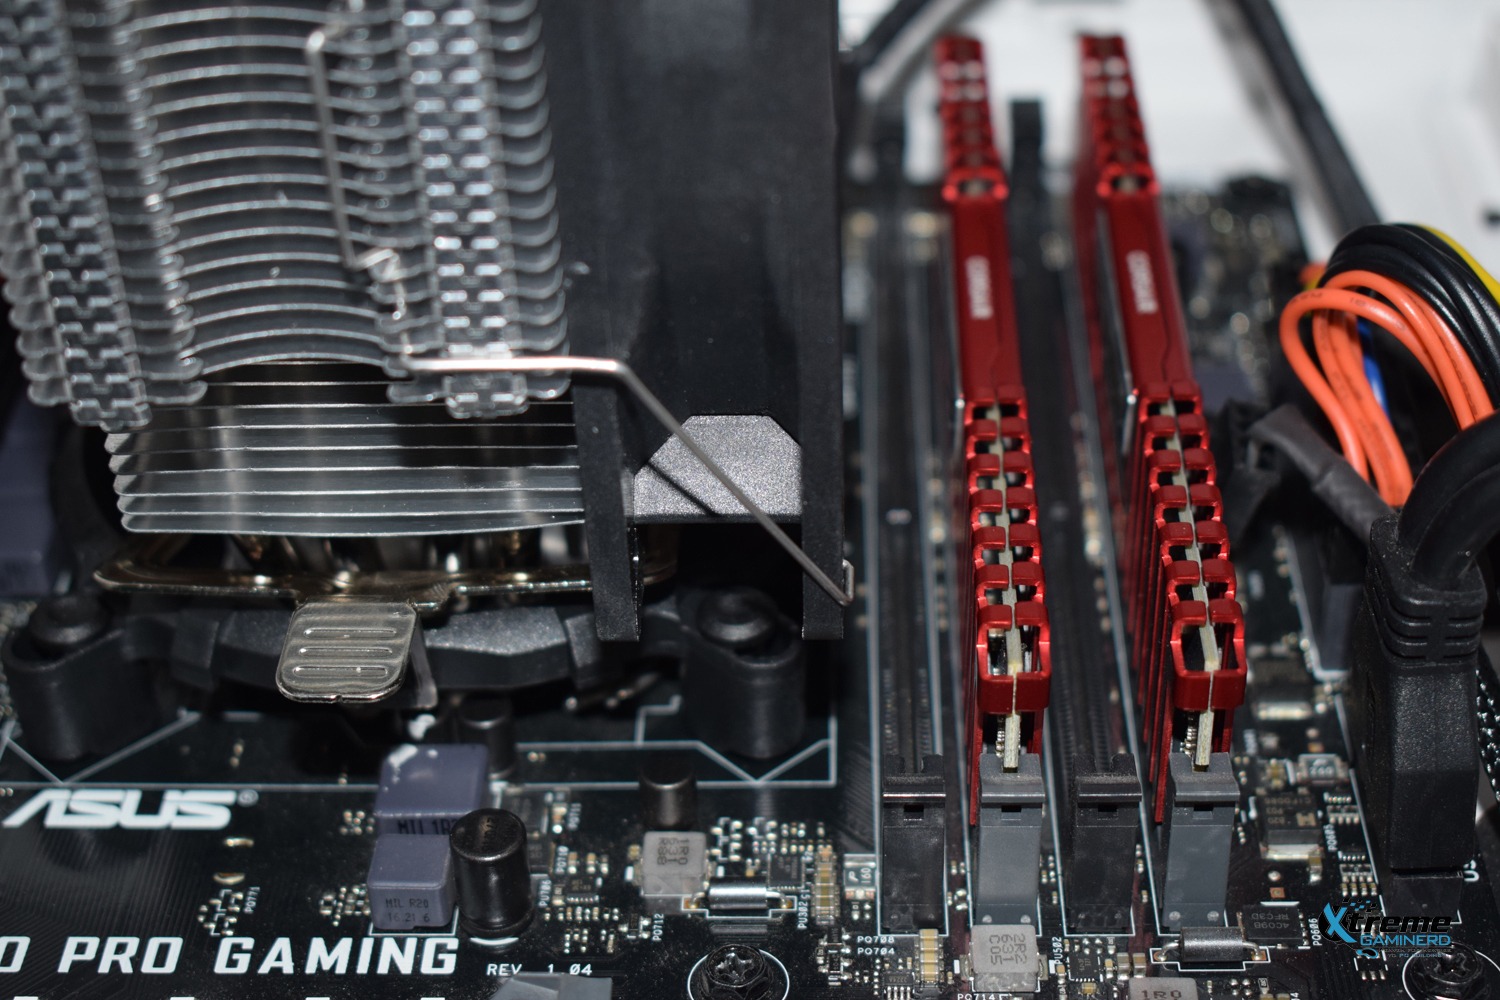
There was no problem for Ram clearance unlike other air coolers I tested and you can install tall memories with ease. A good PRO here.
[nextpage title=”Benchmarks and Conclusion”]
Testing Methodology
Here is the RIG I used for testing the cooler(I use this same rig for every other cooler to keep the results fair):-
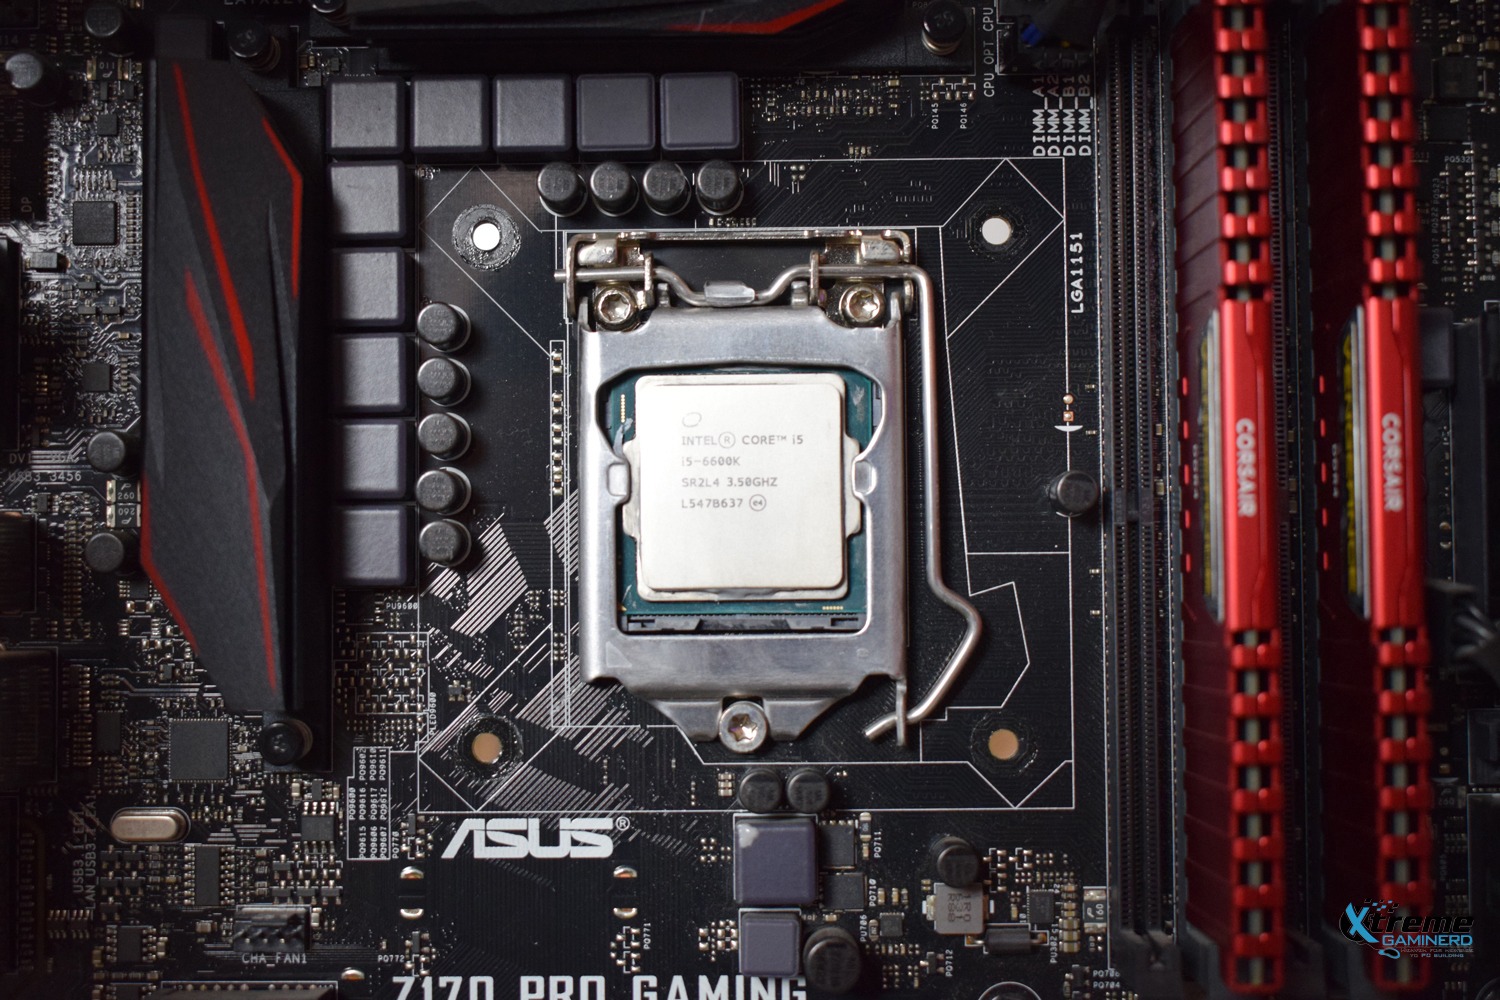
- CPU: Intel Core i5 6600K
- MOBO: Asus Z170 Pro Gaming
- RAM: 2x 4GB DDR4 2400Mhz Corsair Vengeance LPX
- HDD: 320GB WD HDD
- WIFI: TP-Link N300 Wifi PCI Card
- PSU: Cooler Master MasterWatt Lite 500W
- CASE: Cooler Master 690 III
- FAN: 1x 120mm Corsair AF fan at the rear, 1x 120mm DeepCool TF120 fan(Used from Radiator)
I tested the fans at 25C which I measured using a Digital LCD thermometer and kept it in consideration if the room temperature changed anytime while testing. For measuring the CPU temperature and fan speed I used CPUID HWMonitor and for overclocking the CPU I used the Asus AI Suite 3. For tweaking the fan’s speed I used Bios as well as Asus AI Suite 3.
For testing the noise I used a Digital noise tester.
I also kept the side panels open for complete airflow and to maximize the cooling.
Thermal Test
I used the HeavyLoad software for stress testing the CPU and ran the benchmark for 15 minutes each time I changed either the clock speed or the fan speed. And between the tests, I gave it full time to cool down to come to the initial temperature.
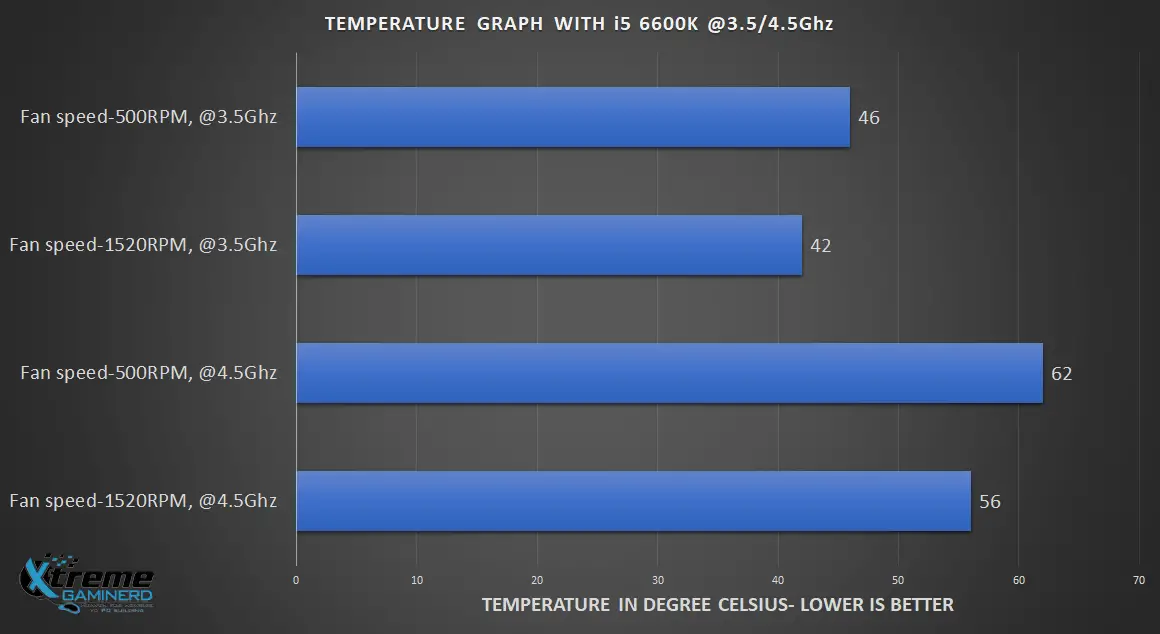

The cooler performs really well in thermals and as you can see it can be used for overclocking an i5 or even an i7 up to a decent clock rate. The temperature that is below 70C is considered decent when the CPU is fully overclocked and at 25C room temperature, this cooler performs really great.
Noise Test
For testing noise, I kept the Digital LCD noise meter a few cm away from the cooler because it can only operate at close range and the following results were obtained.
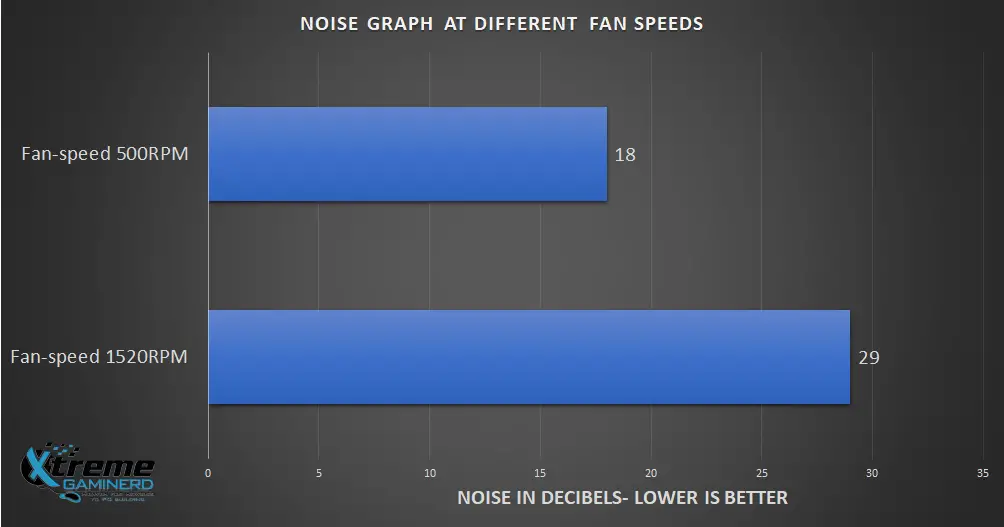
At 500RPM speed, the decibel level is 18dbA which is not great. It should be around 15dbA at this slow speed. Similarly, at 1520RPM it is around 29dbA which is average and not too spectacular. As compared to the cooling performance, its noise performance is not good. I wonder if the fan speed range was over 2000RPM, how much noise would have been this fan making, 35dbA?