When I say “Cheap”, it should mean that the gaming PC should be affordable to the vast majority of the PC gamer community and should be able to play a lot of popular titles, especially eSports games. Therefore, it shouldn’t be only ‘Cheap’ as it is not possible to play all the games on it smoothly.
As this term can mean different things to every other person, I have stated mine to let you know what I am going to focus on in this post.
What is the Cheapest Good PC you can buy?
From the past few years, watching the sales of different PC components around the world as well as the engagement of people on our posts, I have seen that somewhere from $400-$700 is the budget range where most PC gamers fall. Therefore, the build suggestions I am going to give will cover this range only.
So, again, know that for many, Cheap could be somewhere from $200-$300 but I would be wasting your time if I recommend an APU like Athlon 3000G or Ryzen 3200G. These cannot give a proper game experience, definitely not 60 fps at 1080p.
The recommendations I am going to list here will contain the best and latest-gen parts from each category whether it is the processor, graphics card, case, or storage drive. Not only that but you will be given direction on how to build the whole PC that will follow after the build suggestions.
Now without waiting any further let’s dive into the list and make an awesome cheap build that will make you a part of the PC Master Race.
Processor(Option 1, $400-$500 Build)
Intel Core i3 10100F/AMD Ryzen 5 5600G
i3 10100F at Amazon i3 10100F at Newegg 5600G at Amazon 5600G at Newegg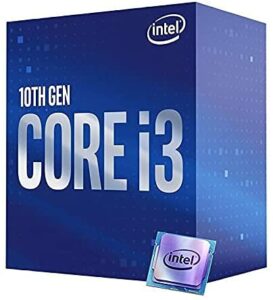
For a budget gaming build, it’s best to go with integrated graphics if you can’t spend on a dedicated GPU. The Ryzen 5600G will here be a fantastic choice which will easily allow you to play at 1080p with low to medium settings.
It comes with 6 cores and 12 threads and integrated graphics based on Vega architecture. It might not be cheap but is surely a viable option. In case, you can spend some more cash, then I would recommend going with the i3 10100F which is significantly cheaper than the 5600G but will have to use a discrete GPU.
Even though we have the 12th gen Alder Lake CPUs, for budget builds, the Core i3 10100F is simply the best bang for the buck. The reason is its price-to-performance ratio. Although launched for around $110 initially, due to a budget battle war between AMD and Intel, its price dropped to way lower than $100. This makes it an excellent choice for cheaper builds.
It features 4 cores and 8 threads clocked at 3.6/4.3GHz. With 4 cores, you can literally play almost every game easily and you don’t even require an expensive unlocked chipset motherboard as the i3 10100F doesn’t support overclocking. This makes the path to building a cheaper PC easier and you won’t be compromising on the gaming performance as this chip is sufficient to push every budget GPU to its 100% potential.
For a $400 to $500 budget, this is the best choice for any cheap gaming build and doesn’t require any custom cooling solution.
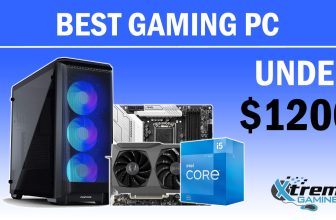
Processor(Option 2, $500-$600 Build)
Intel Core i3 12100F
Buy at Amazon Buy at Newegg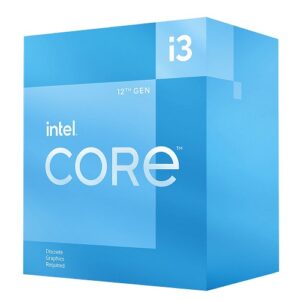
For just over $100, we have the king of quad-core CPUs from the Intel Alder Lake family. The Core i3 12100F is a significantly better choice over all the budget processors under $100 and features the fastest single/multi-core performance for around $110. It easily defeats the Core i5s of previous generations and gives you the sweet spot gaming experience on a budget.
It features 4 cores/8 threads on a base clock speed of 3.3GHz that can reach up to 4.3GHz with Turbo Boost technology. Its TDP is also higher than the 10100F ranging from 58W to 89W making the higher clock speeds sustainable for a longer time. Almost any budget to mid-range GPU will go well with this one and just like the 10100F, it is a locked chip that will be better off on a locked chipset motherboard like H610 or B660.
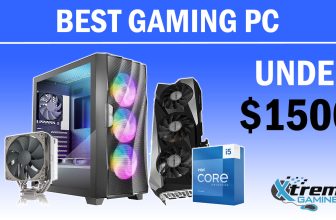
Processor(Option 3, $600-$700 Build)
Intel Core i5 12400F
Buy at Amazon Buy at Newegg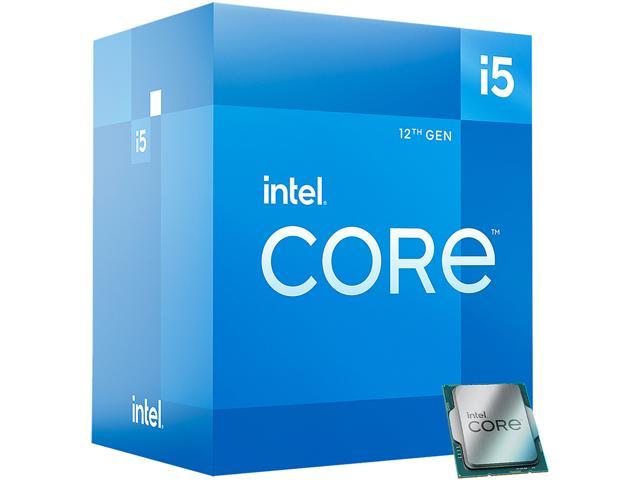
For less than $800 total budget, we have a couple of CPUs from Intel and AMD costing less than $200. This price range is very competitive especially since Intel released the Alder Lake CPUs and AMD answered back with a couple of more Ryzen 5000 series CPUs to compete with them.
We have some really good options like the Ryzen 5 5500 and Ryzen 5 5600X but the Core i5 12400F is still a better option due to its compatibility with the DDR5 platform. It features 6 cores and 12 threads with a turbo boost clock of up to 4.4GHz.
It closes a lot of gaps with the Ryzen 5600X by being more future-proof and decreasing the overall PC cost. Also, as it is a locked chip, you can save a lot of money by purchasing an H610 or B660 motherboard whereas the Ryzen CPUs require an unlocked chipset motherboard if you want to unlock their full potential.
Motherboard
MSI Pro H610M-G/MSI B550 Gaming Gen 3
H610M at Amazon H610M at Newegg B550M at Amazon B550M at Newegg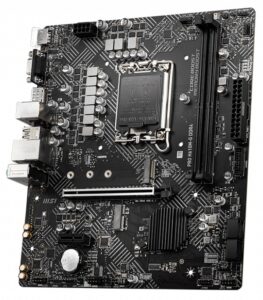
To save the overall cost of the build, it is better to cheap out a little on the motherboard. As the three CPUs I recommended belong to the same family and use the same socket, it makes it easier for you to choose any CPU but retains the same motherboard. You can also easily upgrade to a better CPU in the future without changing this board except if you are looking for something that is overclockable.
The MSI Pro H610M-G is a fine board for less than $90 and comes with all the basic stuff including 2x DIMM slots, 1x armored PCI-E x16 slot for GPU, and 1x PCI-E x1 slot for expansion cards. Unlike most manufacturers, MSI makes the best budget motherboards as even their entry-level boars like the H610M-G are equipped with EZ Debug LEDs that help you out a lot in troubleshooting.
For the Ryzen 5600G, you can go with the budget MSI B550 Gaming Gen 3 mobo which is far better than the H610M and delivers an ATX form factor with tons of ports, slots and headers for components and accessories.
Not only that but it also allows overclocking your CPU which will result in a noticeable increase in performance. It is a little more expensive than the motherboard I chose for the Intel CPUs but you also cut down on a discrete GPU saving more money on your build.
RAM/Memory
Patriot Viper Steel 8GB/ 16GB DDR4
Buy at Amazon Buy at Newegg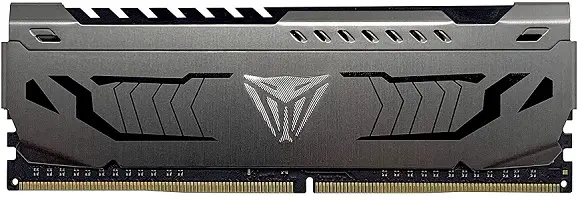
Whether you are building a $400 build or an $800 build, the minimum RAM I recommend is 8GB. Nowadays, I don’t recommend investing money in other parts by cutting off the budget for the RAM because RAM bottlenecks badly if it is insufficient.
8GB RAM will be plenty but also not too much as games easily consume more than 6GB of RAM at 1080p resolution. This RAM stick from Patriot is clocked at 3200MHz which will be completely compatible with the motherboard I listed.
It is fast and affordable and if you need more, you have one more slot left to fill. Make sure you buy this same RAM module if you want to upgrade or if you are building a $600-$700 gaming build.
Storage Drive
Silicon Power 512GB
Buy at Amazon Buy at Newegg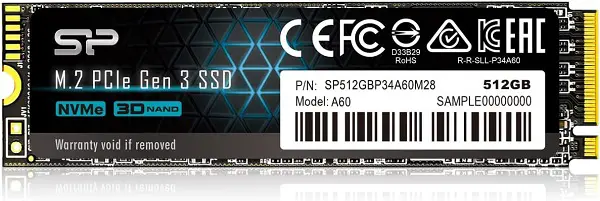
Thanks to Silicon Power for launching a great performing and affordable NVME SSD that cost as many SATA SSDs. You shouldn’t be going with hard drives these days except if you need a lot of storage but in the very start, you need an SSD for storing your OS and files so that they run quickly.
NVME SSDs are even faster and although the MP33 is slower than a lot of NVME SSDs, it is still three times faster than the SATA SSDs at the same cost. Faster NVME SSDs will cost you more than double compared to this one and therefore, will increase the overall cost of the build.
With 512GB capacity, you can surely store a couple of big games on your drive and you can add a new one when you need more space.
Graphics Card(Option 1, $400-$500 Build)
Integrated/ Radeon RX 550
Buy at Amazon Buy at Newegg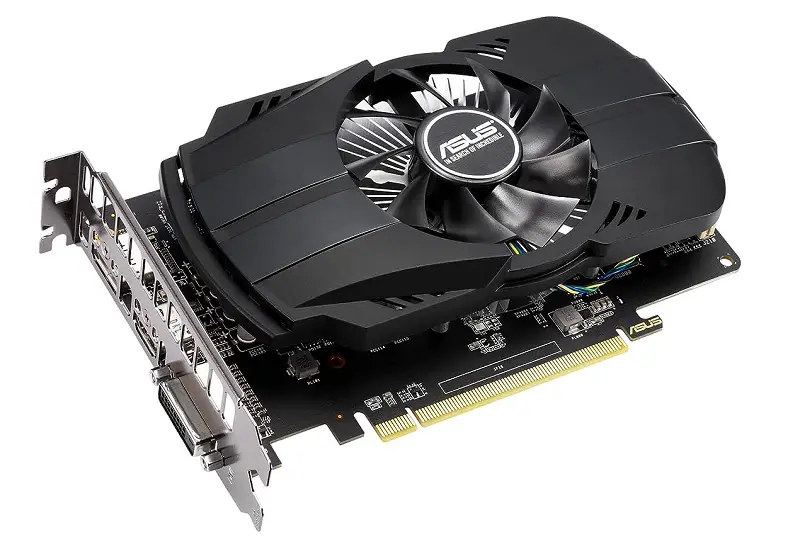
If you are going with the Ryzen 5600G build, then you don’t have to worry about any discrete GPU. The Vega 7 on the 5600G will take care of casual gaming as well as playing a lot of the latest games at 1080p low to medium settings.
In case you are going with the Intel platform, then there are only a couple of options in total and most of these GPUs aren’t available for under $100. Out of the very few options, I believe that the Radeon RX 550 is the best option to go with. It is based on the GCN architecture and features 2GB GDDR5 VRAM. This will be just Ok for gaming on low to medium settings but don’t expect it to perform great at 1080p.
It will be much better for older titles, less graphically intensive games, and esports titles where you need less GPU horsepower. Being a power-efficient GPU, it does have one benefit and that is you don’t need an external power cable to power the GPU. It will take the power from the PCI-E slot and removes the need for an expensive PSU.
Graphics Card(Option 2, $500-$600 Build)
Radeon RX 6500 XT
Buy at Amazon Buy at Newegg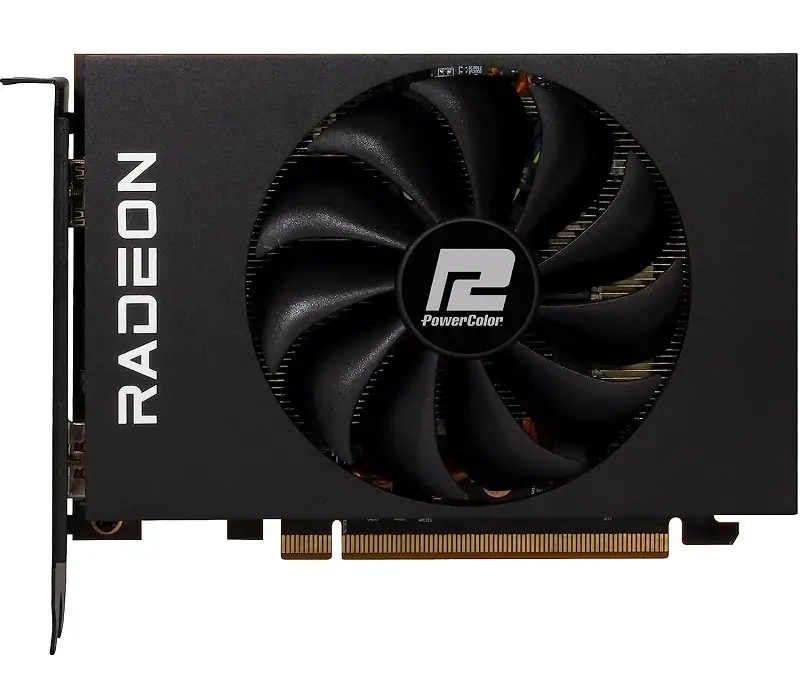
The Radeon RX 6500 XT is in no term the best GPU, not even average if we consider its PCI-E lanes limitation but compared to the GTX 1650, it gives much better value for the price. Initially launched for $200, the GPU can now be found for way less than $200 in most retail stores.
RX 6500 XT belongs to the RDNA 2-based RX 6000 family and features 4GB GDDR6 memory. It features great clock speeds of up to 2815MHz and is power-efficient too. It is capable of playing almost any game on high settings at 1080p resolution with fps close to 60. With some settings tweaked in modern titles, you can reach above 60 fps easily.
Graphics Card(Option 3, $600-$700 Build)
Radeon RX 6600/ RX 7600
RX 6600 at Amazon RX 6600 at Newegg RX 7600 at Amazon RX 7600 at Newegg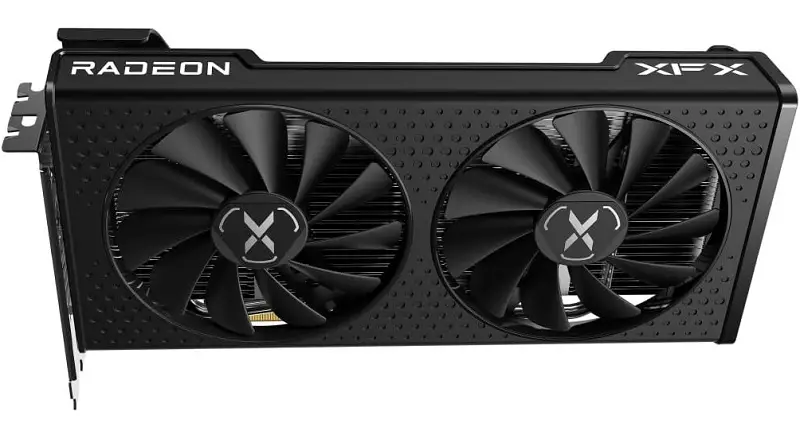
The Radeon RX 6600 is an absolute 1080p beast gaming GPU. Based on the RDNA 2 architecture, it is way faster than the RX 6500 XT and even the RTX 3050 which is currently available in the same price range. It features a good 8GB of VRAM for putting all the graphics settings to ultra and can give you 60+ fps on an average easily whether you use it with the i3 10100F, or the i3 12100F or the i5 12400F.
You will be able to hit the sweet spot gaming experience where you won’t need to compromise on the graphics settings or performance. Moreover, it is also power-efficient with only 132W of TDP. So, the power requirement is easier to fulfill. Combine it with the i5 12400F and you will have an Overpowered 1080p CPU-GPU combo.
If you can increase your budget to $700, it is totally possible to get even the RX 7600 which belongs to the latest RDNA 3 family and delivers 35% higher performance than the 6600. It does not bring many improvements in specifications but the latest architecture does help in improving the gaming performance and also supports AV1 encoding.
Power Supply
Thermaltake Smart 500W/ EVGA 700 BR
Smart 550W at Amazon Smart 550W at Newegg 700 BR at Amazon 700 BR at Newegg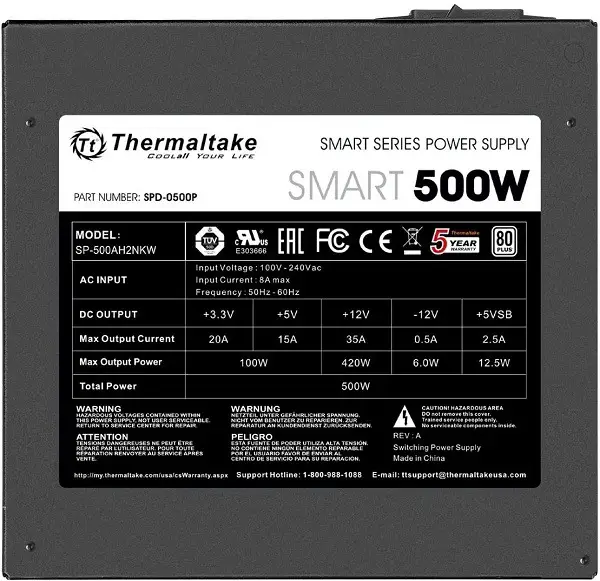
For each cheap build, the TT Smart 500W will be an ideal choice and will be adequate to power your CPU, GPU, Storage drive, and all other components. It is an 80+ rated power supply and comes with all the heavy-duty protections to protect your components from faulty currents and voltages.
I always recommend 80 Plus PSUs as they are very power efficient. Along with efficiency, you also need to ensure that your PSU doesn’t blast and should provide a continuous voltage without much deviation.
As for the build that costs between $600-$700, you can use the EVGA 700 BR which is a little costlier but will be best for your configuration as you will be using an RX 6600/7600. This is a Bronze rated PSU that will deliver even higher efficiency and will provide more wattage capacity for further upgrades.
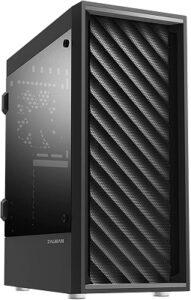
Case
Zalman T7
Buy at Amazon Buy at Newegg
For hosting all the components, we need a good mid-tower that allows good compatibility with the components and has decent airflow and cable management. However, we also need to make sure that it is cheap enough to fit into our budget, and currently, most mid-tower cases are above $50.
So, for around 50 bucks, we have the Zalman T7 mid-tower that comes with a fully-ventilated front panel and a full-length PSU shroud to hide your PSU cables, hard drives, and extra mess. The case is spacious from the inside and supports full ATX motherboards making upgrades easier in the future.
The case can support a CPU cooler with having height of up to 160mm and graphics cards long up to 305mm. Moreover, there are a total of 6x slots for installing SATA SSDs. Lastly, for cooling, it supports a total of 8x 120mm fans at the front, top, rear, and bottom which will be beneficial for high airflow and dissipating the heat to the outside.
How to Build the Gaming PC
So after choosing all the parts, it’s now time to assemble the components to make it work. You can do this in under an hour if you follow my steps by step short guide even if you have never built a computer or if you have built systems before, it won’t take you more than half an hour. In case you want the full tutorial in detail, you can grab our Guide for free.
For assembling the parts, you just need a #2 screwdriver. An Anti-static wristband is preferable but if you don’t have one, then there is no problem.
Let’s start with the building process!
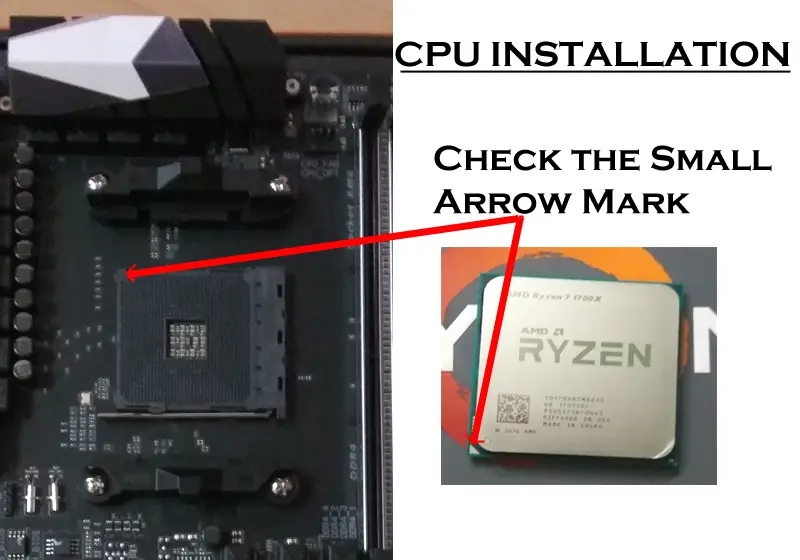
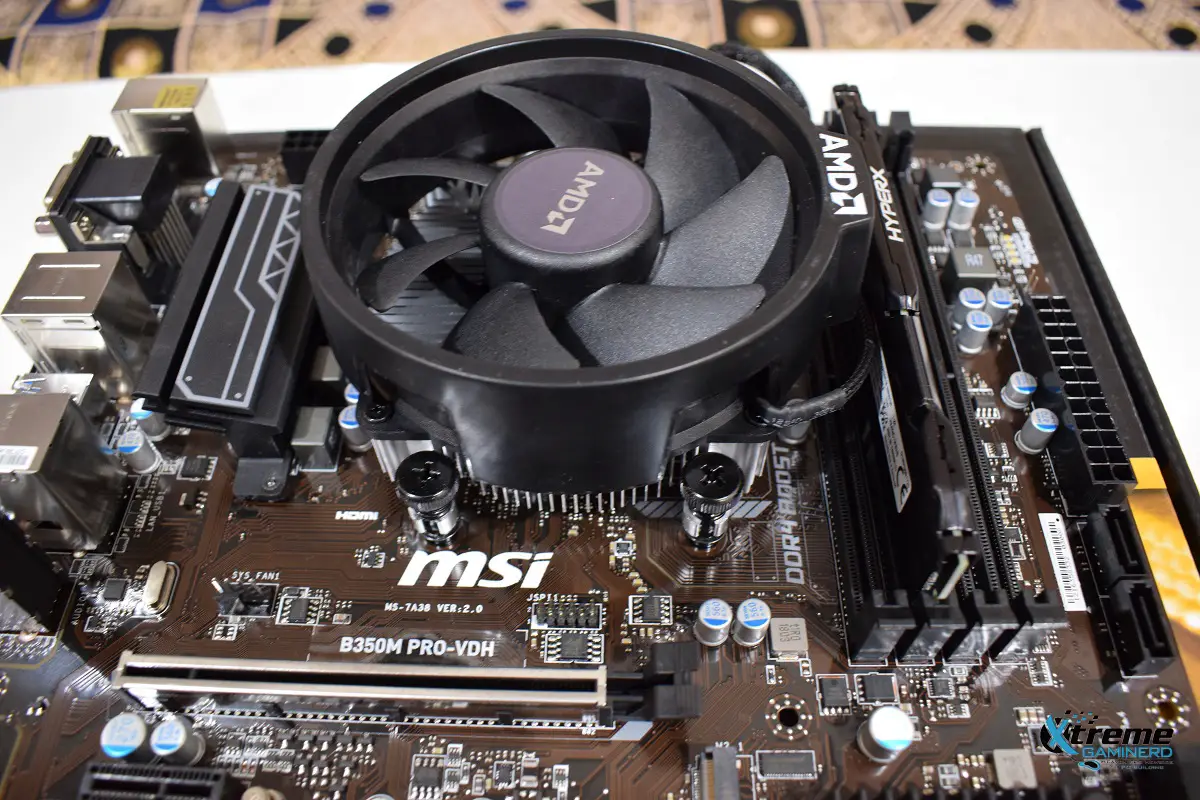
Install the CPU and Cooler
Installing an Intel and AMD processor is a little different. But to align the processor, the method is the same. You have to check a Small Arrow symbol on both the motherboard and the CPU.
Open the latch on the socket by pulling the arm up. Now align the processor to get the correct alignment and drop it gently. Remember don’t put any kind of pressure on it otherwise you will break or bend the pins.
Then close the arm which will take a little bit of force. Don’t feel shy about it.
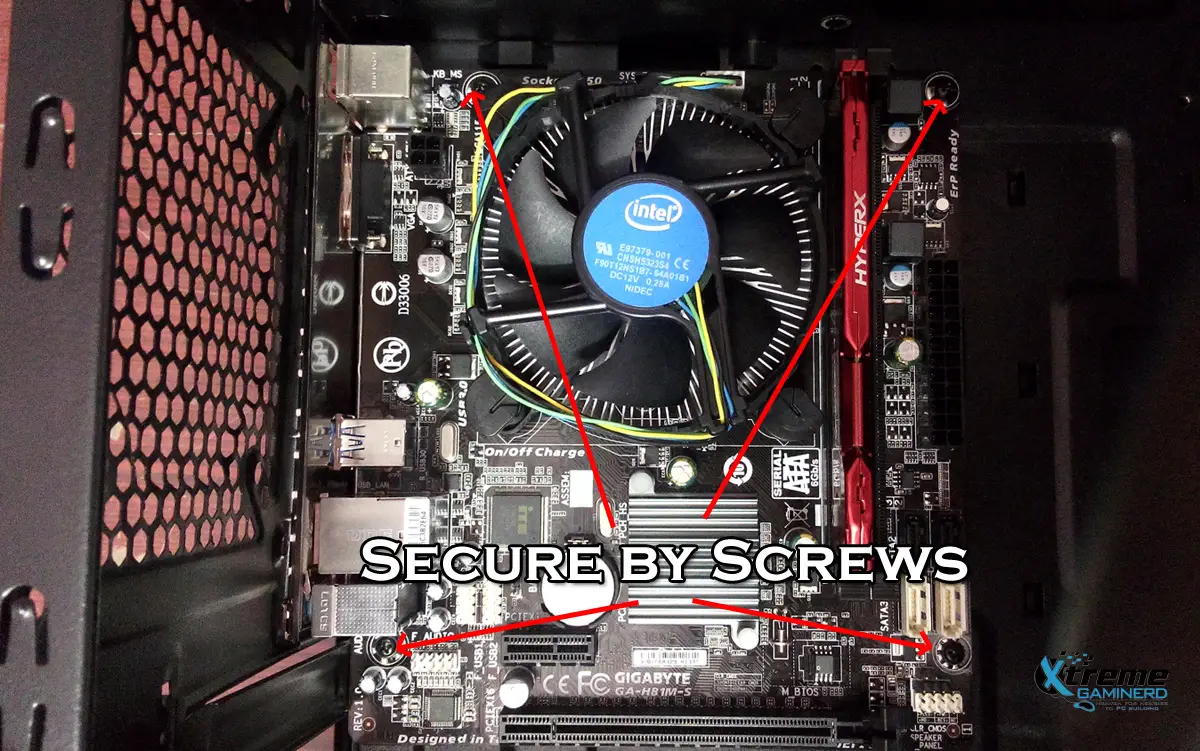
Installing the cooler will depend on the cooler your purchased. Both Intel and AMD have different mechanisms for installing the stock coolers as well as aftermarket coolers. But before installing be sure to apply a pea-sized thermal paste if your cooler doesn’t have pre-applied thermal paste on its base.
On the Intel motherboard, you have to put the cooler on the CPU aligning with the 4 screw holes and then press the plastic latches on adjacent sides with a little bit of force which will make a click sound. After that, you should check it by moving the cooler. If the cooler doesn’t move, then you have installed it properly.
Also, make sure to check the back of your motherboard to see if the plastic latches are evenly coming out on the other side.
On the AMD motherboard, there are two famous methods: The first one is very easy in which you have to remove the plastic covers present above and below the CPU socket in order to align the screws present on your Stock AMD cooler. Just put it gently and secure the cooler with the help of a screwdriver.
The second method is applicable on those CPU coolers where you have to use the two clips present on 2 sides to attach them to the plastic clips which you can see above the CPU socket. You may have to use a lot of force in order to do that but remember to put even pressure on both sides.
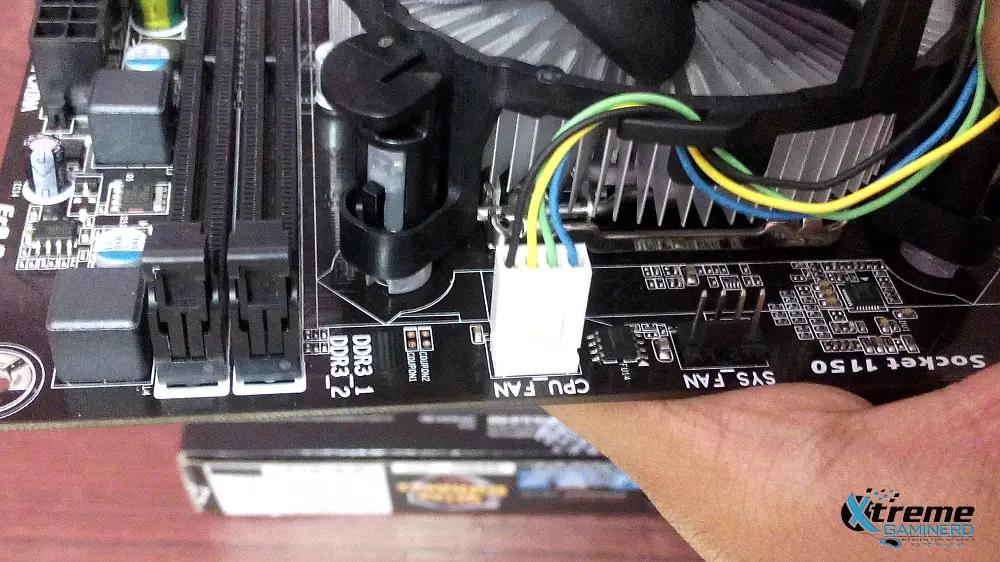
After installing the cooler, you can now plug in the 4-pin power connector which is present on your CPU cooler cable to the CPU_FAN header present on your motherboard. Don’t worry! it will go in one direction only.
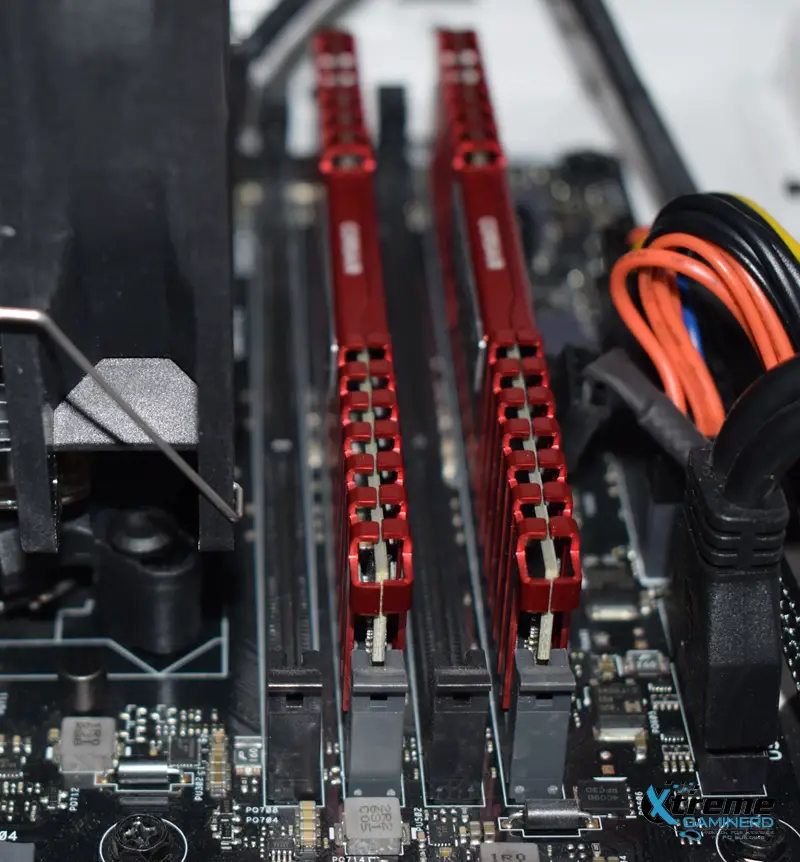
Install the Memory
Perhaps it’s the easiest thing to do. Grab the sticks and align them with the slot. You will find a small plastic barrier in between the slots which will not be in the exact center which will make you know how to align the memory stick. Put some pressure on the stick so that you hear a click sound from both the ends of the DIMM slot confirming that the stick is properly installed.
You should install the stick by leaving one DIMM slot in between them in order to benefit from them the most.
Install the Motherboard
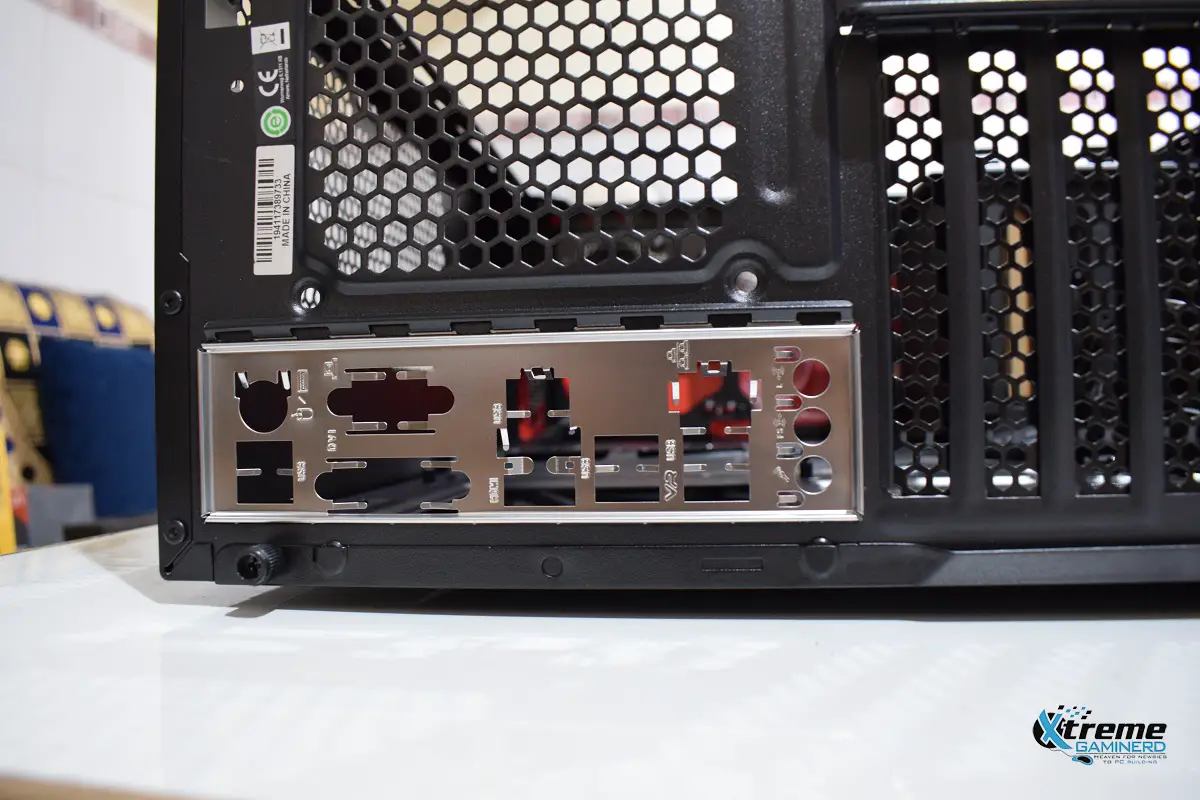
To install the motherboard into the case, you have to first open the side panel of your cabinet to have access to the interior. Now before installing the motherboard, you have to put the I/O shield at the rear of the case to align with the I/O ports of the motherboard. This is one of the most common things people forget.
After that, align the motherboard to the standoff screws inside the case. If your case doesn’t have standoffs pre-installed, you have to install them before putting your motherboard. These standoffs will come free with your chassis. Also, the screws will also be available with your case for installing every component which you will put inside it. So, do not worry about that.
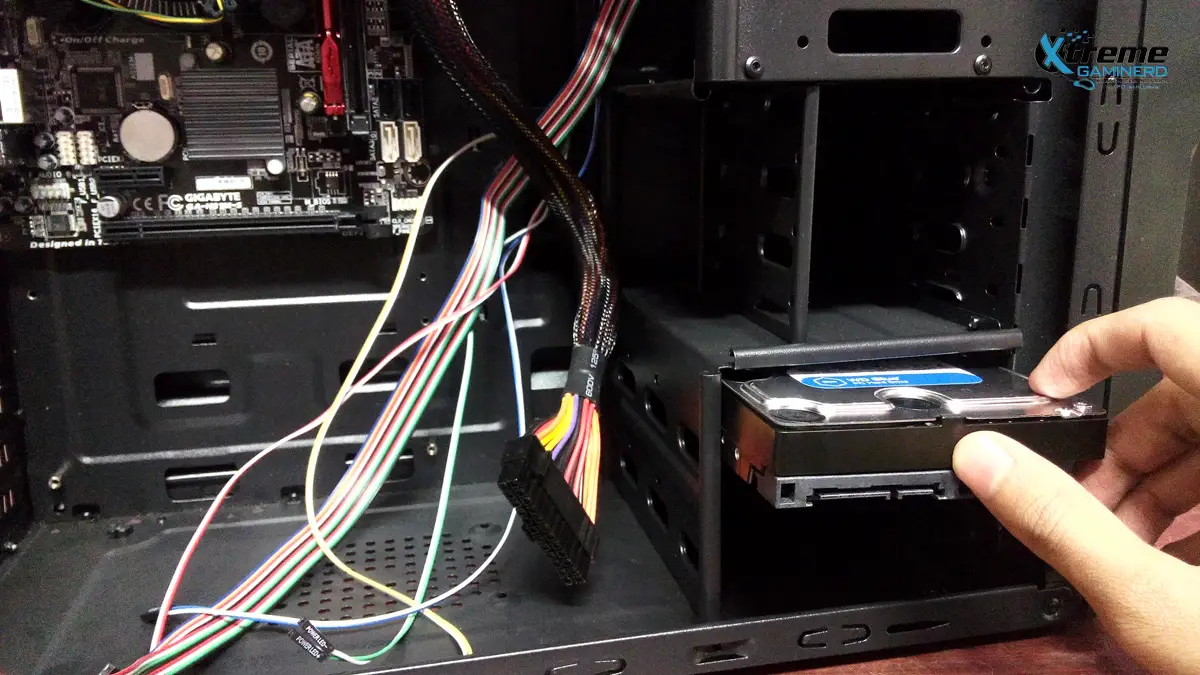
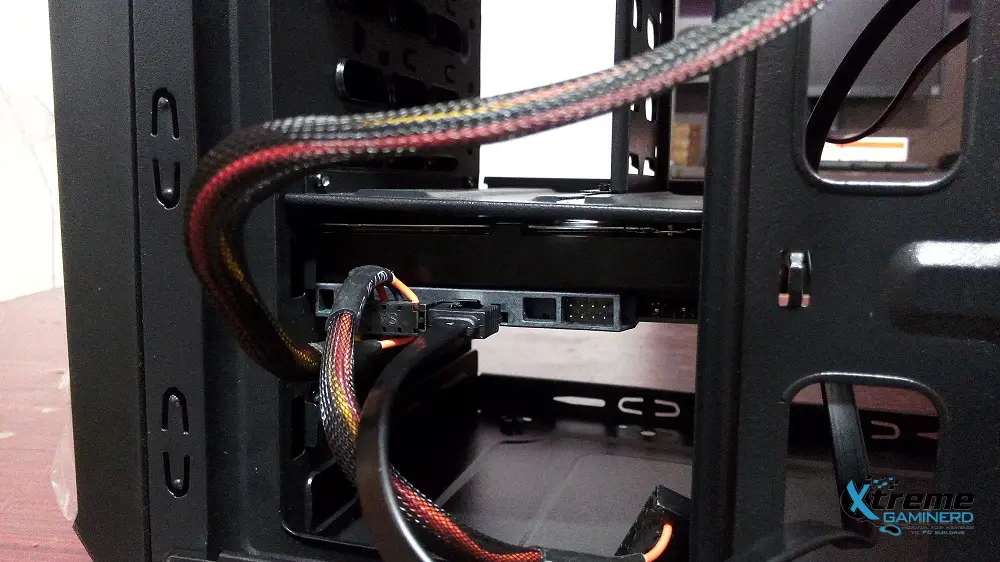
Install the Hard Drive
PC cabinets use different methods for the installation of hard drives but they are easily figurable and you just have to use screws in order to secure your hard drive.
Find the slot inside your case and use the 4 or at least 2 big screws which are going to be used for securing the power supply as well and make sure that the hard drive doesn’t move. Some cases have a tool-free mechanism in which you just have to take out the drive bay and put your hard drive in it. It doesn’t require any screwdriver.
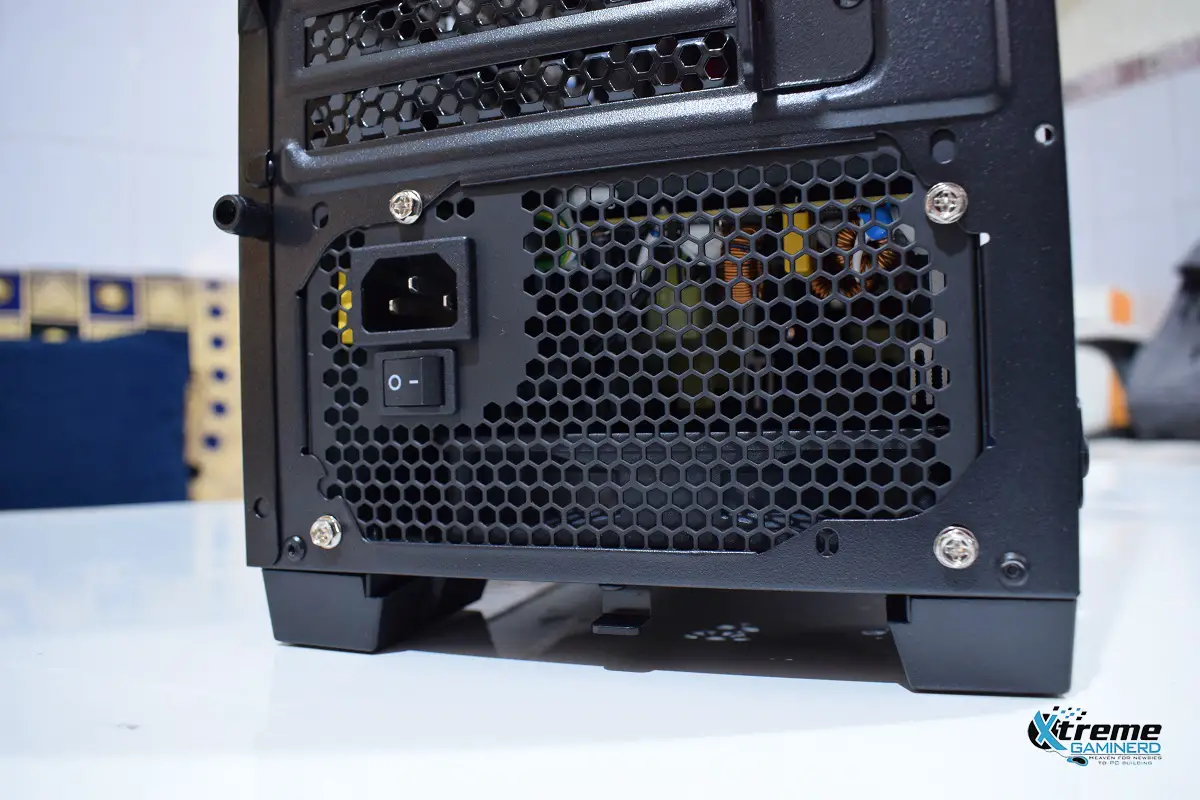
Install the Power Supply
I always recommend installing a power supply after the components I listed above because of the mess it causes. Installing a power supply is just as easy as the hard drive.
Gently slide the power supply inside and align the power supply to the screw holes which are present at the rear of your case. You can either face the Power supply with the fan side down to take cool air or you can also put it in the opposite direction if you want to prevent any dust from entering it. Preferable is fan side down.
Some cases have the Power supply installation area at the top but most of the newer cases have it at the bottom. But the installation method will be the same.
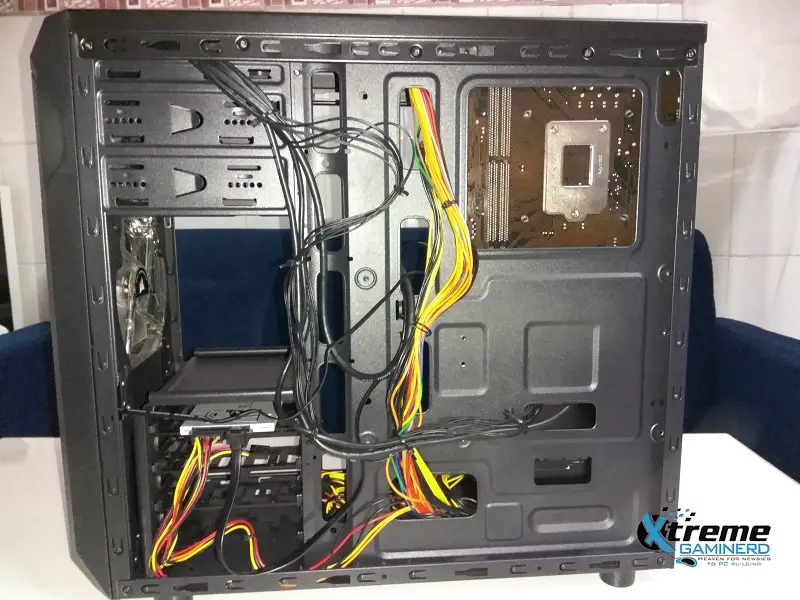
Time to connect the cables!
Wiring is a little bit tricky if you have never done this in past. But when you will follow me you will not need another try to learn it. First of all, I don’t recommend installing a graphics card before wiring because it creates a lot of difficulties in doing so. So, completing the wiring stuff before installing the GPU is highly recommended.
Also, before you connect every cable it is recommended that you make the way for each wire through routing holes so that most of them get hidden behind the motherboard tray. Go through my Cable Management Guide to learn how to do it.
Connect the 24-pin ATX cable
The biggest connector you will find is the 24-pin power connector that will be having the thickest cable and can be recognized easily. You have to connect it to the 24-pin power port on your motherboard which is 95% of the time present on the right middle side of the PCB. It will go in one direction only. Make sure you properly connect it by putting some good pressure on it.
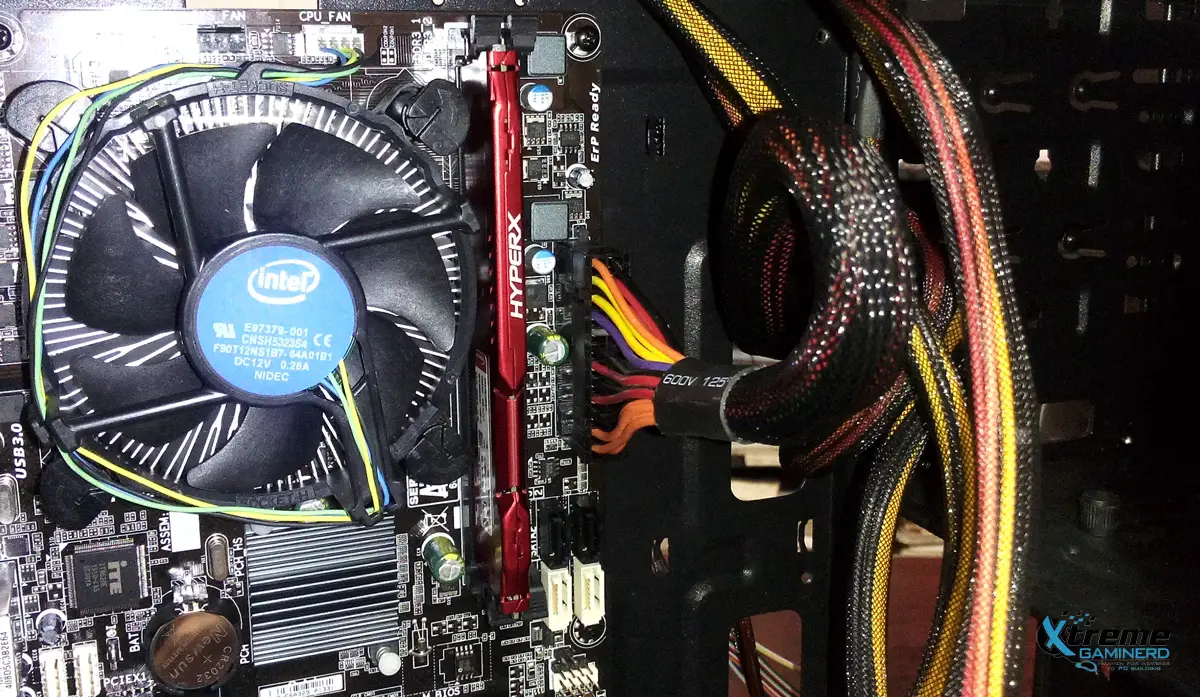
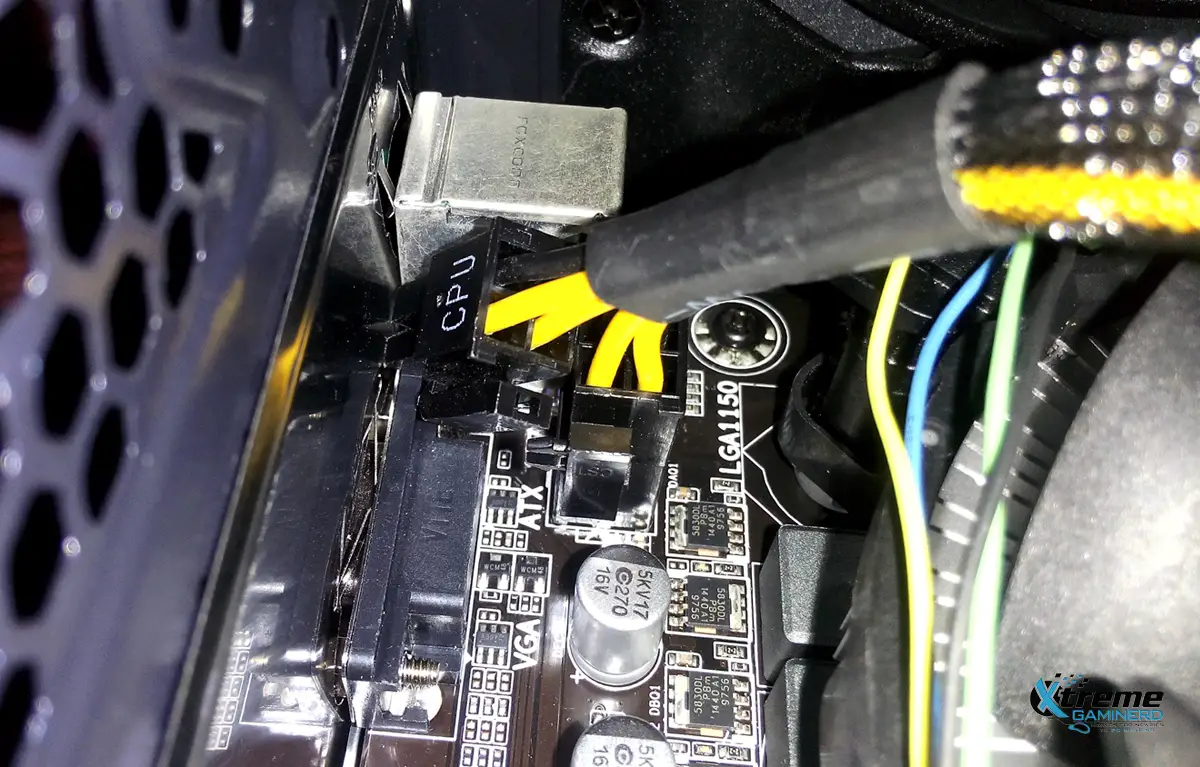
Connect the CPU power cable
The CPU power cable will have 4+4 pin power connectors and there will be either a 4-pin or 8-pin power port on your motherboard which is mostly present at the top left side of the PCB. It will be near your CPU socket. Similar to the 24-pin ATX power connector, it will also go in one direction.
So depending on how many pinholes your CPU port has on your motherboard, you have to connect this connector. You will have to connect either a 4-pin connector only or combine two 4-pin connectors to make them 8-pin power connectors if your board has an 8-pin power port. Eazy peazy!
Connect the SATA cables
There will be two cables that you need to connect to the hard drive. One is the 15-pin SATA power connector to power your hard drive and one will be the SATA cable that you need to connect to the motherboard. The power cable will be present on your Power supply and the SATA cable which is for the interface will be present separately and comes with the motherboard.
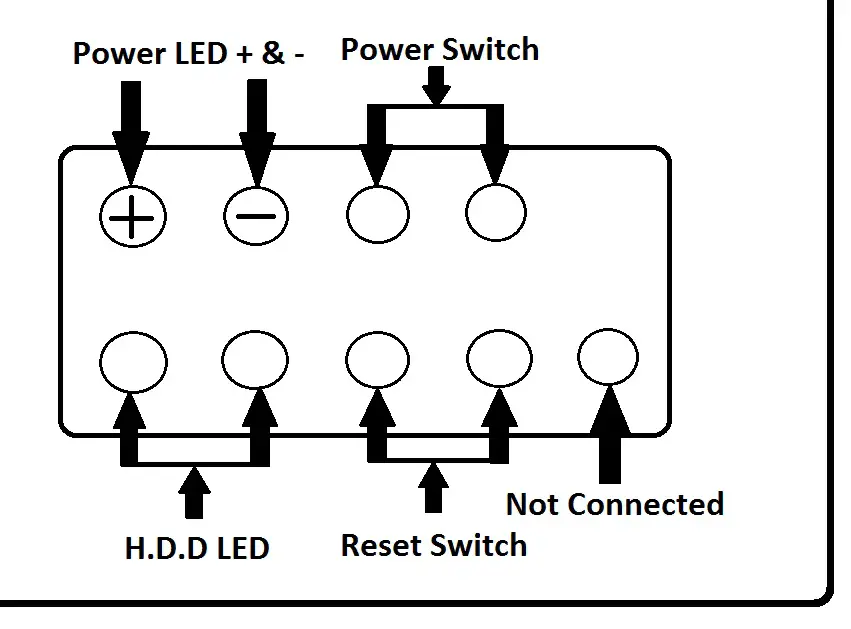
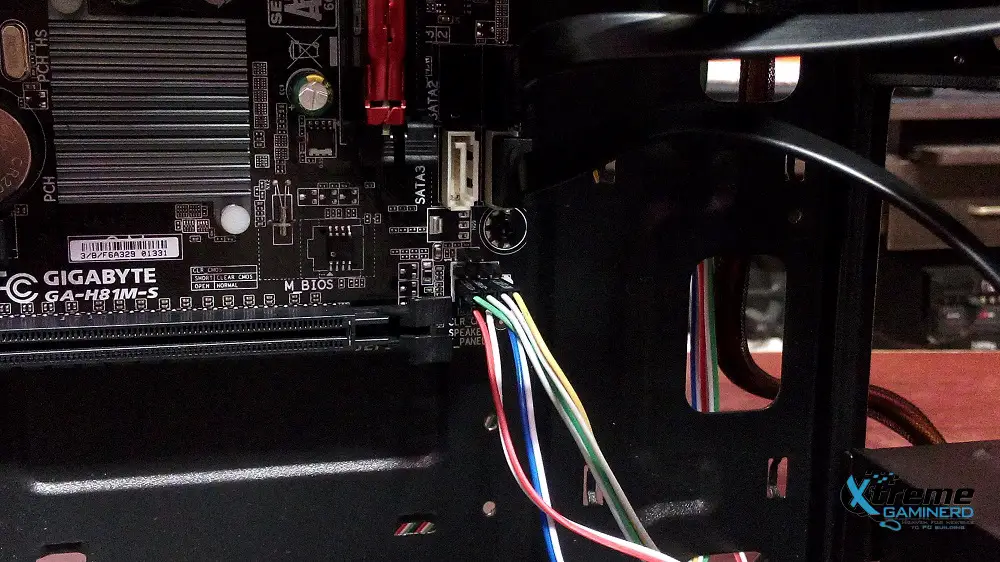
Connect USB 3.0 and front panel cables
This is the most complicated stuff you will face because there are so many small connectors on the cables that come from the front panel of your chassis. These are Audio, USB 2.0, USB 3.0, Reset, Power, HDD LED, and Power LED connectors. Out of these, the Audio, USB 2.0, and USB 3.0 connectors are easy to connect because they are big and go in one way. You can find the labeling on your motherboard easily and if you don’t, then remember to download my guide to do it easily.
For the other small connectors, remember the following diagram and connect these cables just as the diagram shows.
Install the Graphics Card
Time for installing your favorite component. To install it, simply remove the PCI expansion cover which is present in your case at the rear. Generally, you have to remove two of them because most cards are two-slot cards. Make sure you remove the right ones which are aligned to the PCI-Ex 16 slot on your motherboard.
Open the plastic latch at the right end of the slot and plug in the card with a little bit of pressure so that the latch closes by itself. Then connect the power cable from the power supply. If your card has a six-pin power port, then use a six-pin power connector and if it has more, you will have to use more. It is easily figurable.
Use Some Zip Ties
Finally, after all the wiring stuff, use some zip ties in order to make your system look neat and tidy. It will also prevent the loose wires from entering any fan and save a lot of space.
Finalizing
Next thing is to install the operating system. I recommend going with Windows 10 which is compatible with most of the applications and your games will run without any problem.
Then you will need to download the GPU driver for your graphics card and other important drivers from official websites in order to make your system run smoothly.
Peripherals Recommendation
Just because you now know what parts you will be using in this build doesn’t mean that you have completed your whole build. Without proper peripherals, you won’t be able to take advantage of your PC. I have listed some good peripherals that should be in your budget and will help you defeat your opponents in the game.
As I have myself tested a lot of peripherals, I have quite a good amount of knowledge on what you should buy and whatnot.
Keyboard/Mouse Combo- Reddragon S101, M601
Buy at Amazon Buy at Newegg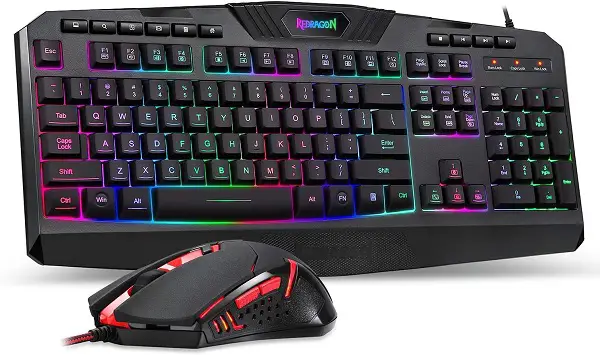
Just close your eyes and get this keyboard/mouse combo. Don’t go here and there searching for what is good and what’s not. Just simply go with it. It will cost only 30 bucks and provide you with the best value for money. Especially, the mouse Reddragon M601 which is a dream of every budget gamer.
Even though I am used to high-end gaming mice like G502, Razer Deathadder, and Corsair M65 Pro, this mouse is still in my eyes a premium peripheral at the cost of a pizza. You can’t compare it with any other cheap gaming mouse because of the number of features it packs.
The keyboard is also a great deal as it comes with RGB lighting in-built. The quality and design of these two are unmatchable and you shouldn’t be thinking about it further. Just get it!
Mousepad- SteelSeries QcK
Buy at Amazon Buy at Newegg
SteelSeries QcK is one of the most popular mouse pads that cost under 10 dollars and is big enough to support your mouse movements. The size of this pad is 12.6 x 10.6 x 1.6 inches with a SteelSeries Logo at the left bottom corner.
You will be able to move your mouse flawlessly on it and it won’t become dirty in a short time, unlike the pads which have a lighter color and need to be washed frequently to make them look clean. This mouse pad has a very smooth surface and a steady rubber base that won’t slide easily by your hand movements.
Headset- Senzer SG500
Buy at Amazon Buy at Newegg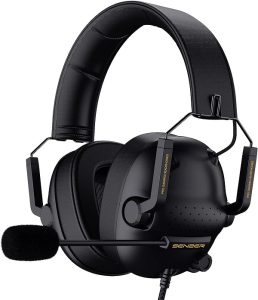
For users on a tight budget, I suggest going with brands that provide excellent quality headsets without costing over $50 or $100. The Senzer SG500 is a perfect headset for gaming that features super comfortable foam ear pads and a dedicated microphone.
It provides you with height adjustment and flexibility to adjust according to your head. It is compatible with multiple platforms including PC, PS4, PS5, and Xbox consoles. Just for 30 bucks, it is a deal breaker and has received thousands of positive reviews on Amazon alone.
Speakers- Cyber Acoustics 2.1 Stereo
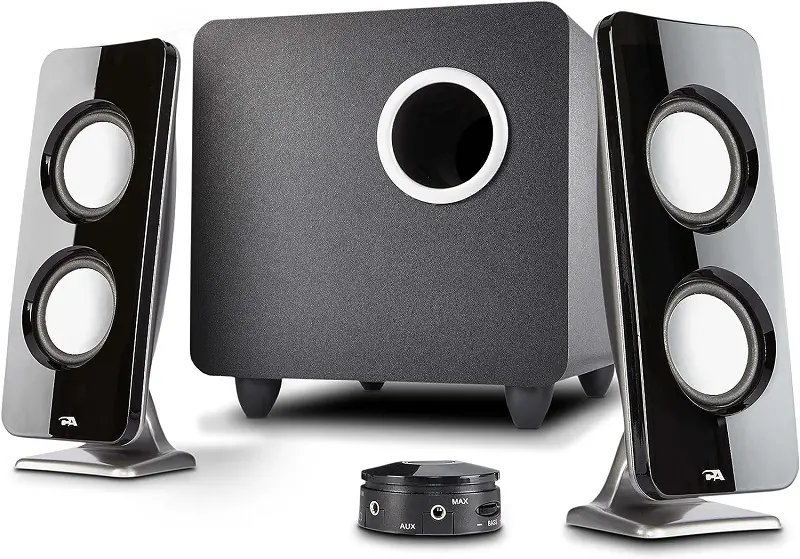
Headsets always will not be the best solution for gaming because using them for several hours may cause pain in the ears and sometimes having audio along with fresh air to your head is also required.
Cyber Acoustics 2.1 speaker sound system is cheap and comes with a pair of speakers and a subwoofer that will fill your room with the game audio. 2.1 may not be a full surround experience but for a cheap build, you shouldn’t be spending a lot of money on 5.1 or 7.1 surround speakers.
These speakers will cost you only 40 bucks which is way cheaper than any other enthusiast-level speakers but are also reliable. Nearly 10K people have provided positive feedback on these because of the value this system provides. Along with the speakers and subwoofer, you will also get a hub that can be used for connecting headphones for gaming so that you don’t have to use your CPU’s audio jacks.
Monitor- ACER Nitro ED270R
Buy at Amazon Buy at Newegg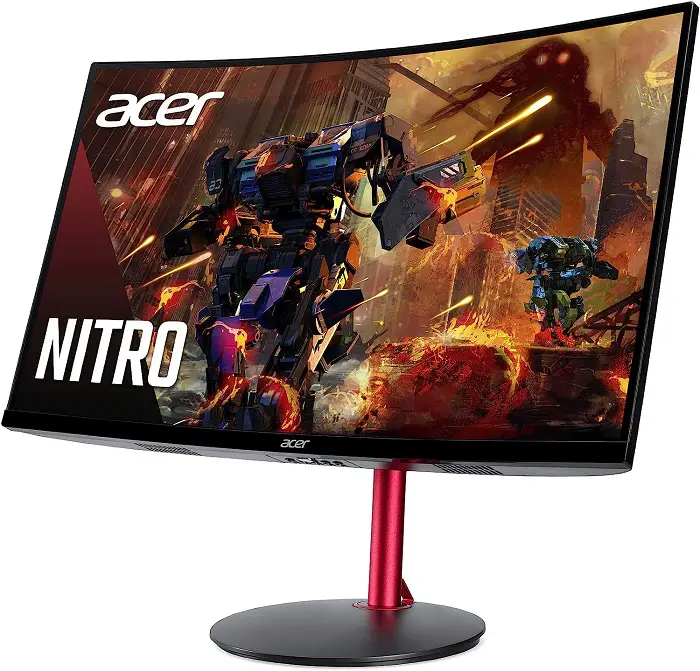
Whether you buy the cheapest budget build or the more expensive one, you will need a monitor that can provide you with smooth gameplay. These days we have higher refresh rate displays with great technology and features. Therefore, I am recommending the LG 24GQ50F-B monitor that boasts a 24-inch screen with 1080p resolution and a 165Hz refresh rate.
It has a quick response time of just 1ms and motion blur reduction technology for distraction-free gaming. You will also get AMD FreeSync technology and a bezel-less panel for a more immersive gaming experience.
Final words
I have completed the most important things in this post and if you still get stuck anywhere in between, there is a comment section which you can find below. So, don’t hold yourself back from asking any questions, and make sure you thoroughly read this guide. It will be a lot beneficial.
![Build the Best Cheap Gaming PC in 2023[$400-$700 Builds]](https://www.xtremegaminerd.com/wp-content/uploads/thumbs_dir/intel-raptor-lake-refresh-e1691670883319-qapgzr7t7axyqnm3v4lyr1ji5ksasn9hhqaffja0jg.jpg)
![Build the Best Cheap Gaming PC in 2023[$400-$700 Builds]](https://www.xtremegaminerd.com/wp-content/uploads/thumbs_dir/CPU-GPU-Combos-for-1080p-Gaming-oqygvbdytrdxga9me0yqi4efkphaaj3icnu0078qpo.jpg)