PC building requires about 30 minutes to an hour approximately to install the components and connect the cables to get the display on your monitor but the steps ahead are even more time-consuming and necessary than getting the display itself.
These steps include OS installation, driver installation, essential program installation, monitoring the hardware, downloading your work files, and much more.
With the increasing quantity of programs and data size on your computer, it gradually becomes difficult to maintain the performance of your system as exactly it was during the first time when you built it up. Also, the components start to perform slower due to aging.
But there are various steps and measures you can take in order to reach optimal performance without deleting everything from your system or changing your components and starting from scratch.
These steps require you to take care of the hardware and software/OS of your computer from time to time to stop your system from going into a state where it’s almost impossible to get it back to the level when it used to perform at its 100%.
The following list of Tips and HowTo will ensure that your computer stays right on track, perform better, live for a longer period of time, and will eventually save you time and money which you end up spending on getting your system repaired at a computer shop.
CLEAN AND MANAGE
Clean the components and peripherals
Cleaning your PC doesn’t guarantee you a 30% or 40% boost in performance but it does play an indirect role in maintaining the performance of your system up to its full potential. I have encountered several cases where the main culprit behind the slow working of a PC was dusty and dirty PC hardware. If you haven’t cleaned your system for more than a year, then it’s time to pull off the plugs and start cleaning right now.
The dust and dirt that accumulates on the PC components may result in thermal throttling and even in some cases jammed mechanical operations. Motherboard, Graphics card, DIMM slots, hard drives, Power supplies, and chassis fans, all of them require time-to-time cleaning with proper tools and cleaning kits, and it’s recommended that you Clean your PC hardware every 3 months.
The Process:-
You can use a compressed gas duster or an air blower to remove the excess dust from your components. Make sure you use the compressed air on the tricky section as well as inside the ports and slots of your motherboard and graphics card to remove the dust from the inside to make sure whatever you connect onto them is recognized properly in the first go.
You should then use an Electronic cleaning brush to wipe the stubborn dust and dirt off the PCB and if there are some sections from where you aren’t able to remove the dust, use Isopropyl Alcohol and a cotton pad or swab. Your motherboard or graphics card will be as new as they were at the time of purchase.
For Peripherals
Similarly, cleaning your Keyboard which accumulates dust very easily as compared to the other peripherals like a mouse, headset, and monitors and results in very uncomfortable operation. It’s usually more time-consuming than cleaning any other component and it’s ok if you do that once in 6 months or a year.
To clean a keyboard, you should switch off the computer and use a cleansing wipe to clean the keys from the top. To further clean the keyboard from tricky areas, use compressed air and a brush that is adequately thick enough to reach out between the keys. Do not spill any liquid on it.
Manage The Cables Inside
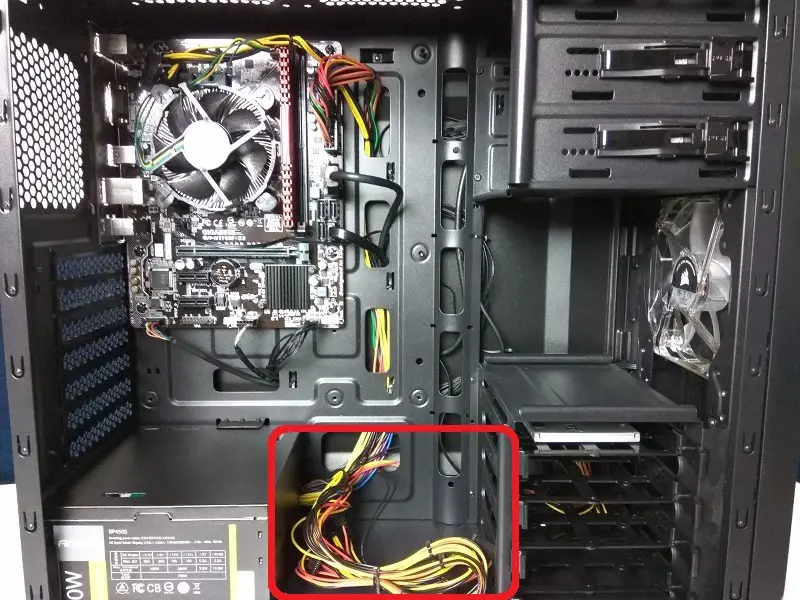
Just assume that the cables in the pic above if suspended to hang here and there without being tied, what would happen?
I have seen cases where the cables either get inside the CPU fan and stop the fan from spinning, or block a considerable amount of airflow from the front panel fans. This will not only create problems for optimal working with lower temperatures but will also make your system look very messy. So, why not use the routing holes that are available in most cases nowadays?
You should check out our cable management guide to learn how to do proper cable routing.
Manage The Cables Outside
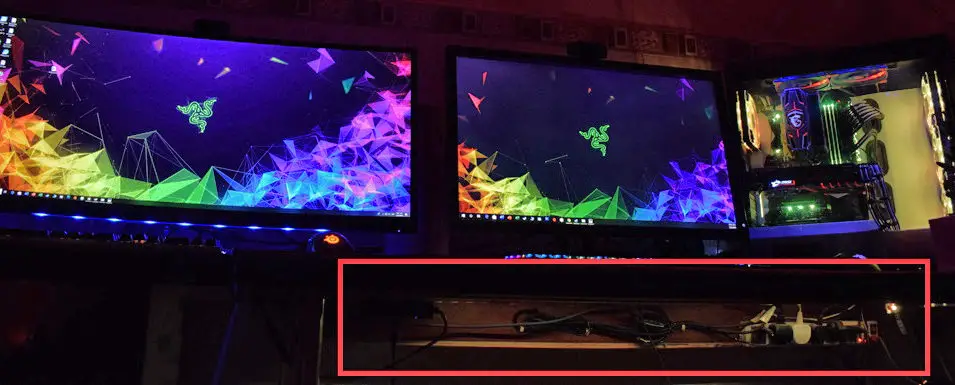
While it doesn’t affect your PC’s performance at all, it surely shows how organized a person you are. Pay attention to the dark area marked in the red rectangle. Instead of just letting your cables lie on the ground, it’s recommended that you secure them somewhere above the ground so that you aren’t directly able to see them.
Cables that are suspended all over the room look very untidy and you should plan on how and where you should put the cables coming from different components and peripherals. It won’t be easy but in the end, you are going to see a desk that takes hardly a few minutes to clean without the wires being tangled.
Keep Your Chassis Above The Desk
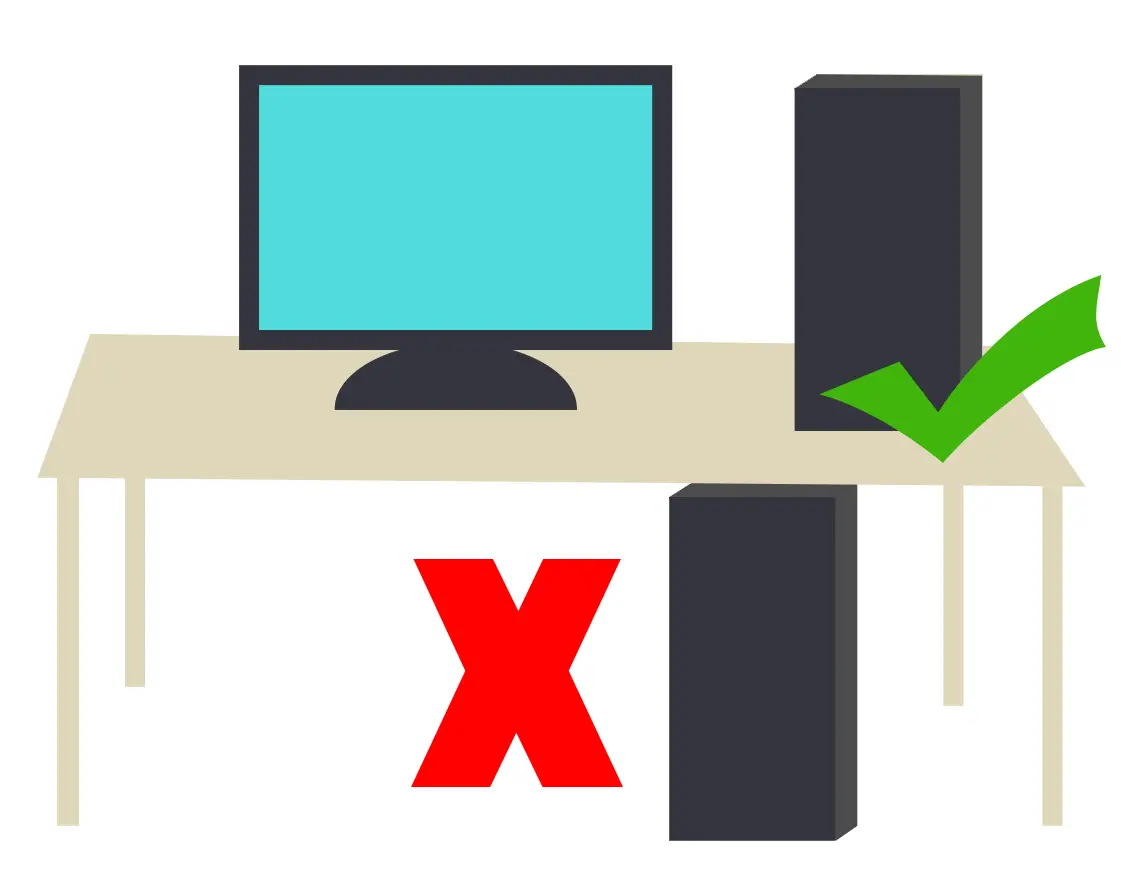
Keeping your chassis on the ground makes your system prone to a lot of dust. You can minimize most of the dust entrance by just putting your chassis above the table. The only disadvantage of putting the chassis on the table is limiting the space on the table for monitor and peripherals but if you have a large table, then that can be even better if you have a good-looking CPU.
Have A Good Ventilation
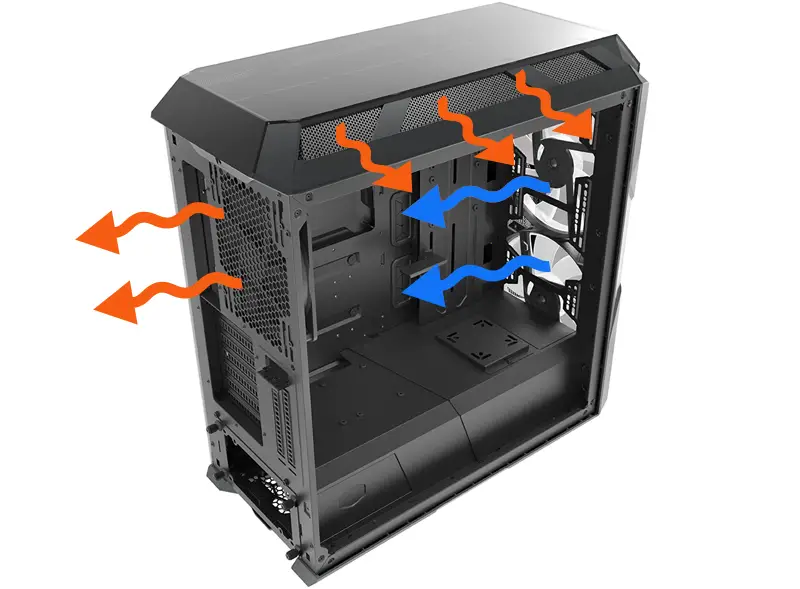
The first thing you should do for keeping your system cool is to create good ventilation for the air to flow from outside to inside the case and let the hot air exhaust outside. Almost every case has at least one exhaust fan slot to remove the heat generated inside the chassis and if your case doesn’t have even one, then it should be your first step to install a fan at the rear.
For better cooling, you should install some fans even at the front to make sure that the cool air is coming inside from the outside of the chassis. Some cases have opaque front panels that block the airflow completely but you need a ventilated front panel for letting the cool air in.
If your current case doesn’t have a ventilated panel, then you can remove the front panel altogether but it will result in a lot of dust accumulation.
It will be great if your case has dust filters. If it doesn’t then you should buy one or buy a better case if you want a better cooling solution. There are currently dozens of great airflow cases which you can buy for less than $50 and the prices of top-end airflow cases may go above $200.
COMPONENTS
CPU Maintenance
Apply Thermal Compound
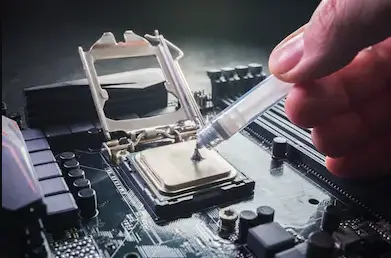
Regardless of how good a heatsink you own, the thermal compound which fills the gap between the heatsink base and CPU chip doesn’t last forever. It’s recommended to change the thermal compound after a couple of years by removing the heatsink.
Though you can change it whenever you like but a good thermal compound easily lasts for more than 3 years without drying up. Use Arctic MX-4 or Cooler Master high-performance thermal paste for longer operation.
Use An Aftermarket Cooler
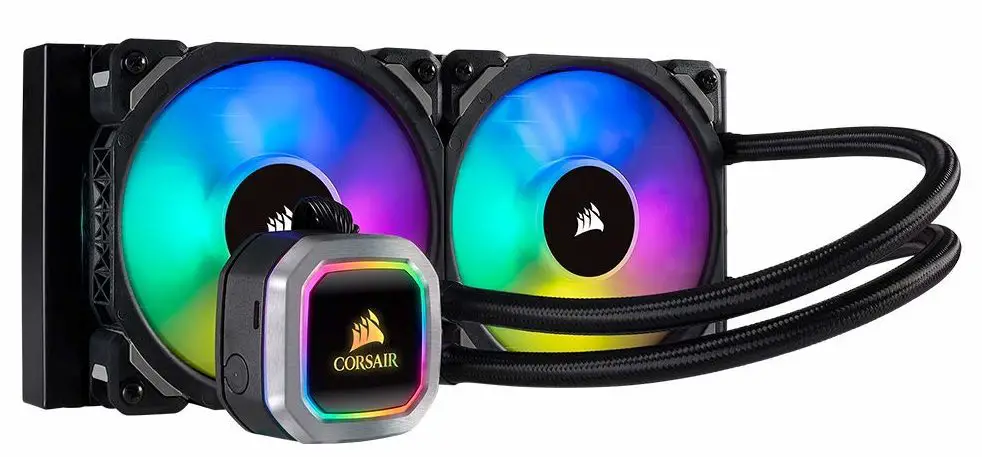
Stock heatsinks that come with Intel and AMD processors may not fetch you better cooling results. Although AMD Ryzen processors come with better heatsinks than Intel processors, they won’t be as effective as an aftermarket CPU cooler can be.
If your CPU temperature remains below 70 Degrees Celsius in full workload, we don’t recommend changing your CPU cooler but if it stays always above 80C or even higher, then you need to buy a better cooler.
For budget CPUs, an air cooler works just fine. You can get a good one for less than $50 but for enthusiasts who are owning an 8-core or a higher-end processor, it’s recommended to use an AIO cooler which will always keep your CPU’s temperature below 60C.
Not only that but your system will be quieter as a stock heatsink fan is way louder than the aftermarket CPU cooler fans.
Overclock and Monitor

If you want your CPU to work for a longer period of time, then you should monitor the performance and condition of your CPU on a regular basis. Your processor needs good low temperatures and stable voltages to work properly for a longer time.
Overclocking is another great thing you can do along with monitoring it if your CPU and motherboard support it. It allows you to get some good performance for free by just increasing the clock speed and voltages either from an overclocking software or Bios.
For monitoring to check if everything is alright, we recommend Software like CPUID HWmonitor that will provide you real-time info on clock speeds, voltages, utilization, and temperatures of each core.
For checking if your CPU is performing up to its full potential, benchmark it with different tools. Cinebench R15, UserBenchmark, Handbrake, Heavy load, Passmark, and GeekBench are among the top tools to benchmark your CPU.
Motherboard Maintenance
Update The Bios
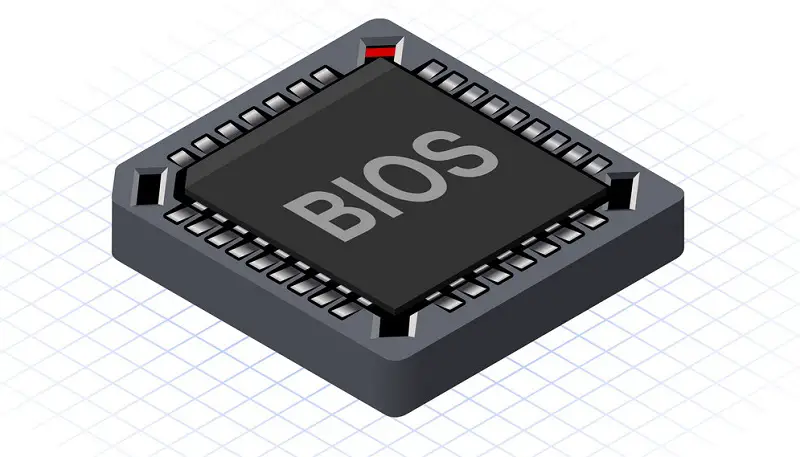
Motherboard manufacturers provide new Bios versions from time to time to keep you updated on the latest technology updates. Some motherboards can’t even run a newer generation of CPUs if their Bios are not updated.
Updating the Bios eliminates several issues related to CPU and RAM. Some systems can observe a lot of fluctuations in CPU voltage which are generally fixed by updating the Bios. Some systems don’t support highly overclocked memories which again can be resolved if the motherboard already has support for that but is currently running an older version of Bios which isn’t able to support higher clock speeds.
Manufacturers nowadays provide you with their own official software to handle the Bios which can be downloaded from their website.
Use Motherboard Drivers And Utilities
The most common problems with systems nowadays are related to wifi, fan control, RGB lighting, and audio which are due to not using the drivers and utilities that come with the motherboard. You should download the necessary drivers from your motherboard’s manufacturer’s website for full compatibility with peripherals that directly connect to the motherboard.
RAM Maintenance
Clean The DIMM Slots and RAM Sticks
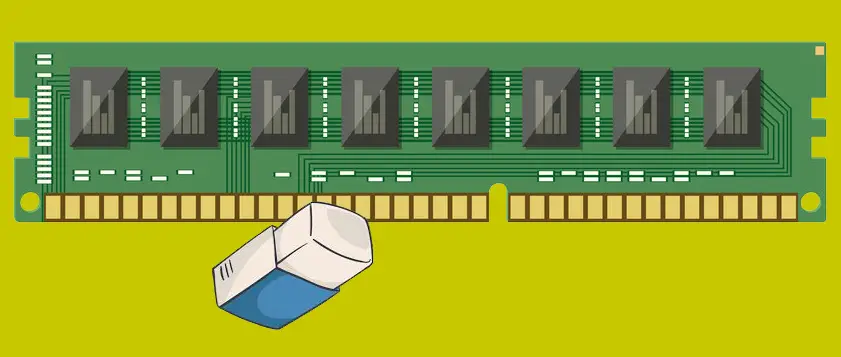
Sometimes RAM sticks stop working suddenly and you have no idea what caused this to happen. Before you try to replace your RAM modules try cleaning both the DIMM slots and RAM modules.
You can use a sheet of paper and fold it several times to make it thick enough to cover the area inside the DIMM slot for cleaning. For cleaning the RAM sticks, use an eraser and rub the RAM pins.
Overclock To Unlock Full Potential
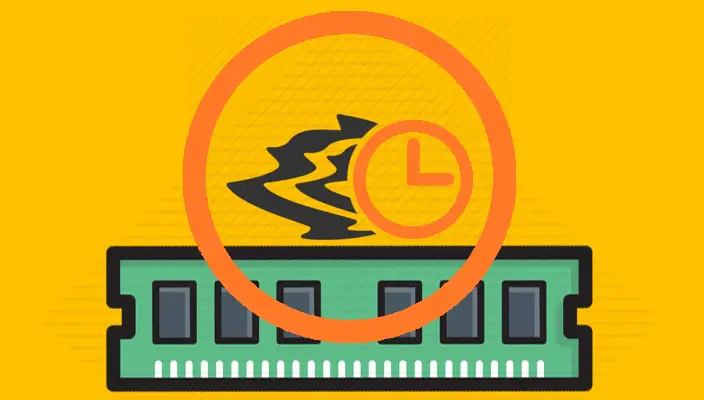
Current-gen processors from AMD and Intel perform better if accompanied by a highly clocked RAM kit. The more the clock speed, the better will be the performance in gaming and memory-dependent programs. Though it has a limit after which you will actually going to see a lower performance. So, it’s recommended that you stick to the ideal frequency of your RAM kit for optimal performance.
Hard drive maintenance
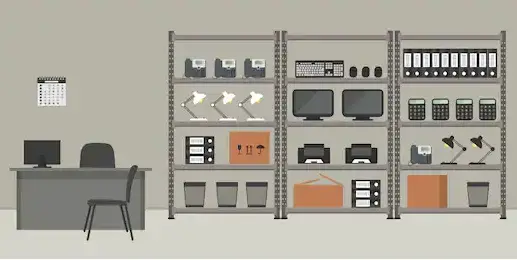
Organize For Easy Access
The first step of maintaining the hard drives starts right where when you make a partition in Windows installation. You should ensure that you make a big enough partition for the C drive where your OS will be stored. As this drive eventually gets filled up with many residual files and software, you don’t want to format your hard drive, again and again, to clean up space.
A 1TB of the hard drive is best to be partitioned into 3 drives. One for OS and software, the second one for games, and the third one for other files. The games partition should be the biggest one followed by the C drive and then the smallest should be the one that stores other files. This method of partitioning can be extended to storage drives bigger than 1TB.
You should also make folders according to your work for easy access to the files. You can create subfolders as well if there are multiple categories and set them according to their names, sizes, dates, or types.
Defragment For Faster Operation
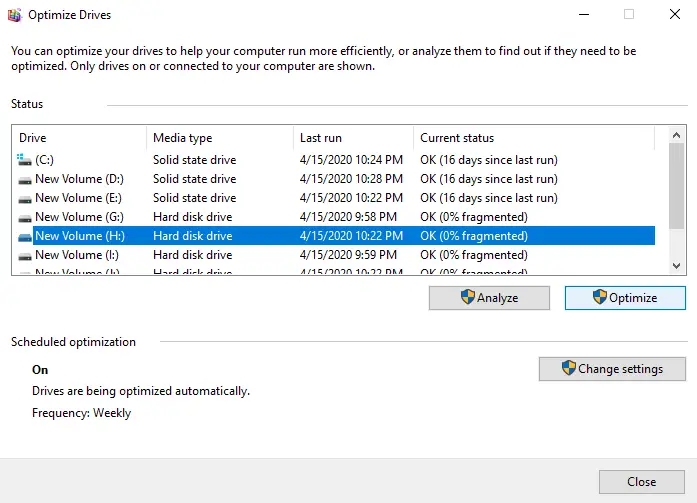
Defragment is the process of separating the free space from the acquired space on your hard drive. Solid-state drives don’t need this process but a hard drive does. The free space on your hard drive eventually gets between your acquired space over time making the hard drive slower which results in delayed access to the required file or folder.
The defragment tool is already present in the Windows operating system and takes only a few minutes to separate the free space to one side.
Cleanup To Save Some Space
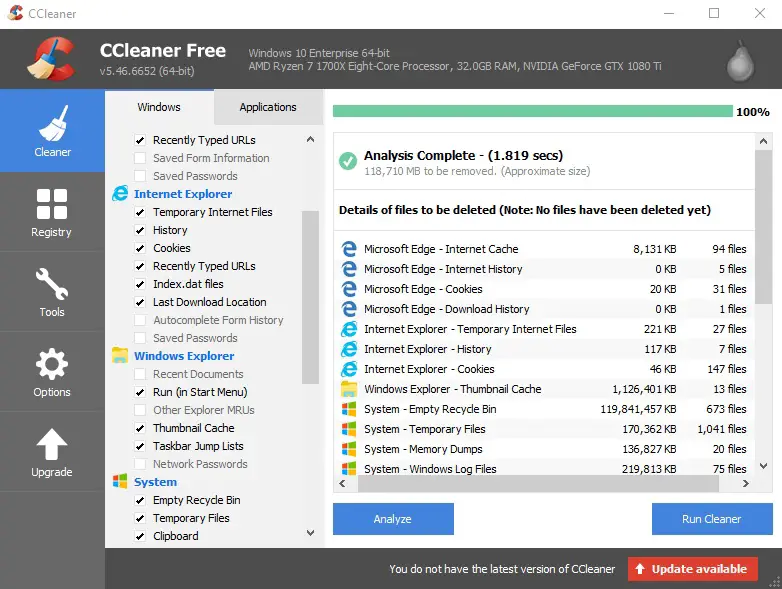
A lot of cached files, memory dumps, cookies of internet browsers, windows log files, etc. continuously pile up whenever you use applications. They aren’t needed afterward and should be deleted. Now, you can’t just search them manually by digging deep into the C drive but there is an application called CCleaner that will do the job with only a click only.
It will help you clean up the residual unnecessary files from your computer and you can also change many startup settings from here.
Backup To Remain On The Safe Side
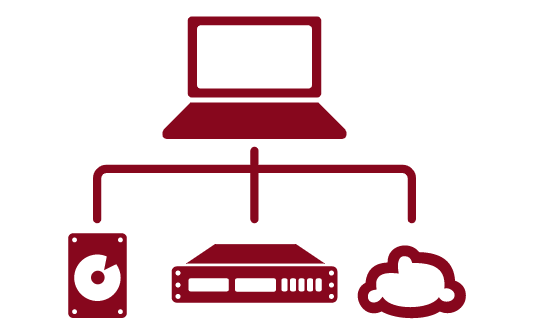
No one can guarantee that your data will remain safe always on your PC and therefore you should make a good backup of your important files at least so you don’t get into some trouble. Backing up data is very easy and can be done either offline or online. While Windows OS inbuilt backup tool is free to use, you can also use online tools such as Dropbox to take your important content online and safely. From there you can access them at any time.
You can also use EaseUS backup tool for easy backing up. You can check out their tutorial on how to do it for free.
Graphics card maintenance
Update The Graphics Driver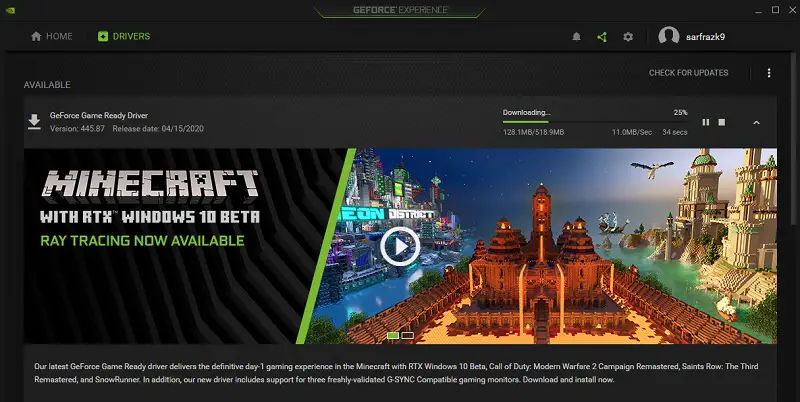
Almost every graphics card comes with a driver CD and although we don’t recommend using that it’s there for a reason. As several great new games release every day, graphics card manufacturers such as Nvidia and AMD try to make their graphics cards as compatible as they can to provide maximum performance in the games.
AAA titles have special requirements and their graphical settings may or may not be able to take advantage of your graphics card if your graphics driver is not updated.
The drivers update automatically with one click from the manufacturer’s software/program. Keep a regular check on the newest graphics drivers and don’t miss any.
Overclock And Monitor
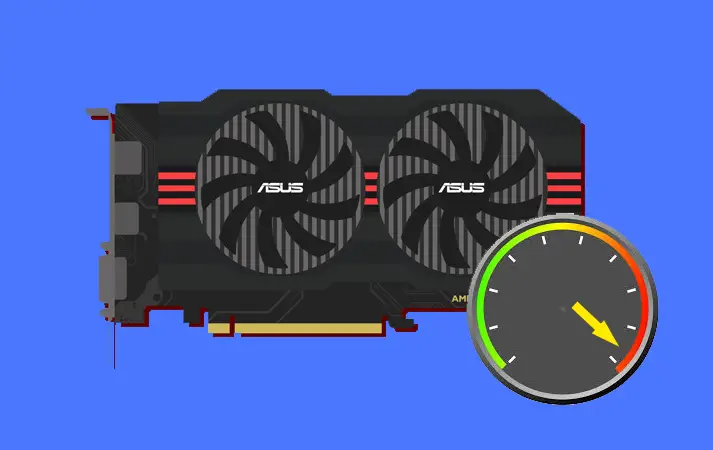
Just as we recommended overclocking and monitoring for the CPU, overclocking the graphics card may bring even better results in some of the applications and games you use today. Graphics cards are used in 3D rendering programs, special effects in video editing, and games for sure.
You can use software like MSI Afterburner which is the best tool for overclocking and monitoring your graphics card at the same time. All you have to do is just gradually increase the core clock and memory clock and check its stability by benchmarking or stress test.
You can also increase the voltage if you want more performance but that will result in more heating which will require you to modify the fan curve for cooler performance.
PERIPHERALS
Optimize Your Keyboard
You can optimize even a $1 keyboard with a few simple steps. To make your keyboard fun faster, all you have to do is to search in the Windows search bar- “Keyboard” and open up the control panel to tweak some settings. Here you will find the Repeat Delay and Repeat Rate.
You can adjust the speed of your keyboard according to your need. This tool although is not as good as the software which lets you program your keys as you like but if you have a decent keyboard from Corsair, Cooler Master, Razer, SteelSeries, etc. then you have some really good options to tweak your keyboard functionality through the manufacturer’s software.
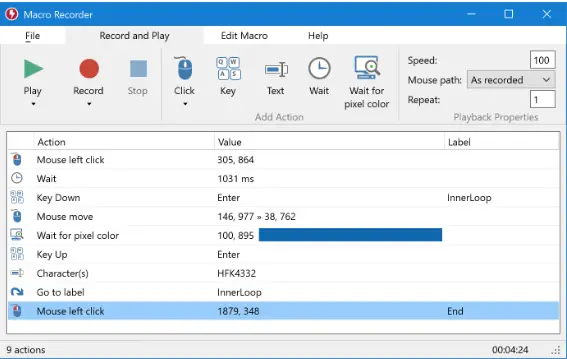
Another great thing that you can do for free without having an expensive keyboard is to use Microsoft Keyboard and Mouse Center to assign macros. Or you can use a tool called Macro Recorder which will ease up the process. Macros help very much with repetitive tasks that consume a lot of time and you can assign these repetitive tasks to a single key.
Take Full Advantage Of Your Mouse
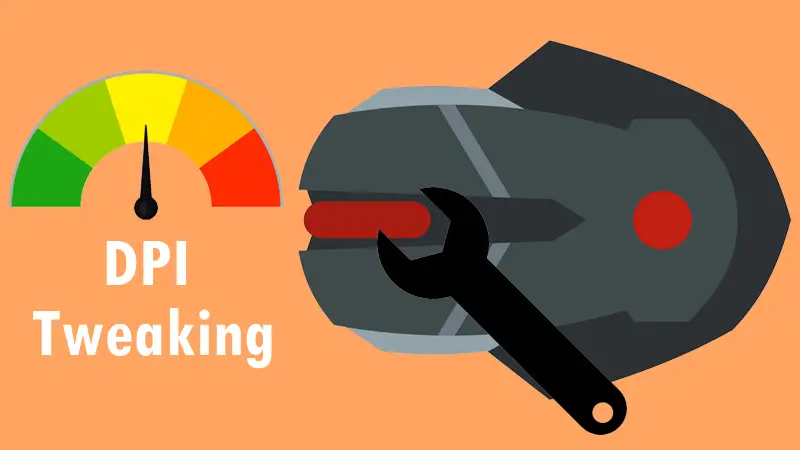
Either you can tweak the mouse settings from the control panel or you can change the functions of your mouse buttons through the manufacturer’s software. Whatever be the scenario, it’s best to use your mouse in a way that increases your work speed.
On a large monitor, it’s recommended to use high DPI than what you would use on a small monitor. If your mouse has a DPI button, then it will be great if you set two modes: One with high sensitivity and one with low sensitivity. Make sure your mouse sensitivity isn’t too high otherwise you will end up being inaccurate.
You can also set up different DPI modes for your games. For example, I use a lower DPI for games like CSGO while a higher for non-gaming works.
If your mouse has additional thumb buttons, then assign some tasks so that you don’t have to use the keyboard for small tasks. Going back and forward in a browser like Chrome is one of the tasks you can do with your mouse thumb buttons.
Overclock Your Monitor
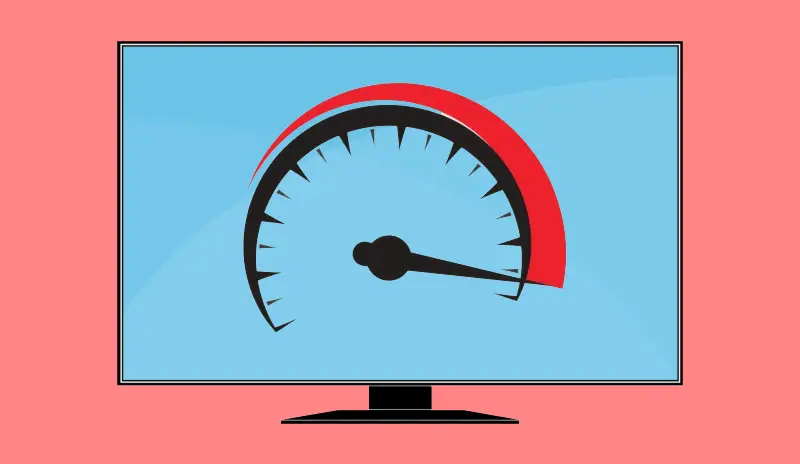
Overclocking a monitor means increasing its refresh rate for smoother operation. Keep in mind that not every monitor is overclockable and you can check it from the settings. Overclocking a monitor is very helpful in gaming if you own a graphics card that can provide very high fps. If you are getting 100+ fps but your monitor has only a 60Hz refresh rate, then you aren’t enjoying those 40 extra fps.
For overclocking your monitor, there are two ways: One is to use the GPU manufacturer program and the other one is to use inbuilt Windows Display Settings. If you own an Nvidia graphics card, then you can overclock your monitor through the Nvidia Control Panel and if you have an AMD graphics card, you can use the AMD Catalyst Control Center.
The options will be displayed and you have to select the highest refresh rate your monitor can handle. If your monitor supports only 60Hz at max, then you can’t go above that.
If you don’t own a graphics card, then you can go to the Display Settings by right-clicking on the empty space on your desktop in Windows 10. From here, go to the Advanced Display Settings and head to Display Adapter Properties. From there you can change the refresh rate to the highest your monitor can support.
WINDOWS & SECURITY
Acknowledge The Importance Of Updates

While most of us get annoyed by seeing a new Windows update notification, most people still probably don’t know how important is to update Windows and only realize it when they encounter some serious problems. Using latest-gen CPUs from Intel or AMD on an un-updated Windows can result in frequent crashes and hangs and there is no way to know it.
Whenever you build your PC, it’s compulsory to update the Windows right away, in the beginning, to stop these problems from occurring and make your OS completely compatible with other drivers and programs that your system will use.
You can check out our guide on what software to install after building a new PC.
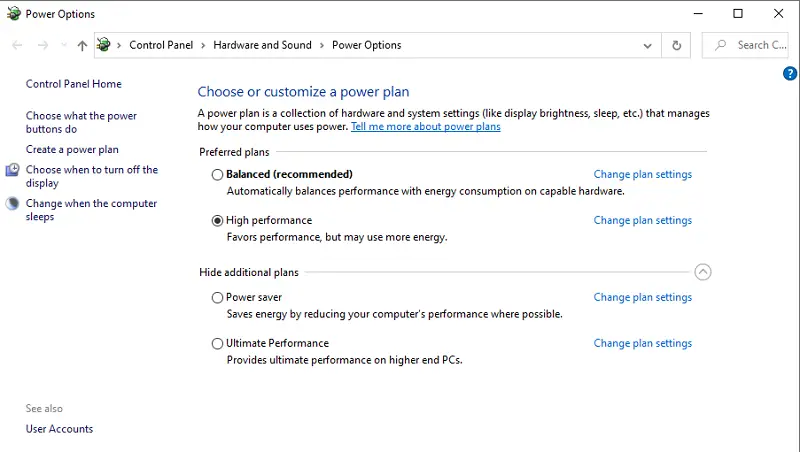
Also, you should select a Balanced or High-performance plan from the Control Panel to make Windows 10 run at its full potential. You can also tweak the graphics settings to reduce the load on your CPU if you aren’t using a graphics card. To do this, Right-Click on This PC, select Properties, go to the Advanced System Settings, select the Advanced tab and click on Settings under Performance.
Don’t Let Unknown Files Take Over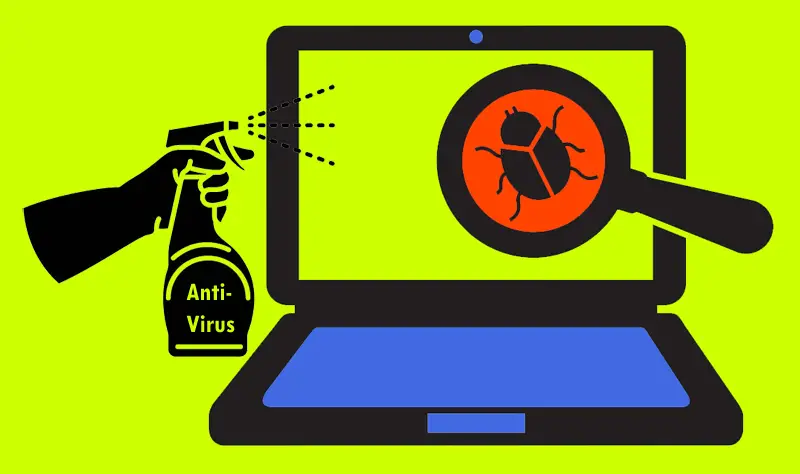
We don’t need to discuss how necessary is to protect our computers from viruses and malware. They affect your computer in several ways and it doesn’t matter how small or insignificant a virus is, it will always affect your computer’s performance.
Some viruses slow down your system through CPU utilization, some will use up your Internet data, some may lead to bizarre computer functions and some can even steal your personal information.
While Windows Defender is a must to be turned ON, not installing an Anti-Virus and using Internet browsers might make you end up re-installing your Windows again in just a couple of days. When we talk about installing an Anti-Virus, we don’t mean the free anti-viruses you download through random websites.
Get a yearly subscription from an official Anti-Virus company website. Norton, Avast, McAfee, Kaspersky, Bitdefender, and Avira Prime are some of the best Anti-Viruses you can get right now.
THE FINAL OPTION
Replace Faulty Components Or Upgrade
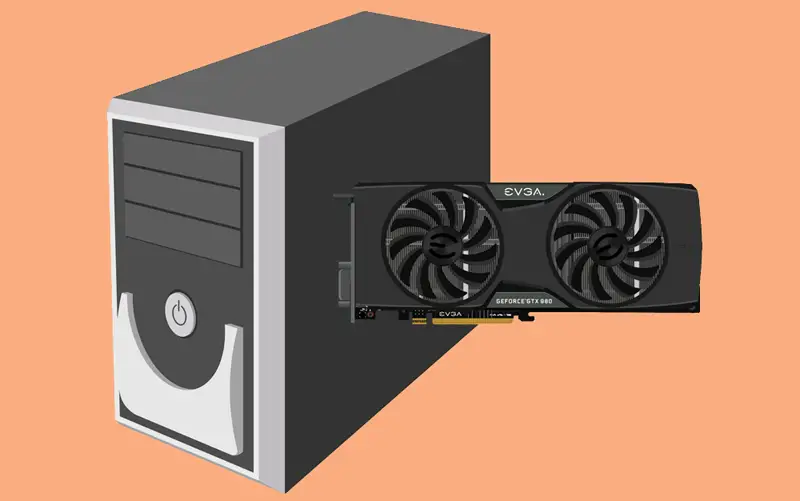
This is the last step you can do to maintain or increase your system’s performance, and unlike most of the steps in the list, it’s not free.
When you have completed almost every type of troubleshooting you could do and you can’t find the answer, it might be the best time to change your faulty component and upgrade. It’s not necessary that you should only change your component whenever it malfunctions but you can also change it whenever you feel like your computer is running slow in programs where you need more performance.
You can change your CPU, Motherboard, RAM, or graphics card according to the work you do. If you are a hardcore gamer and you aren’t getting a high fps on ultra settings, then you can opt for a better graphics card. If you are someone who needs more processing power for CPU-intensive applications and multitasking, then upgrading to a CPU with more cores is highly recommended.
This goes for other parts too but makes sure you check the compatibility of each component before you go for the buy.
More Solutions?
The list recognizes most of the common solutions you can do right away on your system. However, the solutions aren’t limited to these 25 steps. This list will expand as we discover more ways and you can definitely provide more solutions and suggestions you know in the comment section below!